Quilgo Proctoring is installed once for your whole Canvas account. The setup has two parts: an LTI 1.3 app, and one proctoring snippet in your Canvas theme. Both are required.
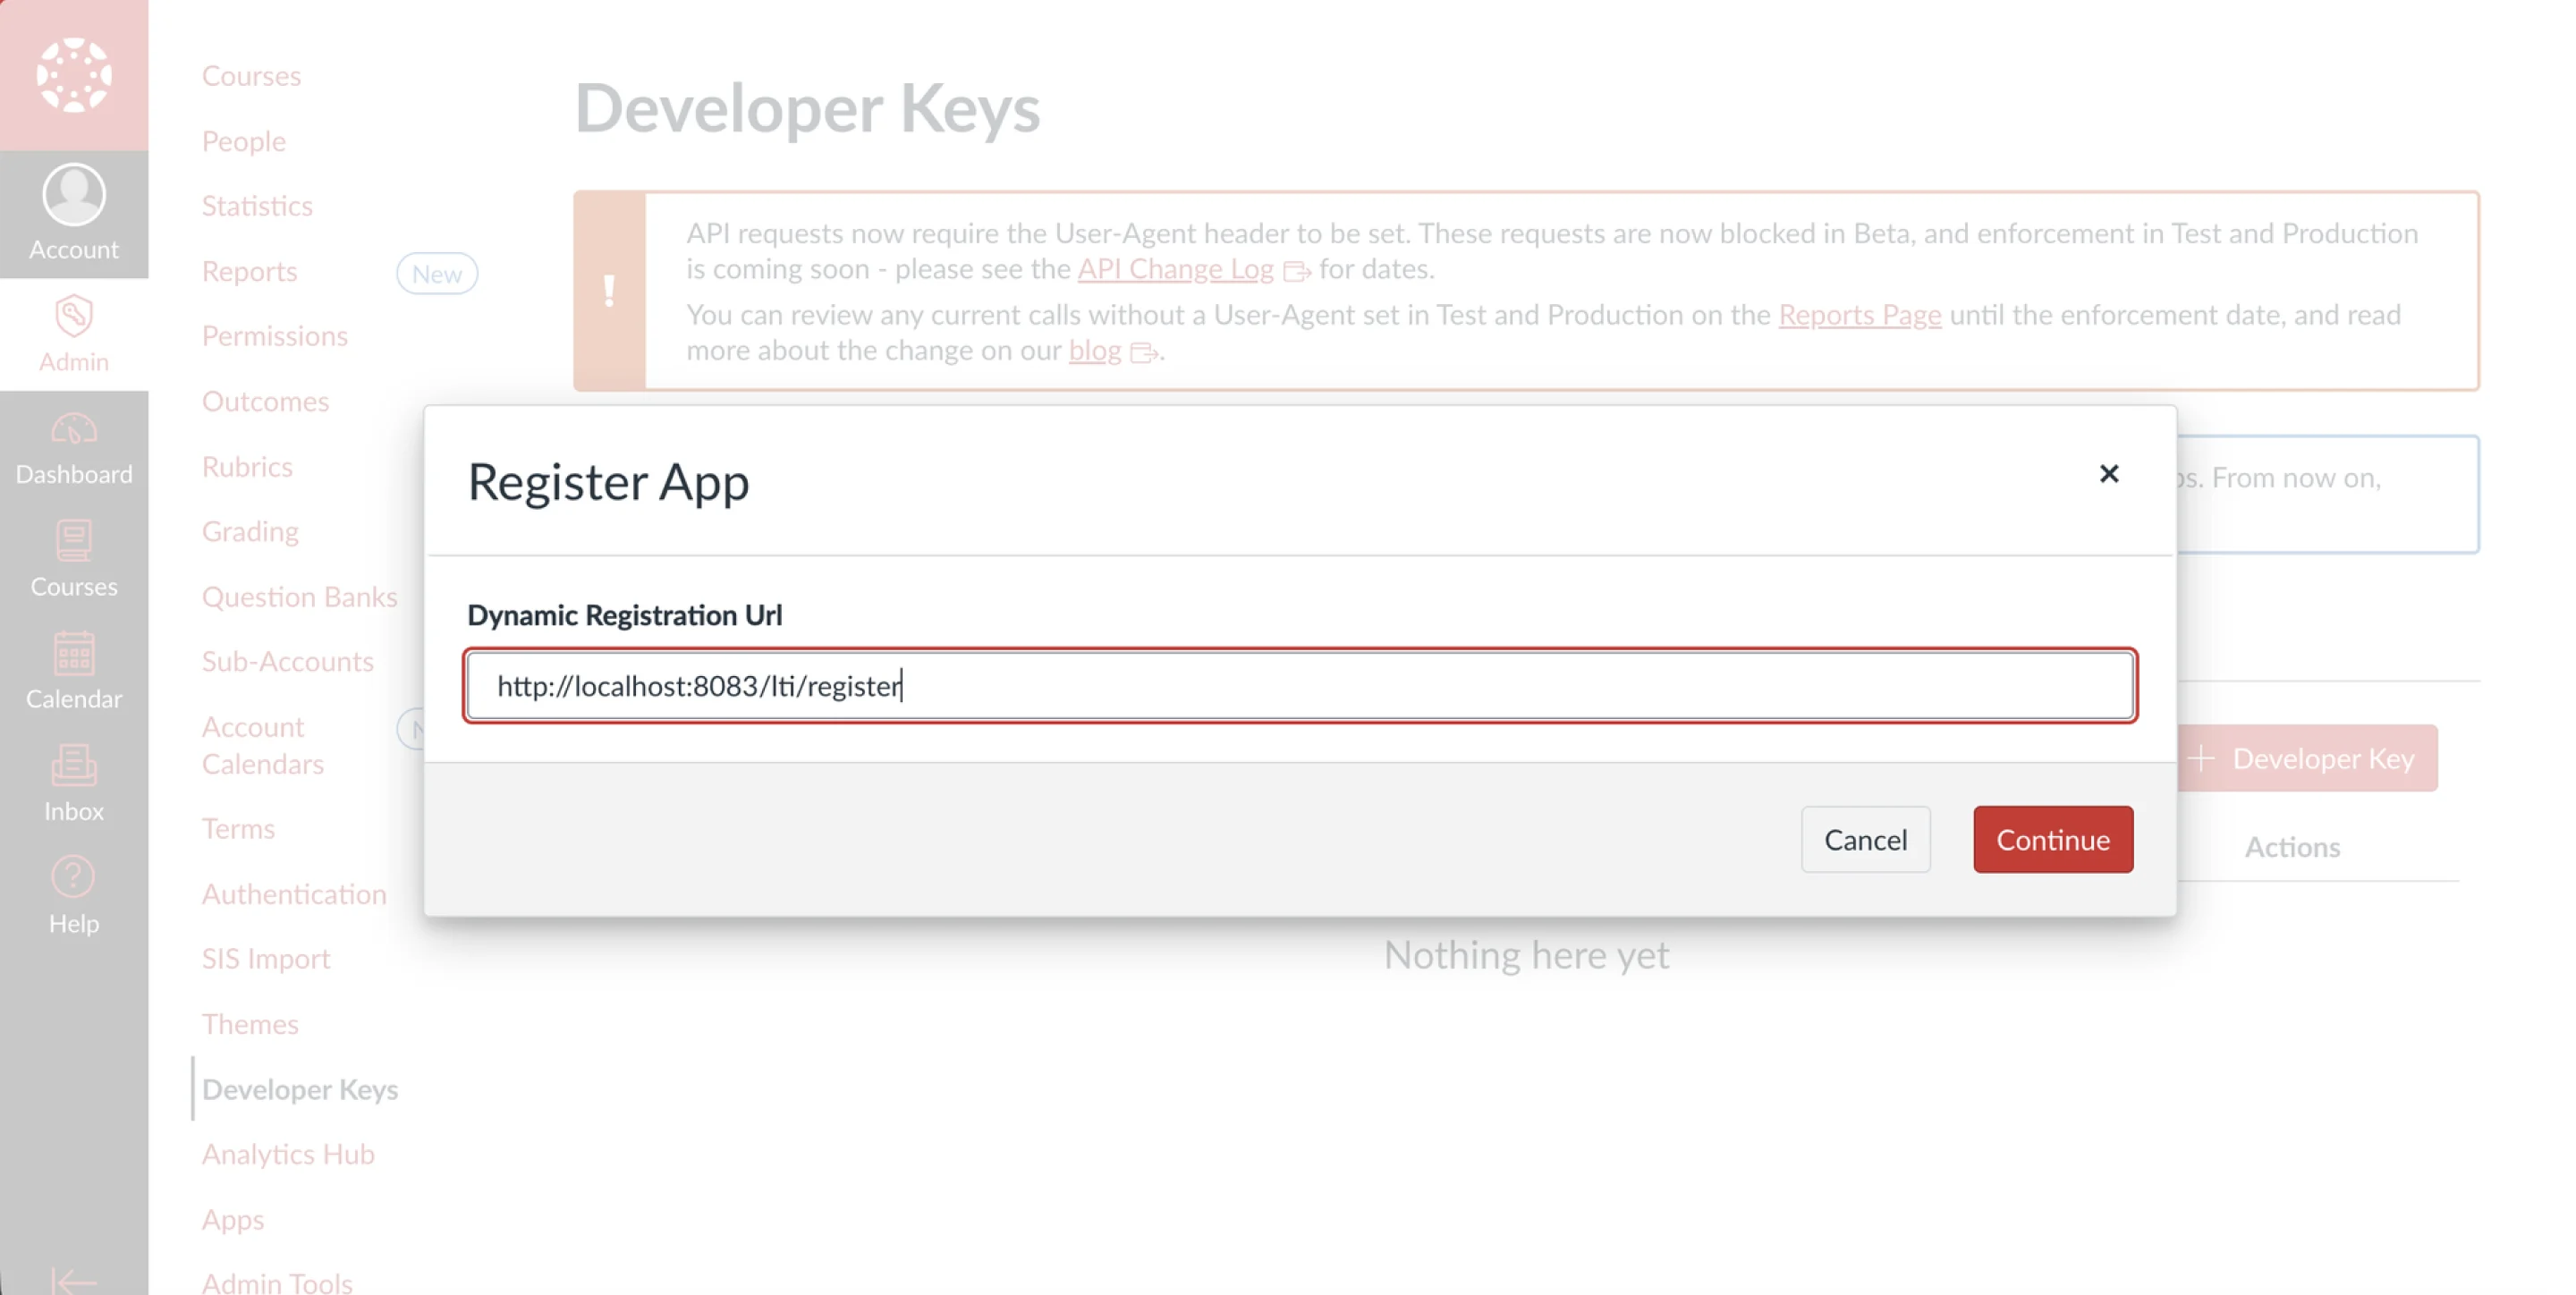
Paste your Quilgo registration address and click Continue. The address in the example points at a test server.
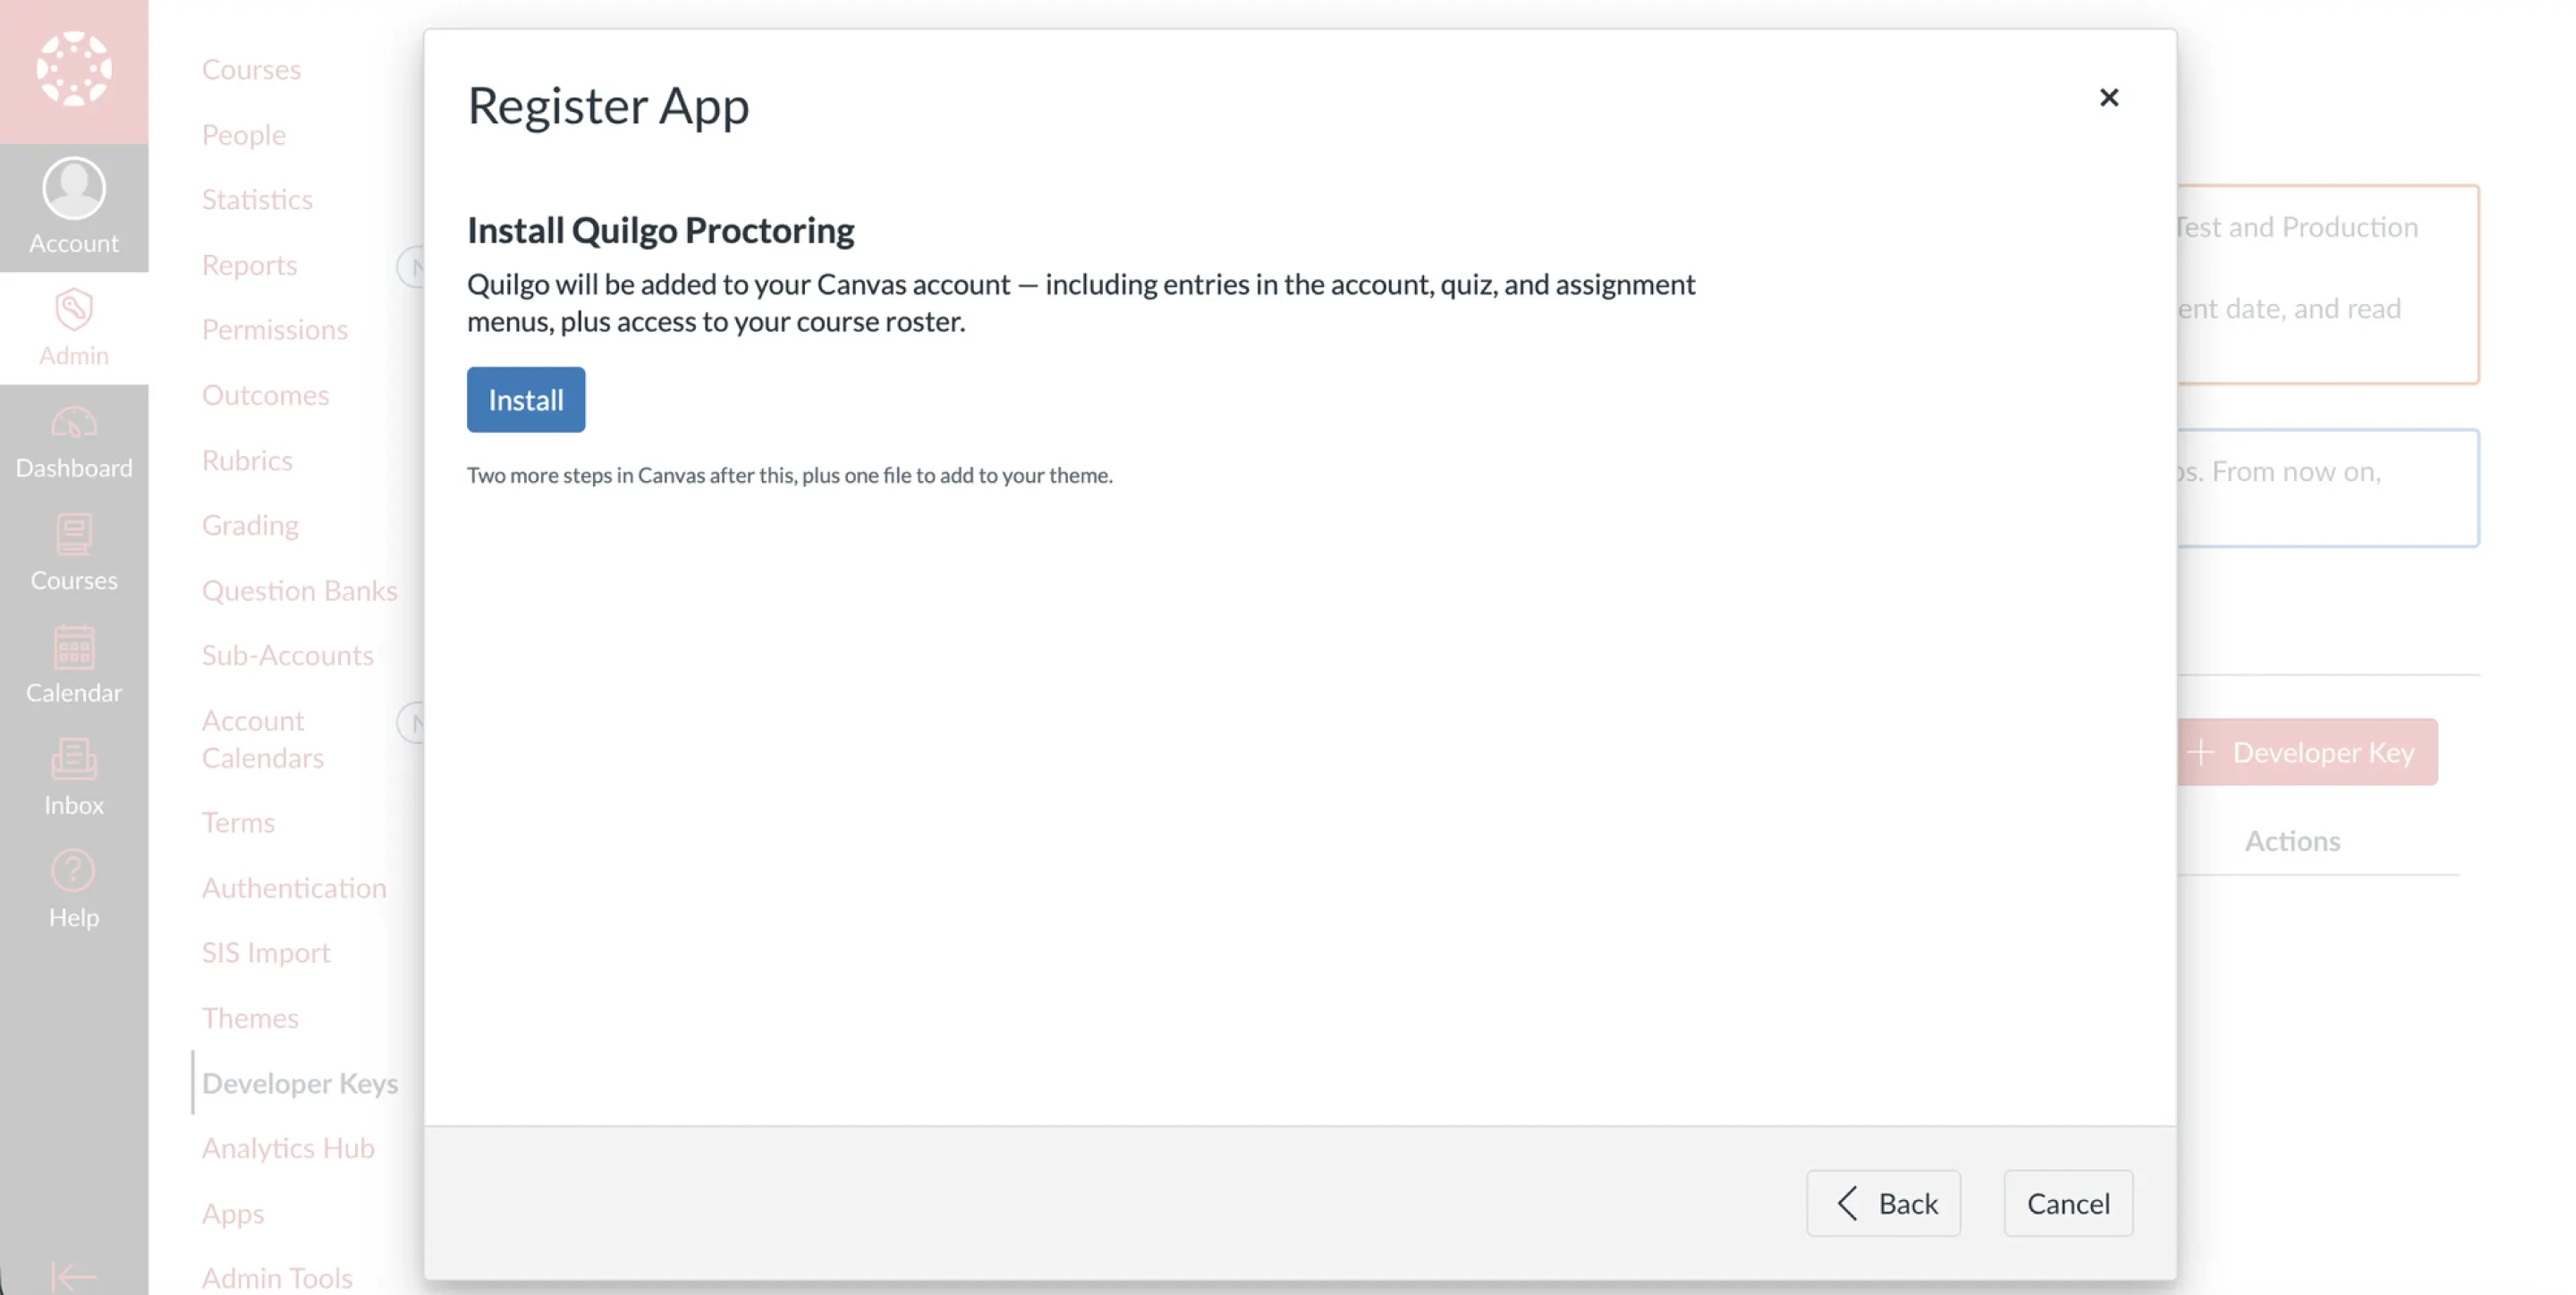
3. A Quilgo page opens inside Canvas. Click Install.
The Quilgo page inside the Canvas dialog — click Install
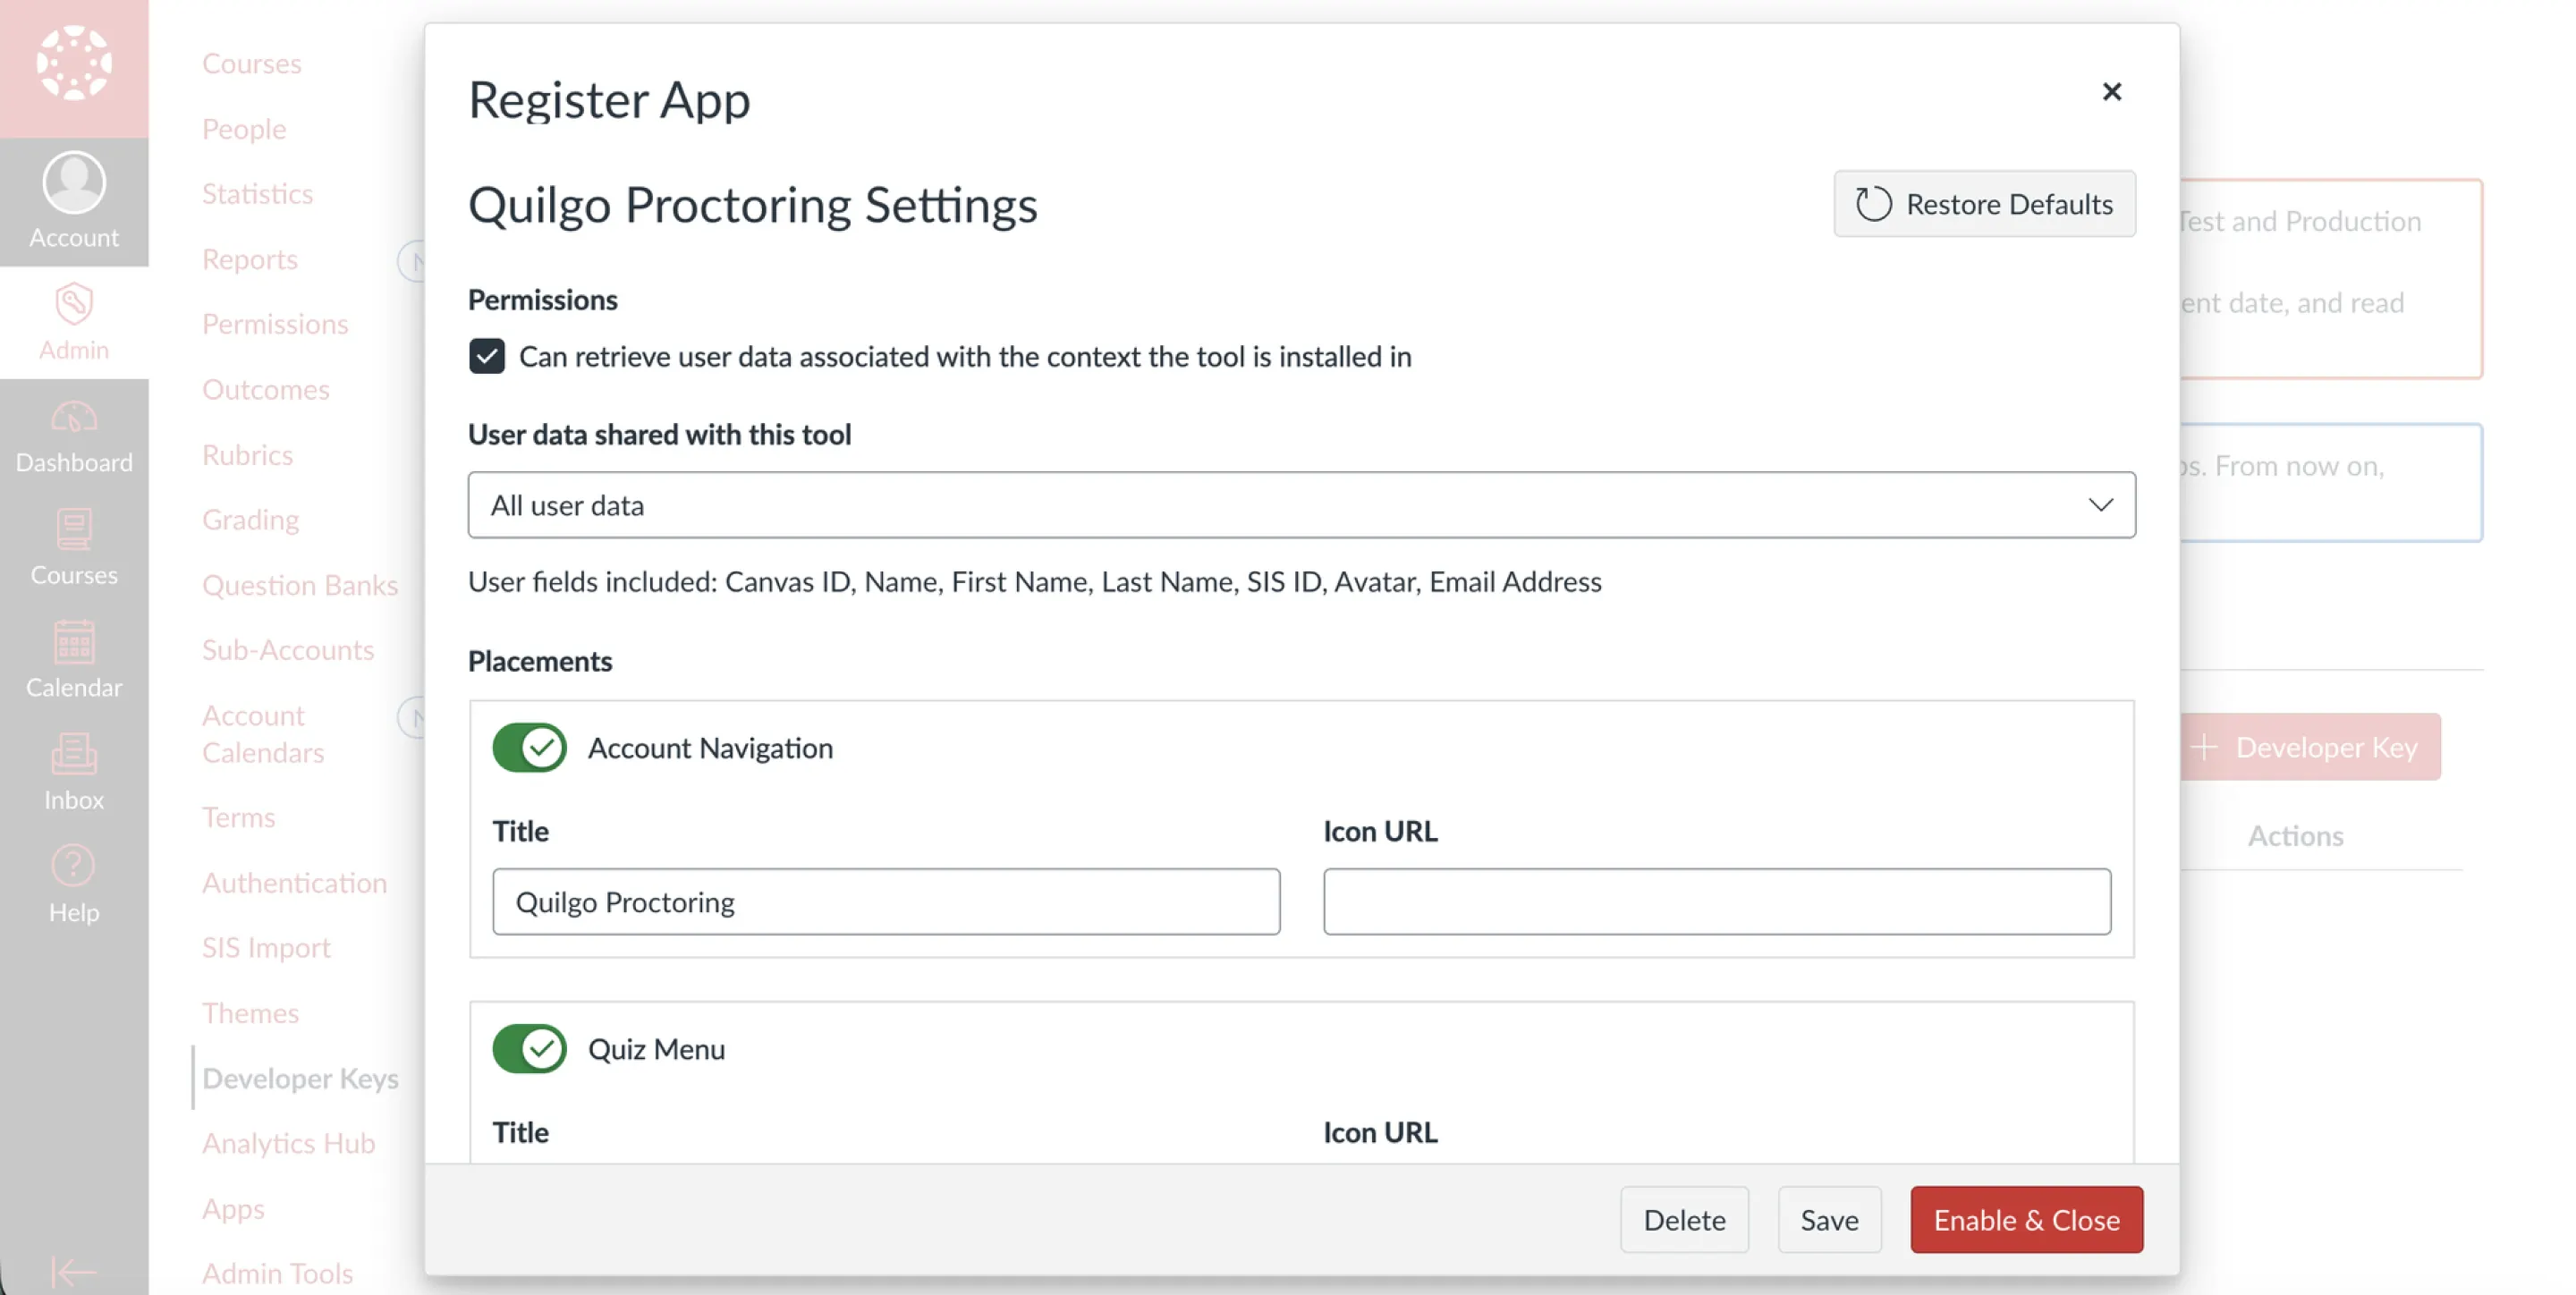
4. When Canvas shows its confirmation dialog, click the Enable & Close button.
Canvas shows the permissions and placements it is about to create — click Enable & Close.
2. Turn the key on and make the app available
Canvas has now created the new key. Ensure it is ON and follow these steps to activate it:
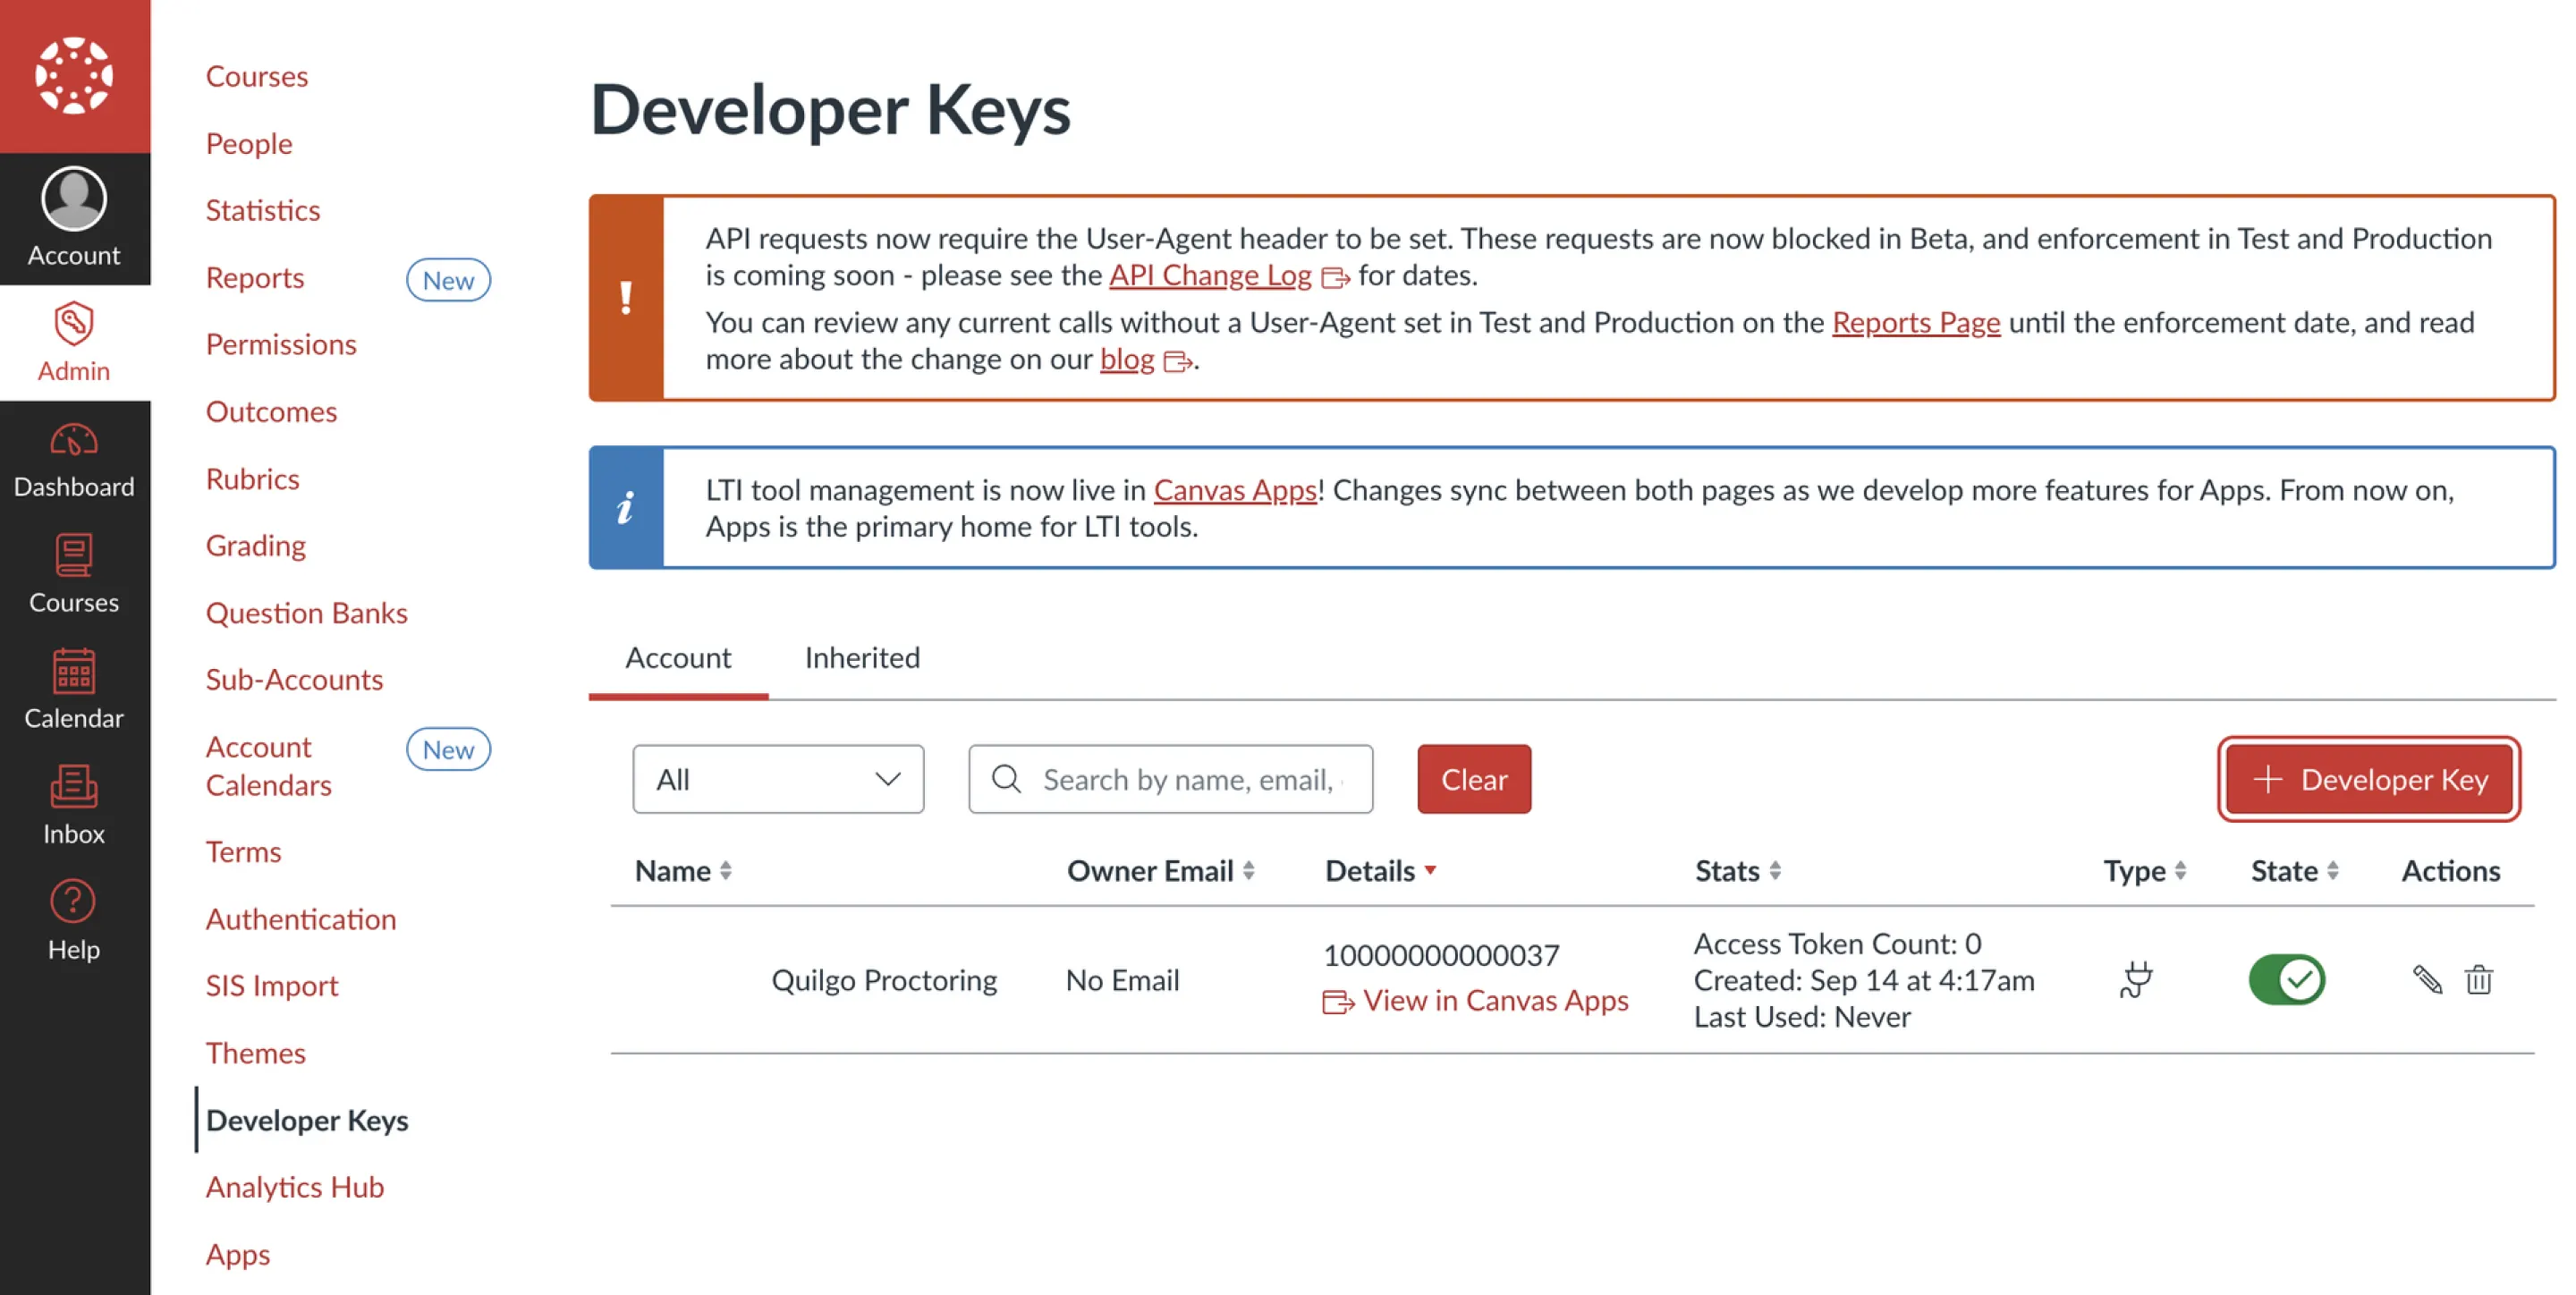
1. Go to Developer Keys, find Quilgo Proctoring and make sure its State is ON (switch it if it isn’t).
The Quilgo Proctoring row in Developer Keys — State must be the green toggle.
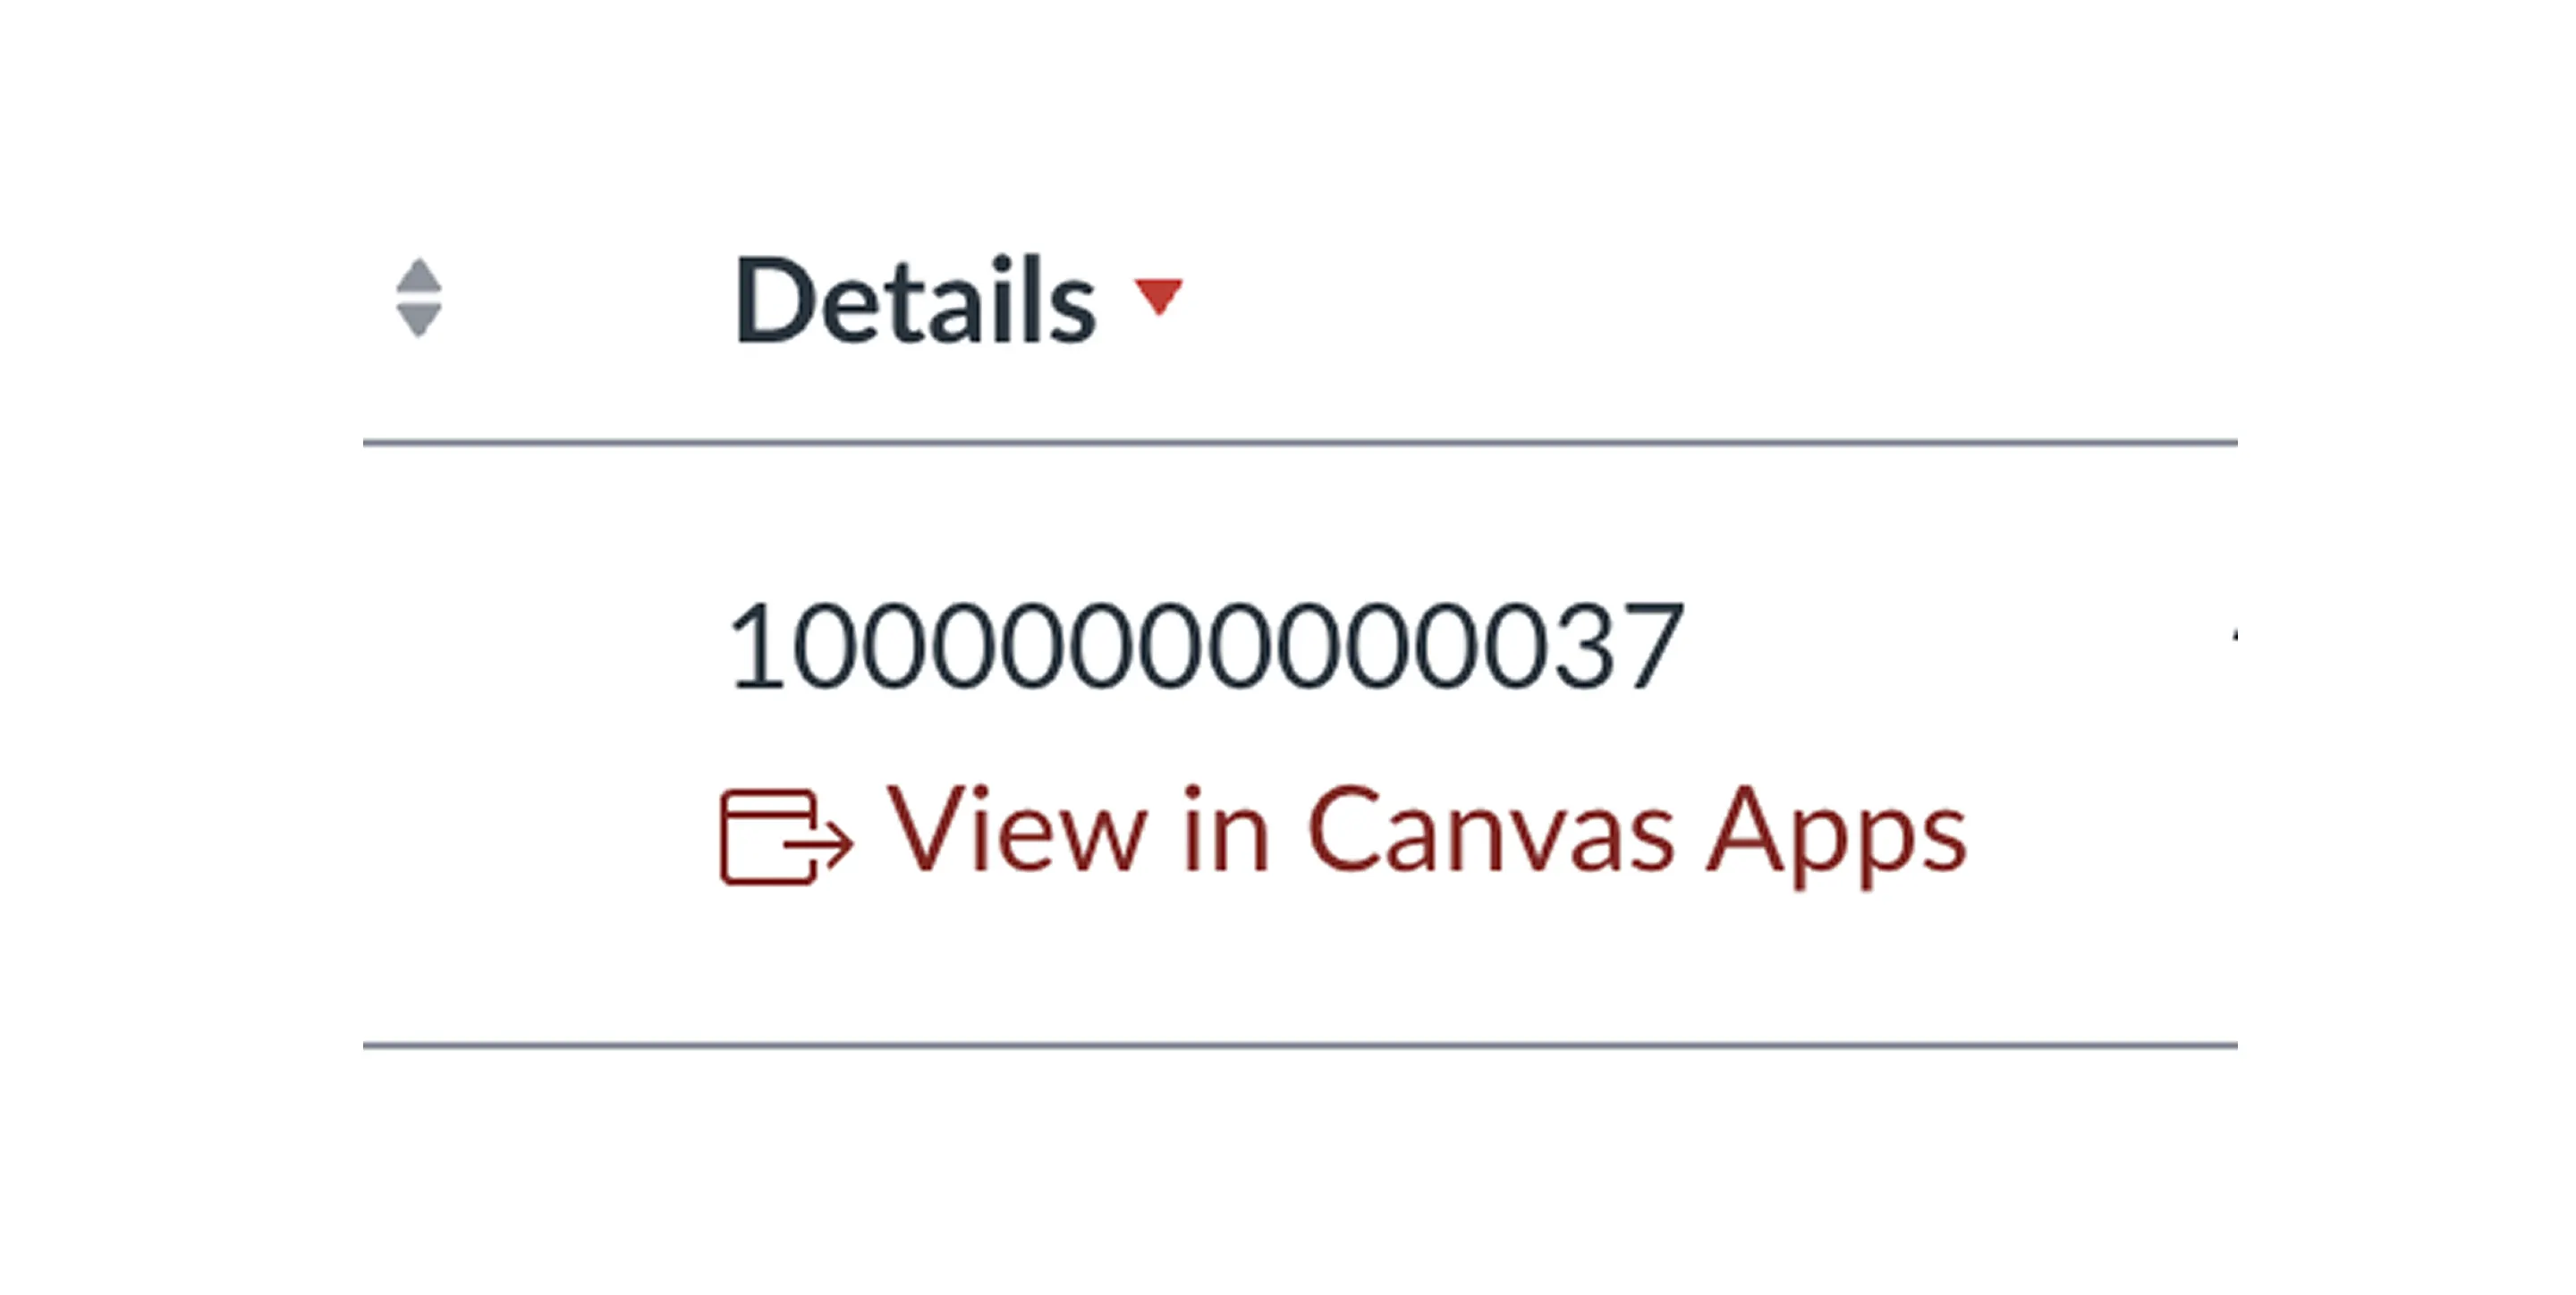
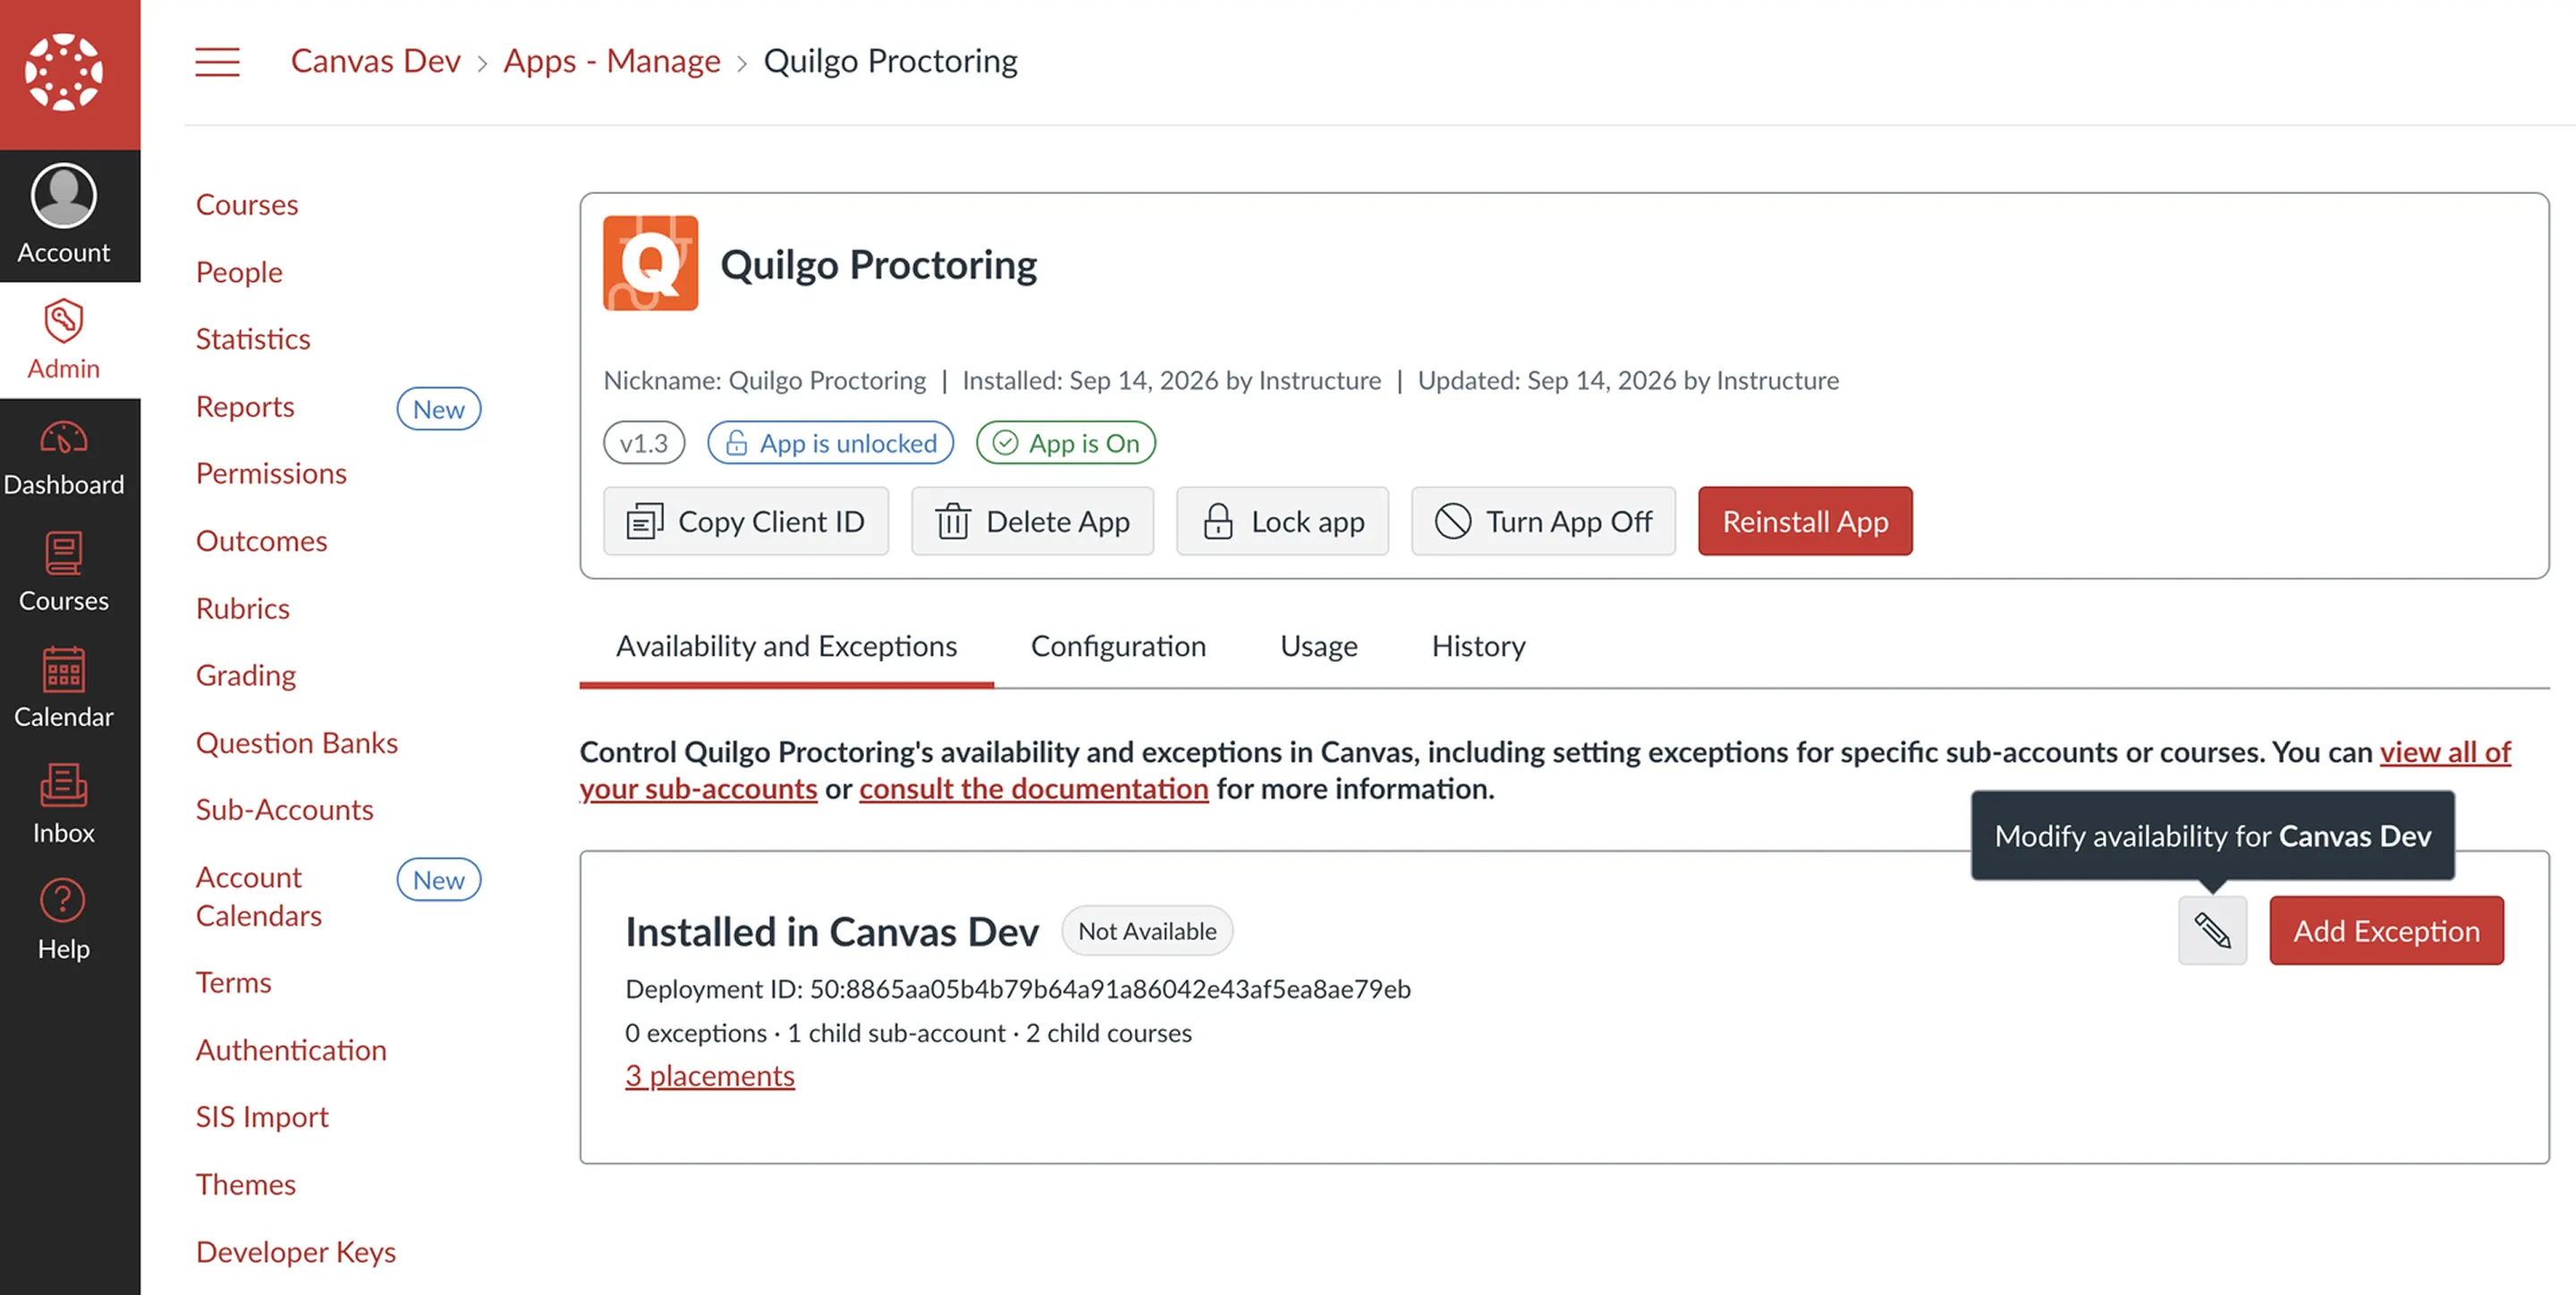
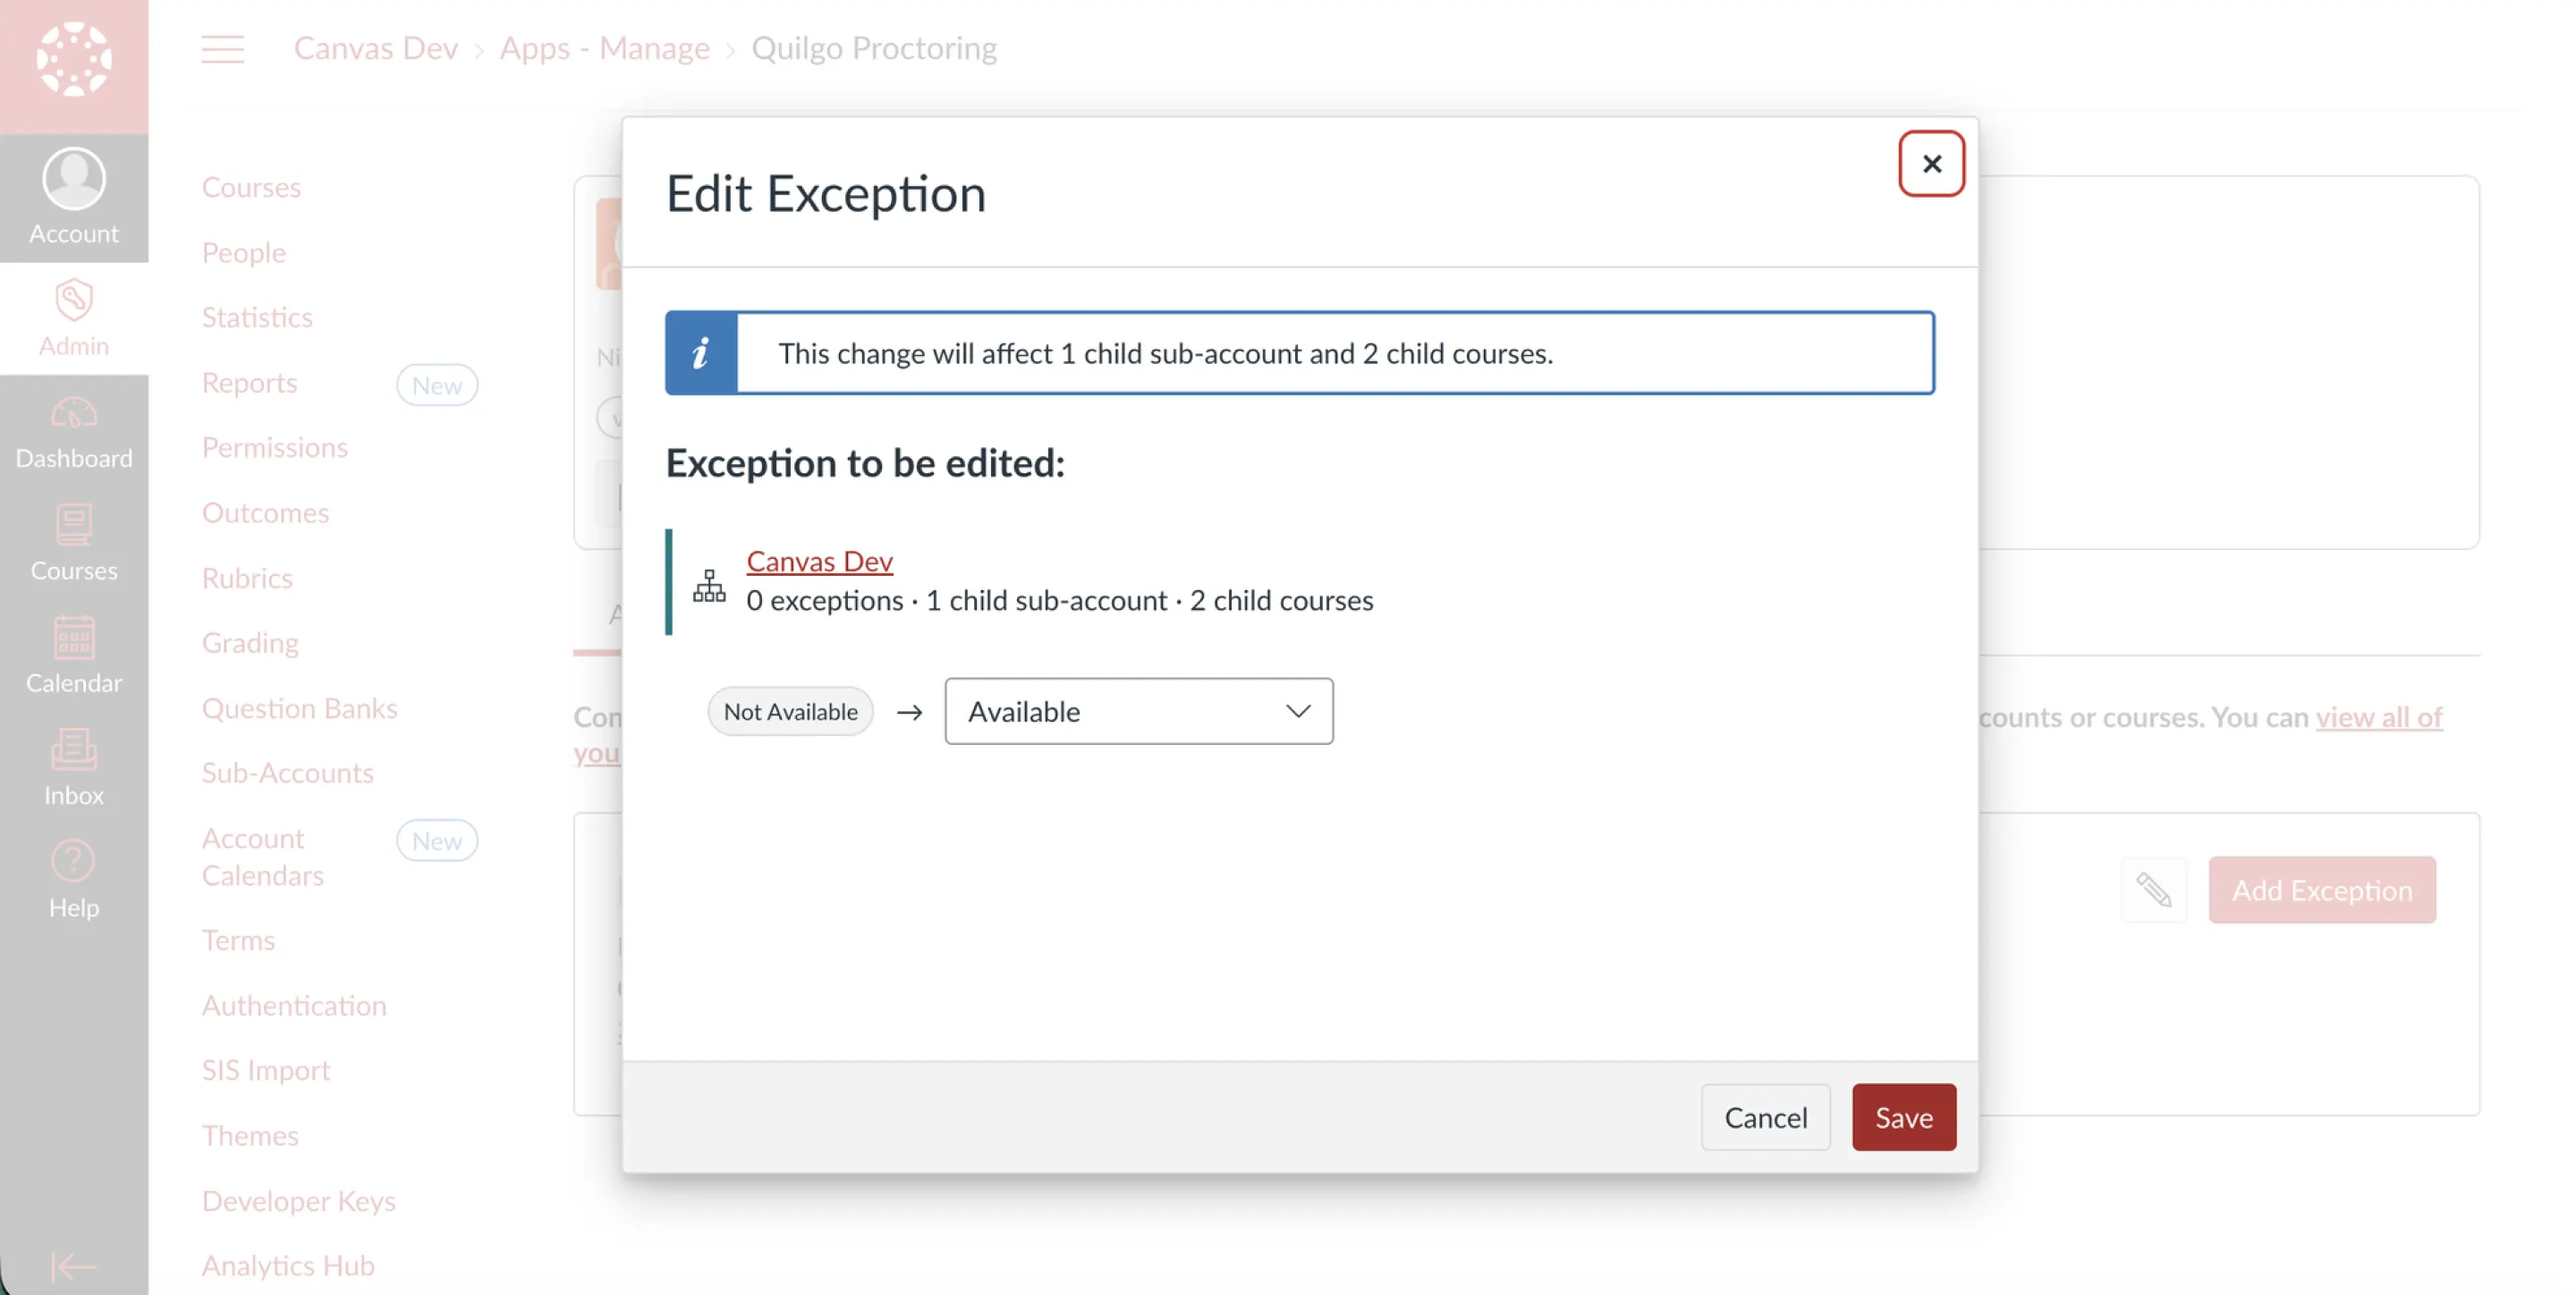
Open the key’s View in Canvas Apps link. Under Availability and Exceptions, click the edit (pencil) button, set the app to Available, and click Save.
View in Canvas Apps sits in the key’s Details column.
On the app page, open Availability and Exceptions and click the pencil button.
Switch Not Available → Available, then Save.
3. Reload the page — Quilgo Proctoring appears in the Admin sidebar.
3. Upload the proctoring snippet to your theme
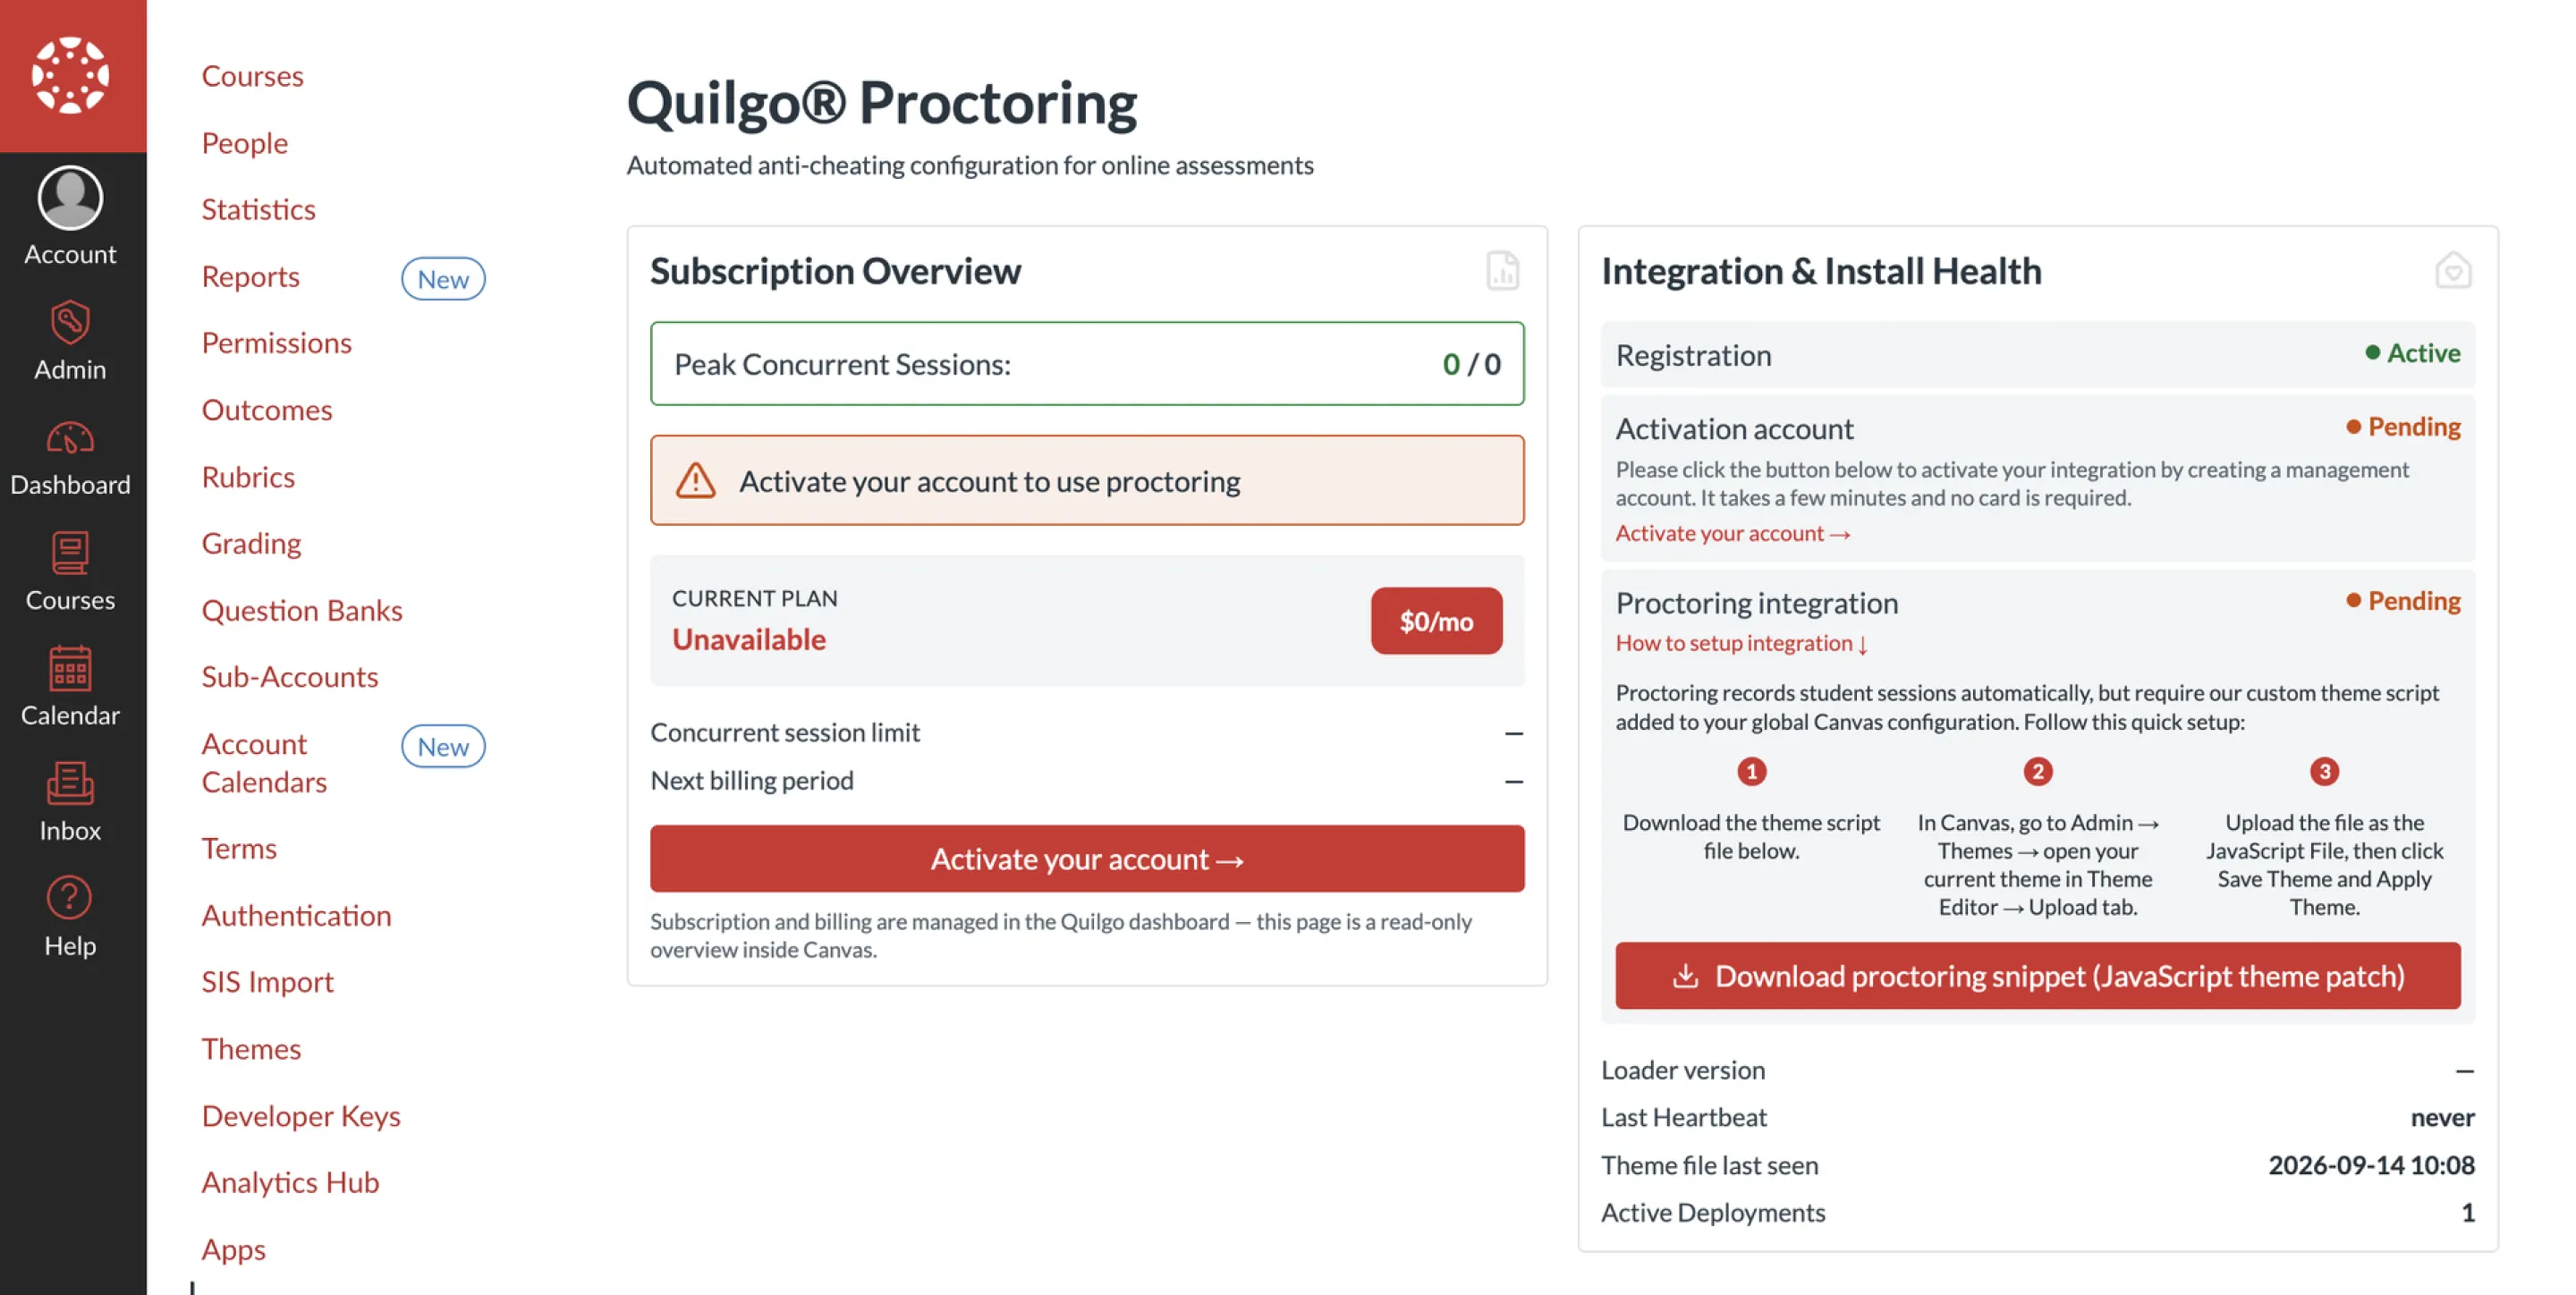
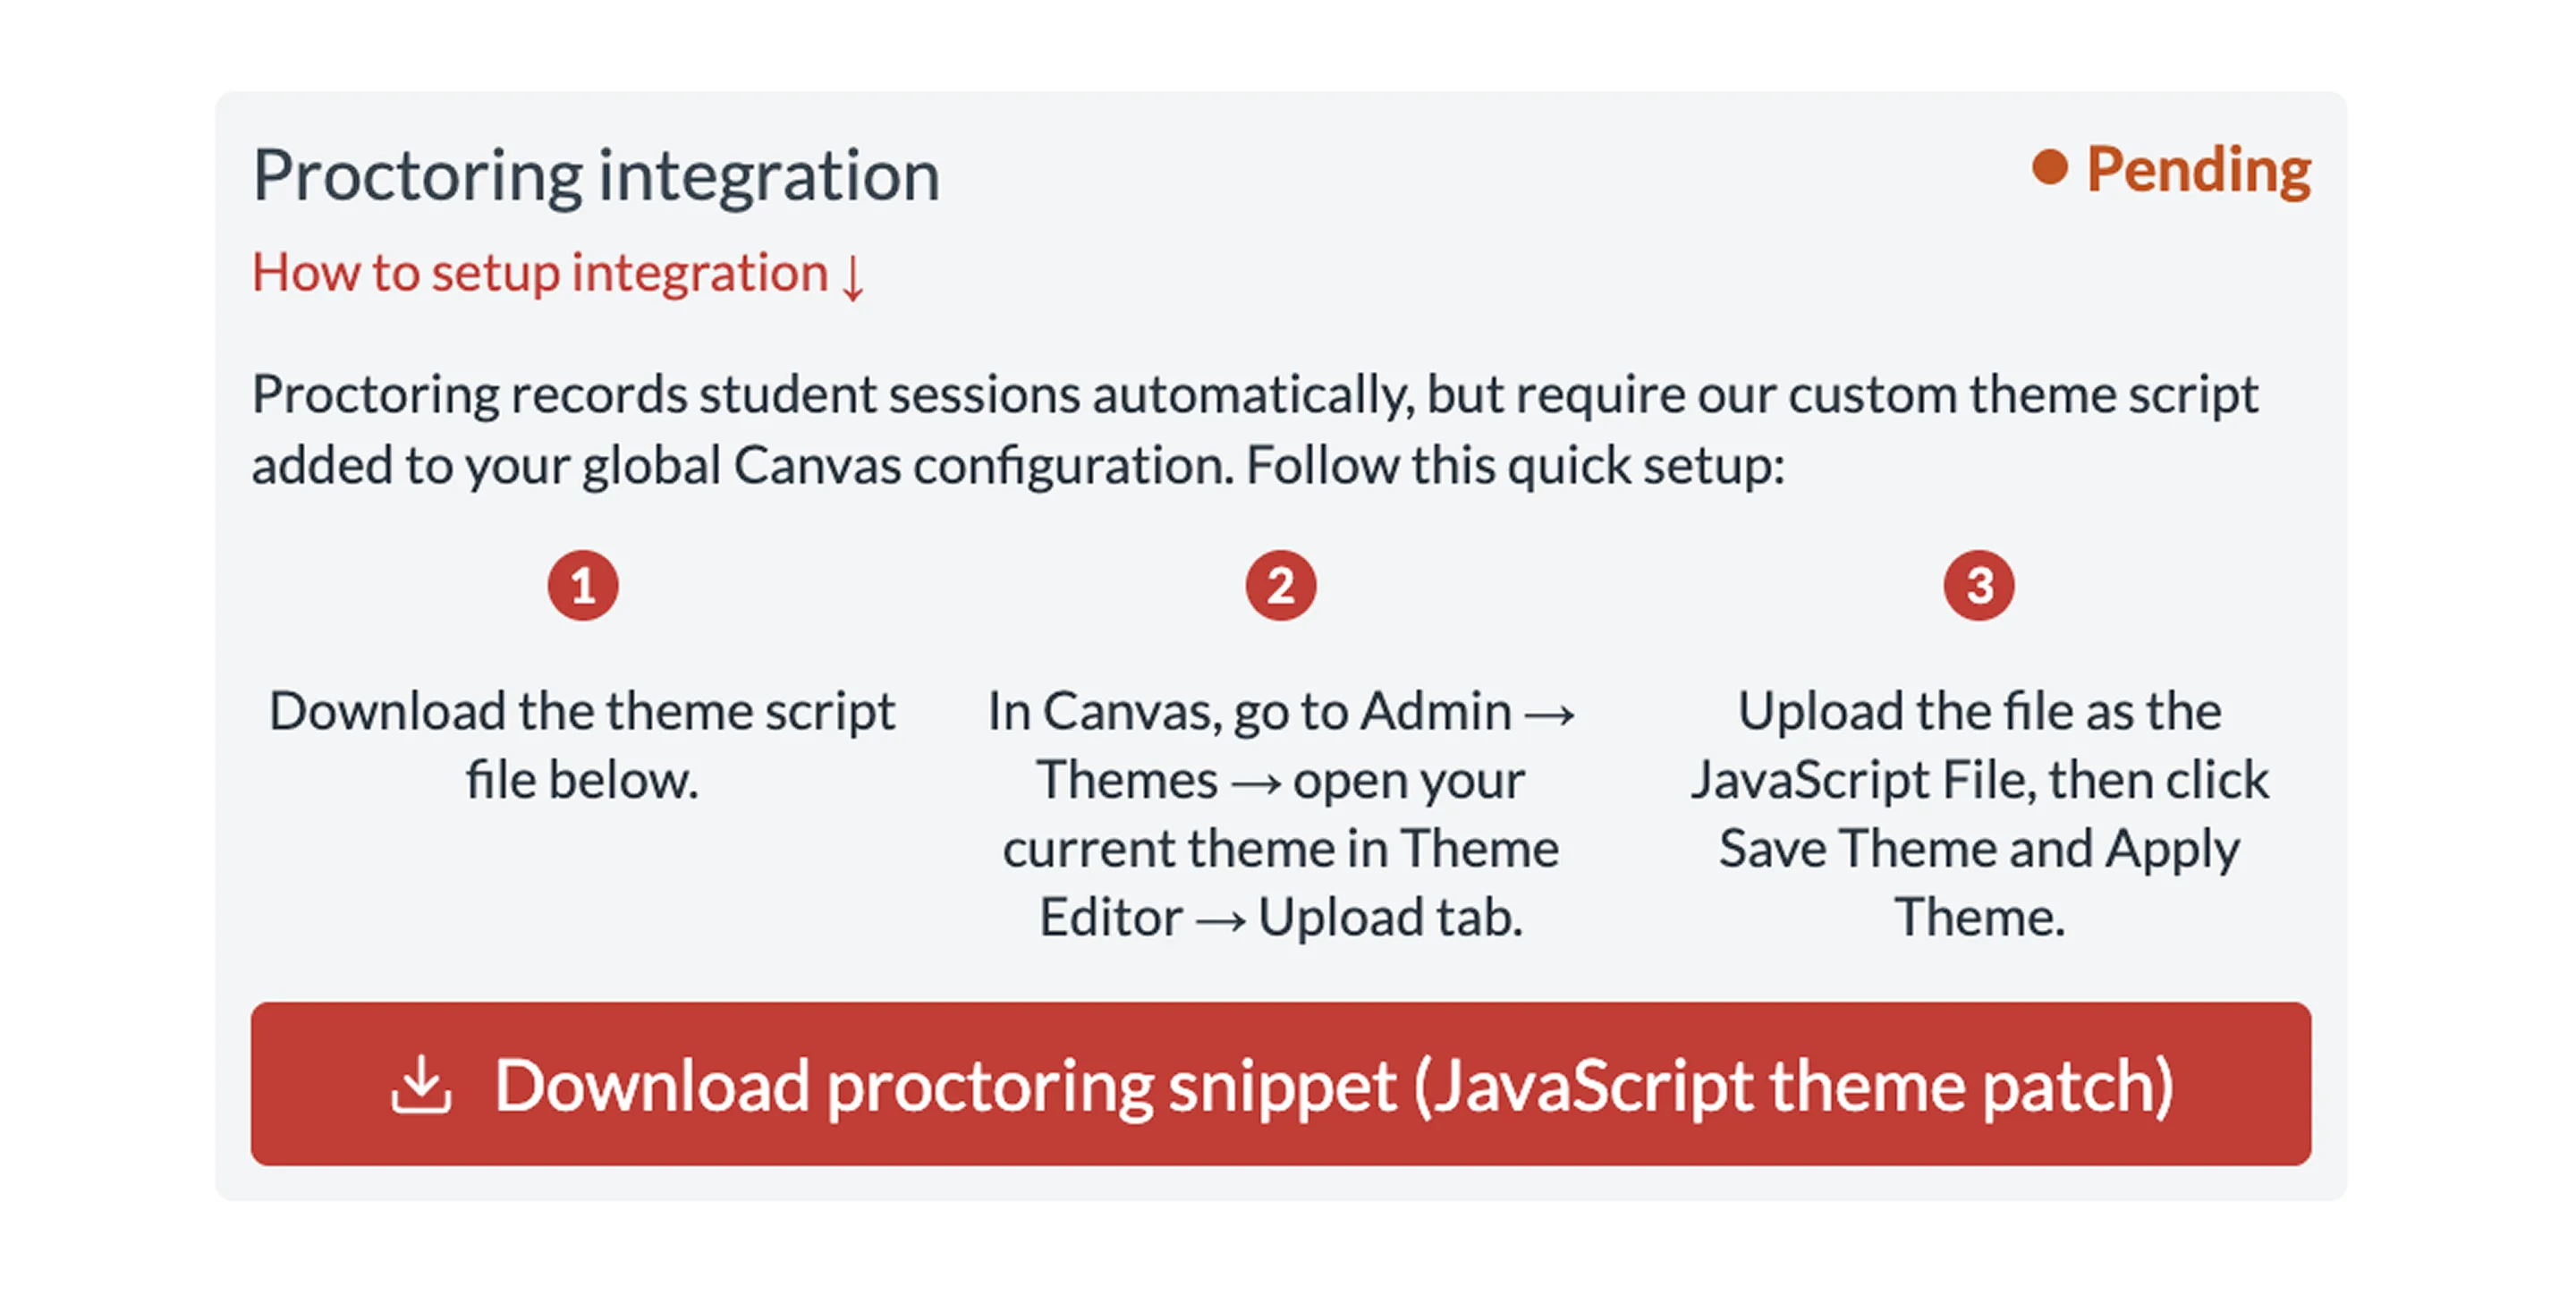
1. Download the snippet: in the Canvas left navigation open Admin → your account, then click Quilgo Proctoring in the account menu on the left (it appeared there after Step 2). On the page that opens, click Download Proctoring snippet — this saves quilgo-canvas.js to your computer
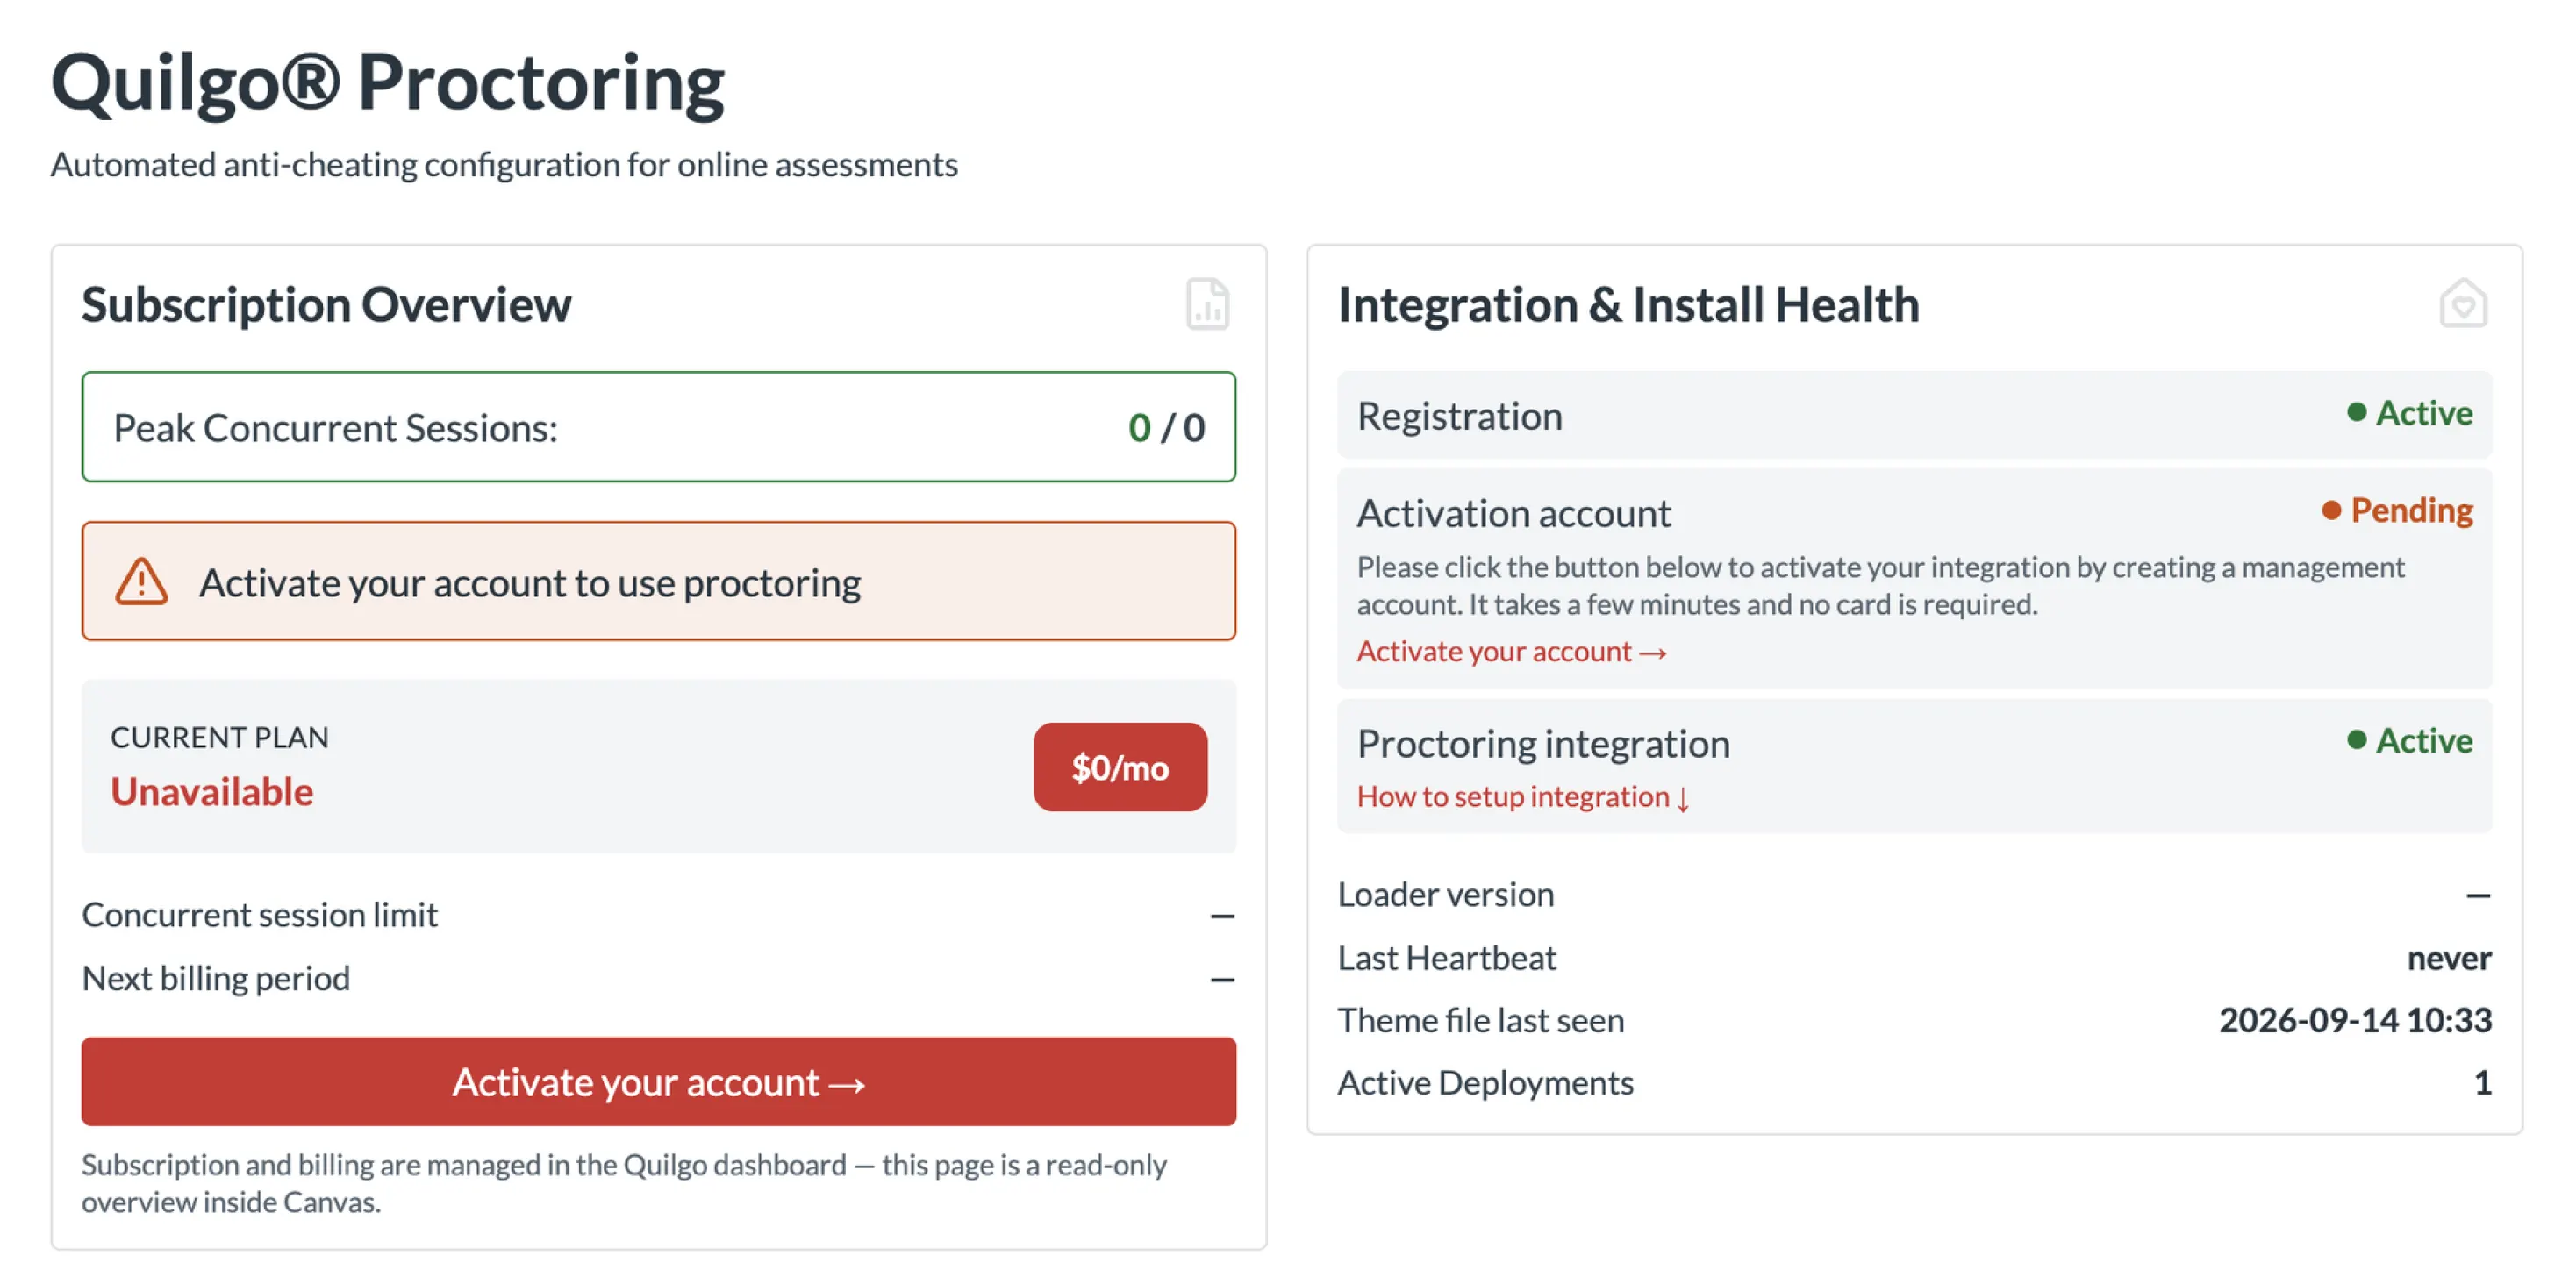
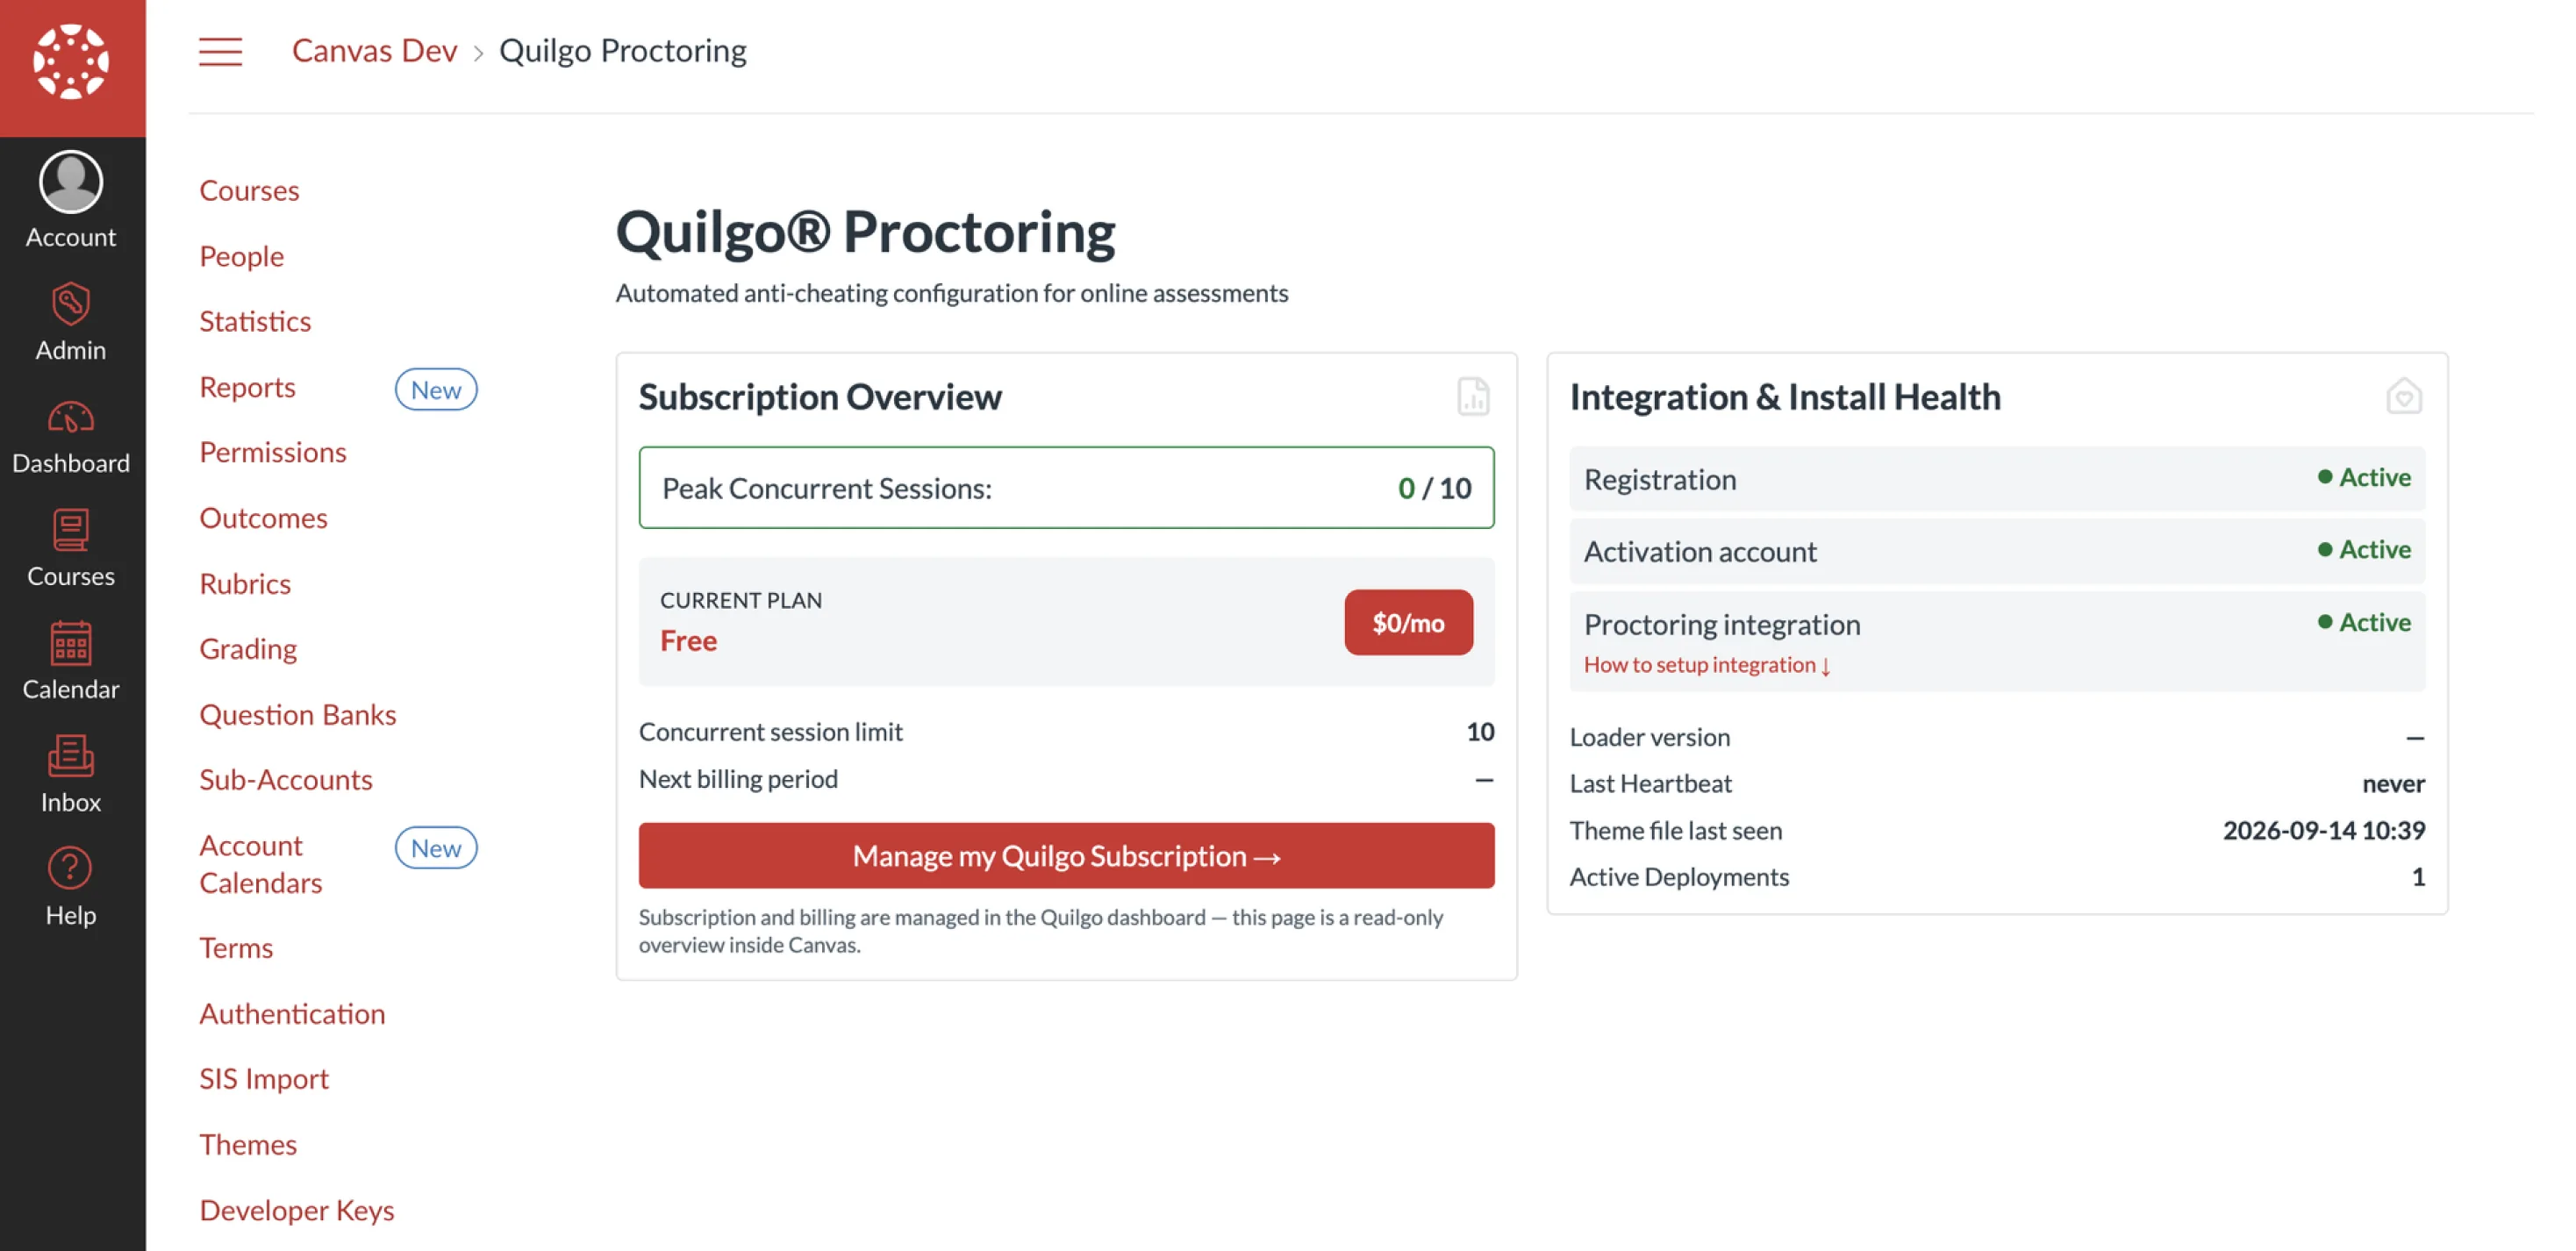
The account-level Quilgo Proctoring page, opened from the Admin sidebar.
In Integration & Install Health, click Download proctoring snippet.
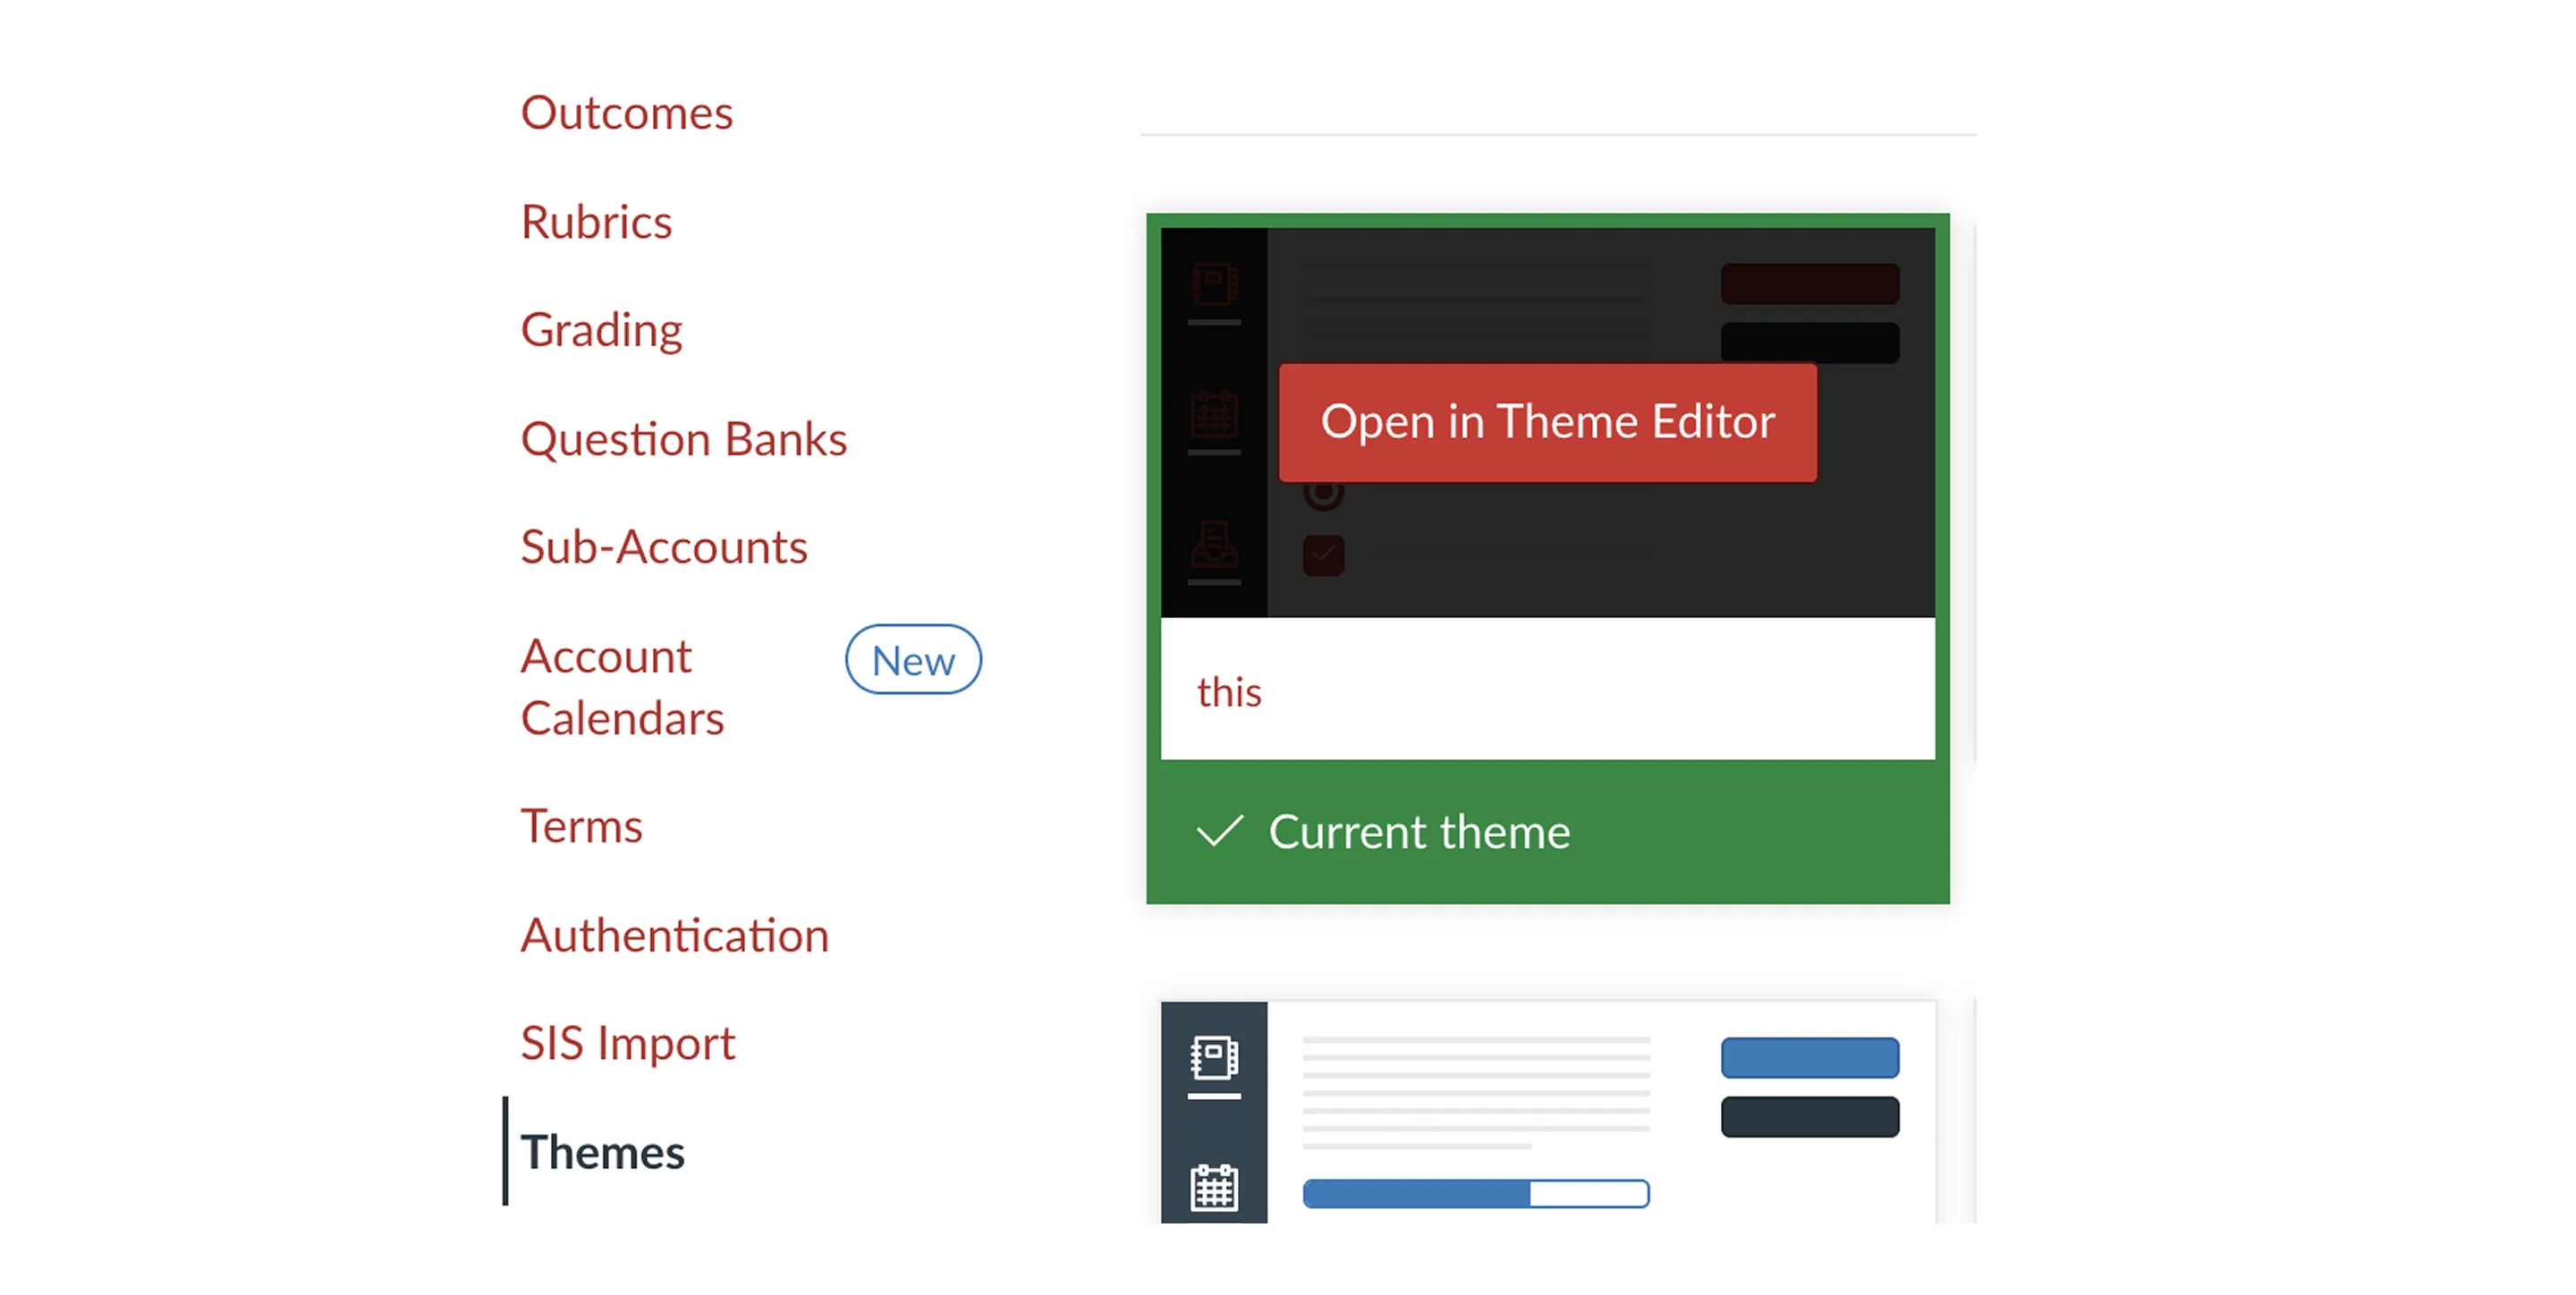
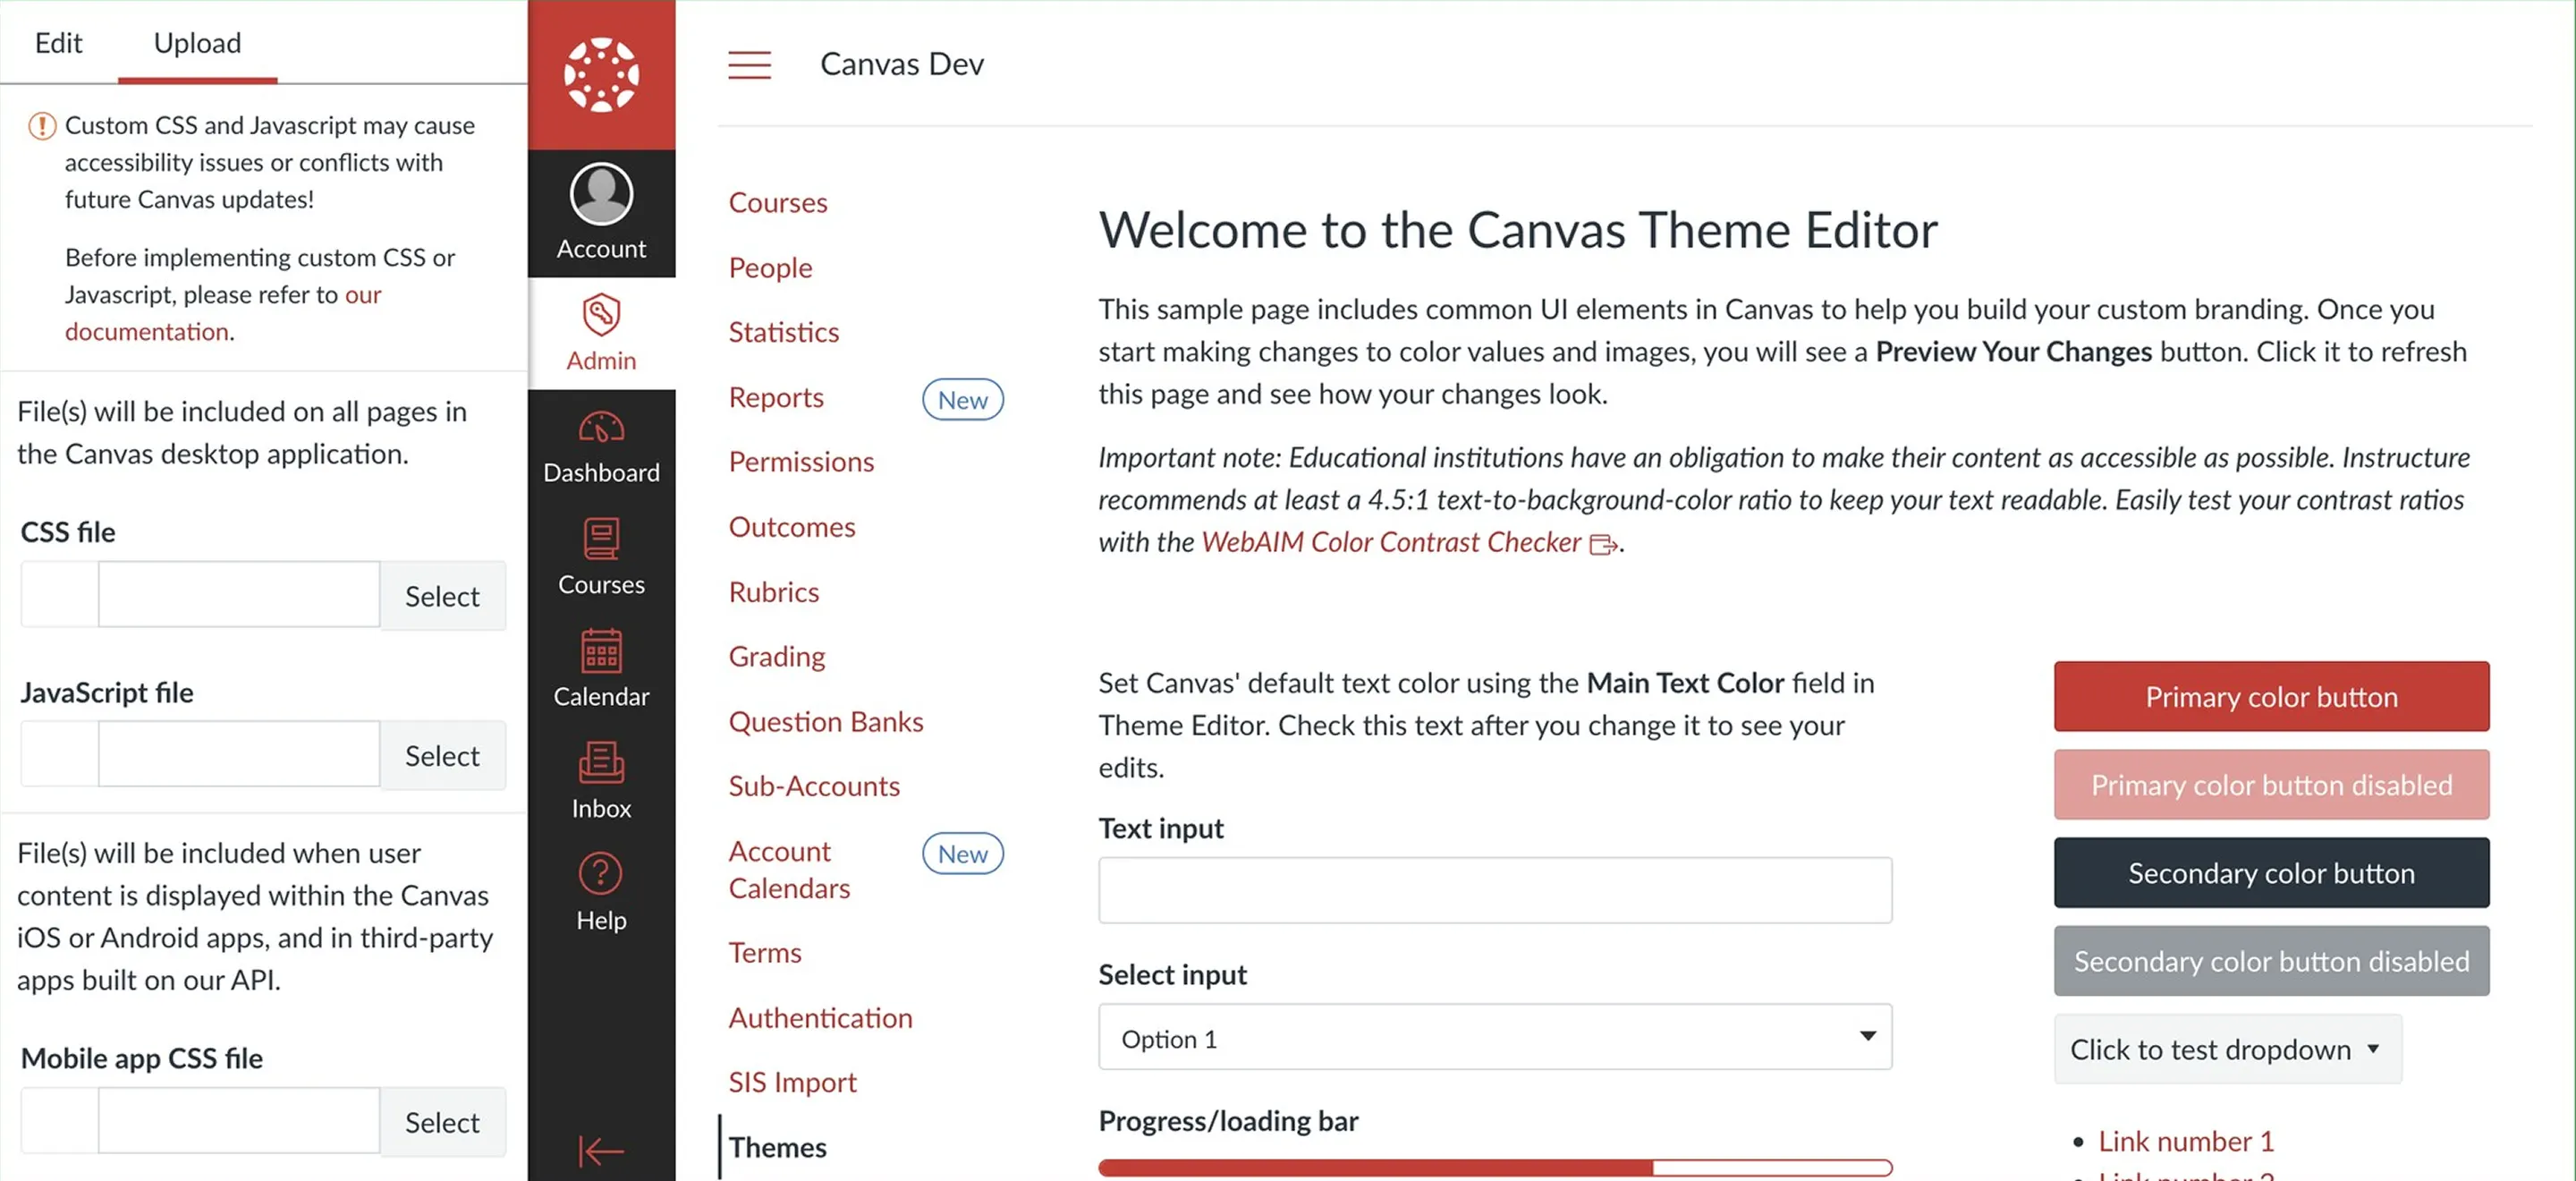
2. Go to Admin → Themes, open your active theme in the Theme Editor and make sure the Upload tab is visible.
Admin → Themes — hover your current theme and click Open in Theme Editor.
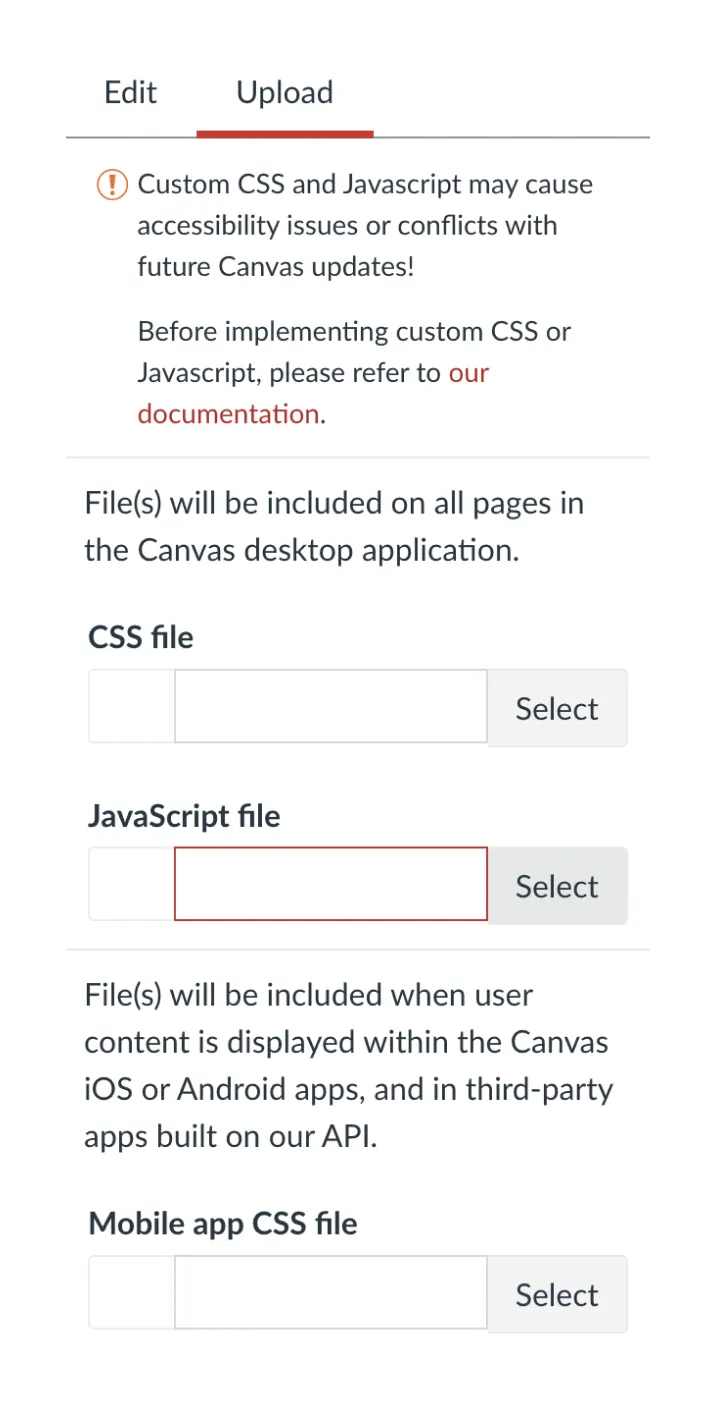
The Upload tab with the JavaScript file slot.
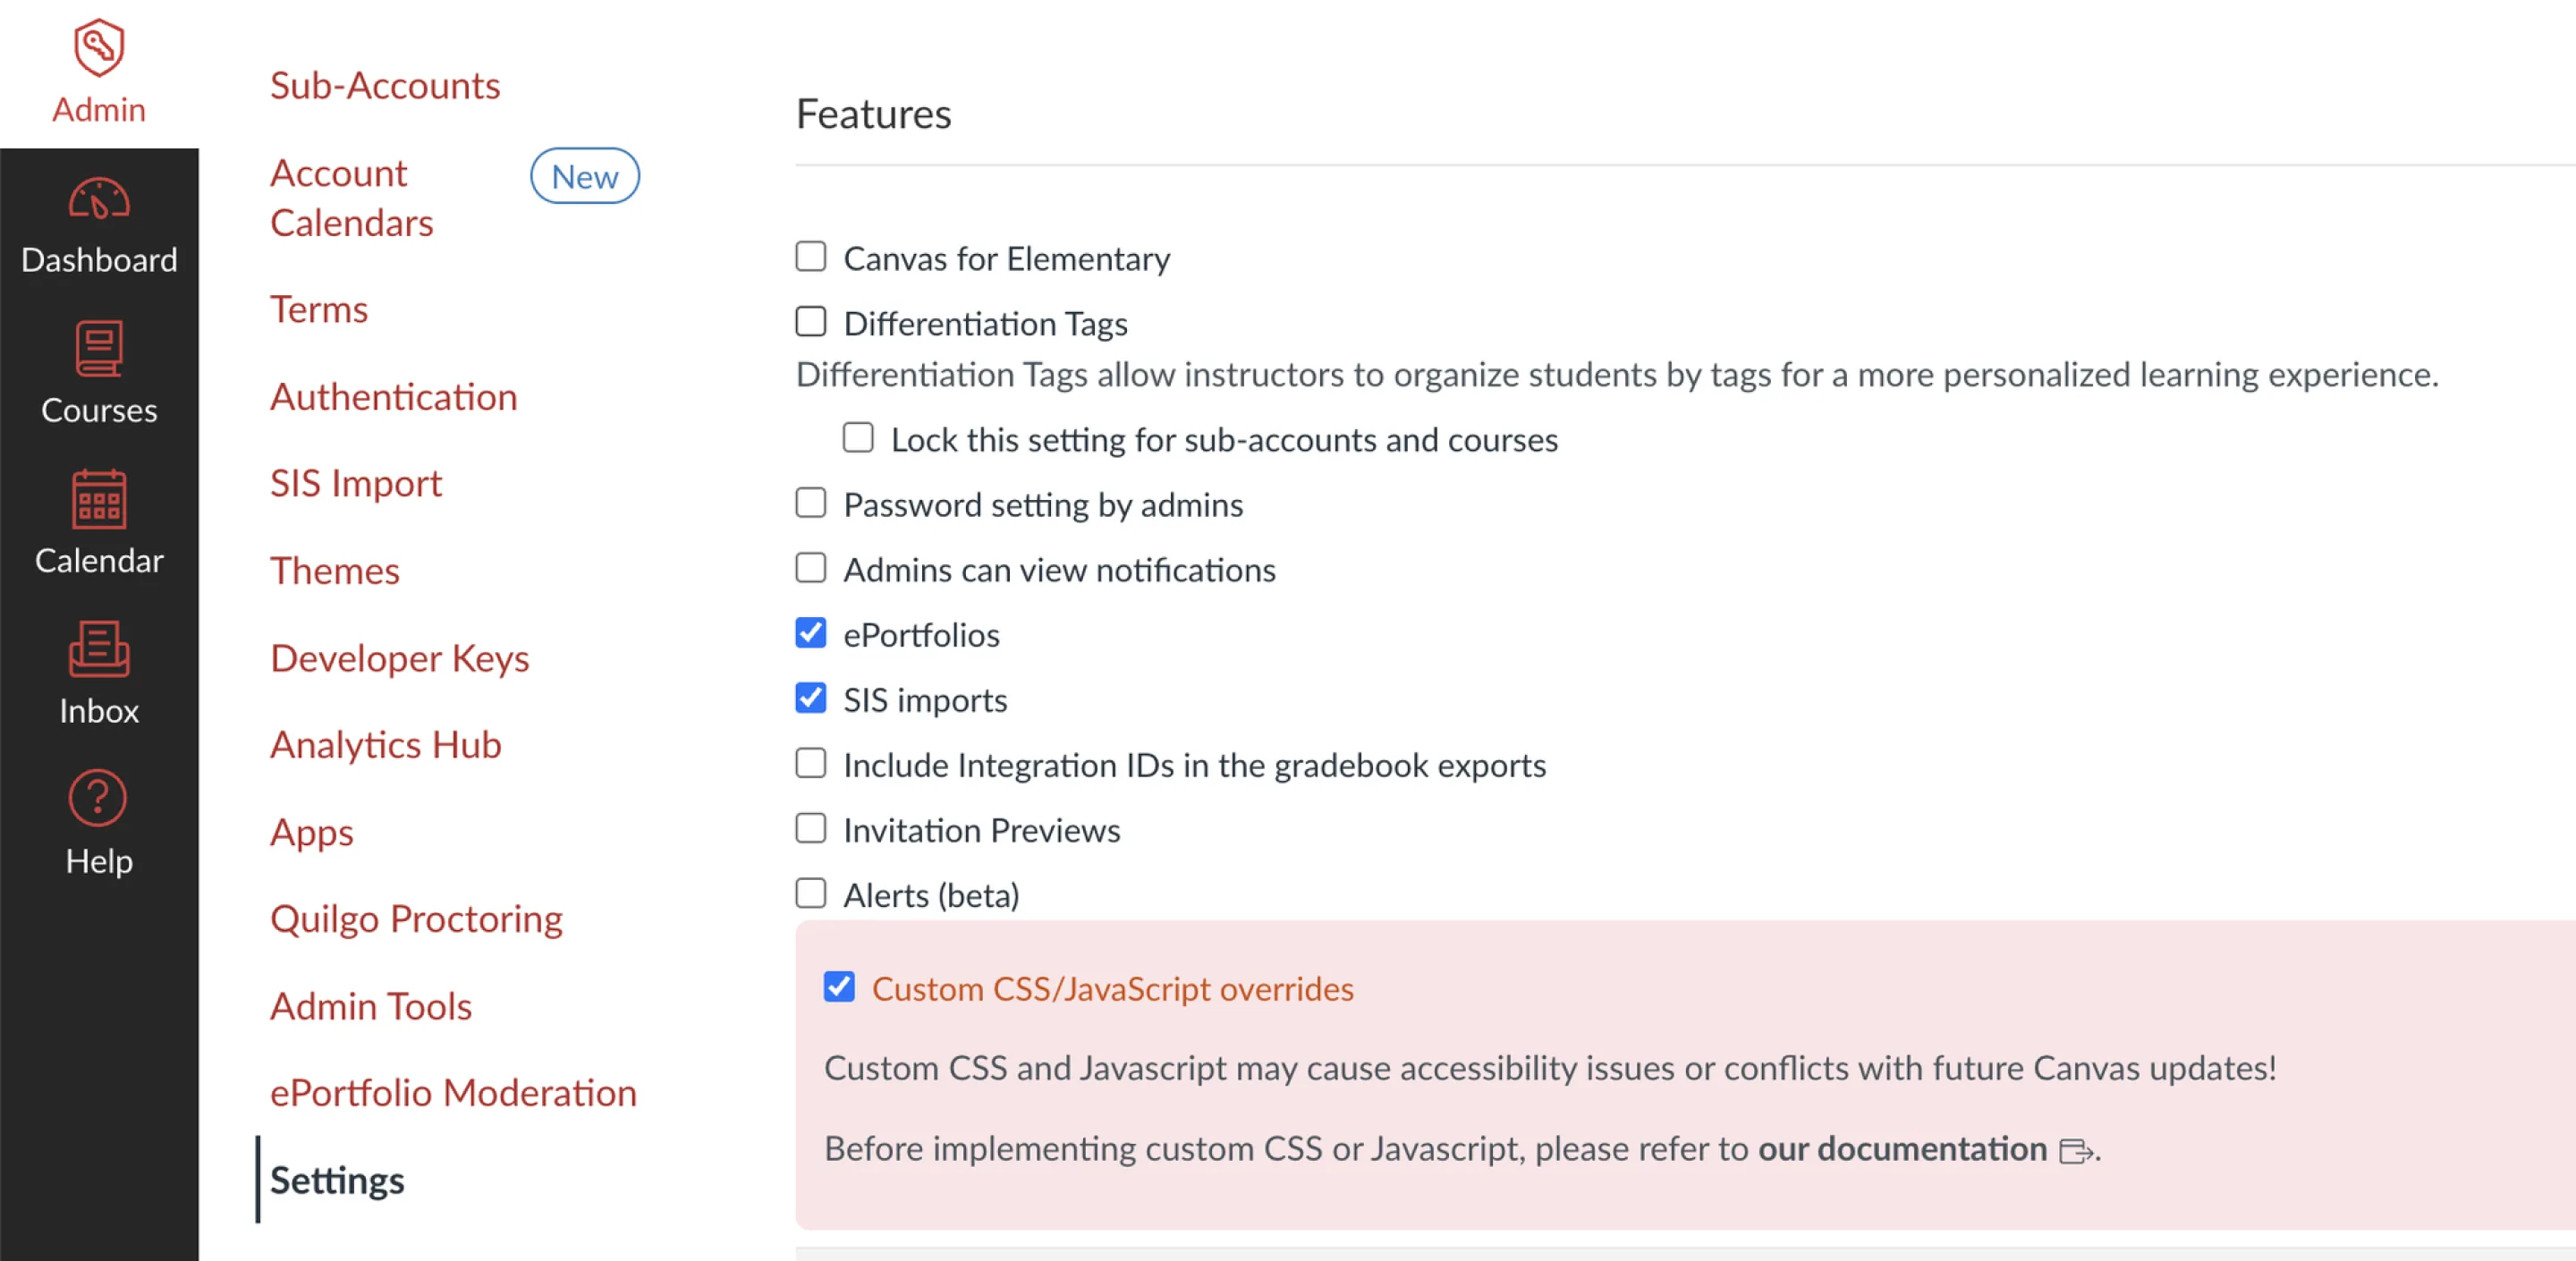
No Upload tab? Go to Admin → Settings, scroll to the bottom of the account settings page, tick Custom CSS/JavaScript overrides, save, then reopen the Theme Editor.
3. On the Upload tab, check whether a JavaScript file is already uploaded:
No file: nothing to combine — you will upload the downloaded quilgo-canvas.js as is.
An empty JavaScript file slot — nothing to preserve, upload the snippet as is.
A file already exists: click the View File button next to the JavaScript file uploader and save the file to your computer. Open both files in a text editor and paste the snippet’s entire code at the very end of your existing file. Save the result with a .js extension and continue with the combined file.
Important: add the snippet at the end of the file. Canvas allows only one JavaScript file per theme — uploading the snippet alone would replace your existing code.
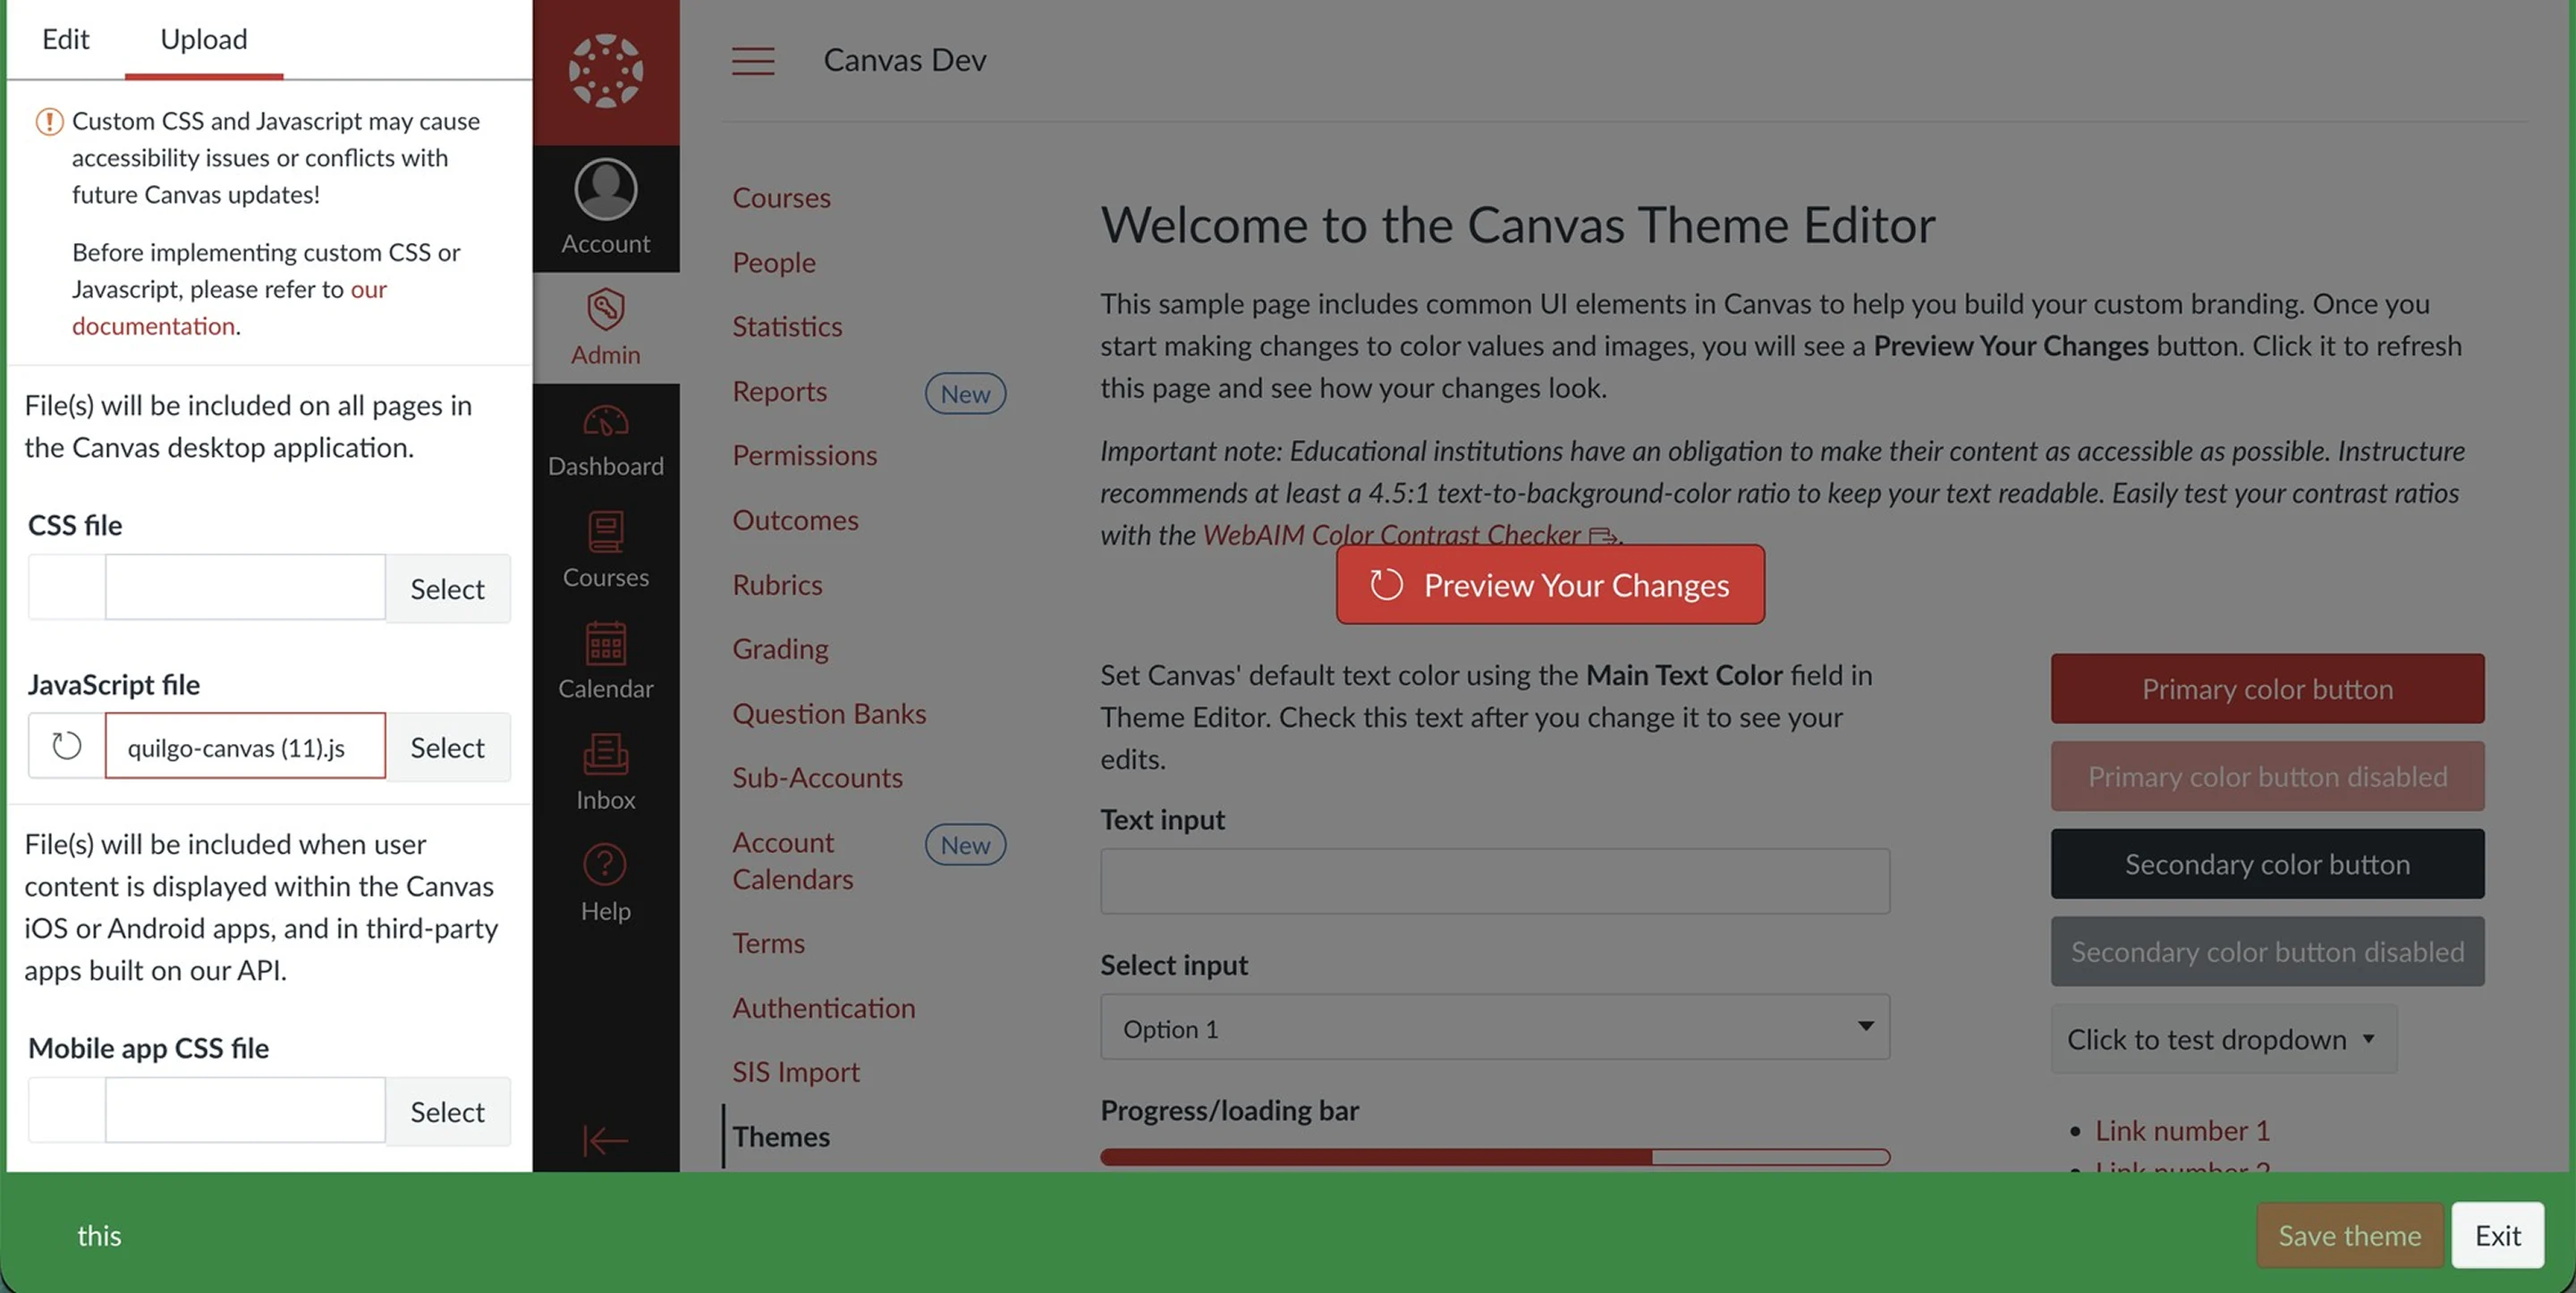
5. Upload the file in the JavaScript file slot on the Upload tab.
6. Click Preview Your Changes, then Save theme and Apply theme.
4. Activate your account
Until the account is activated, proctoring settings in quiz menus stay locked: teachers see “Please ask your administrator to activate the account to enable proctoring”, and administrators see the activation button right there.
1. In the Admin sidebar, open Quilgo Proctoring and click Activate your account. The same button sits in two places on that page — at the bottom of Subscription Overview, and in the Activation account row of Integration & Install Health; either one opens the Quilgo dashboard on the sign-up page.
Both entry points: the button under Subscription Overview and the link in the Activation account row.
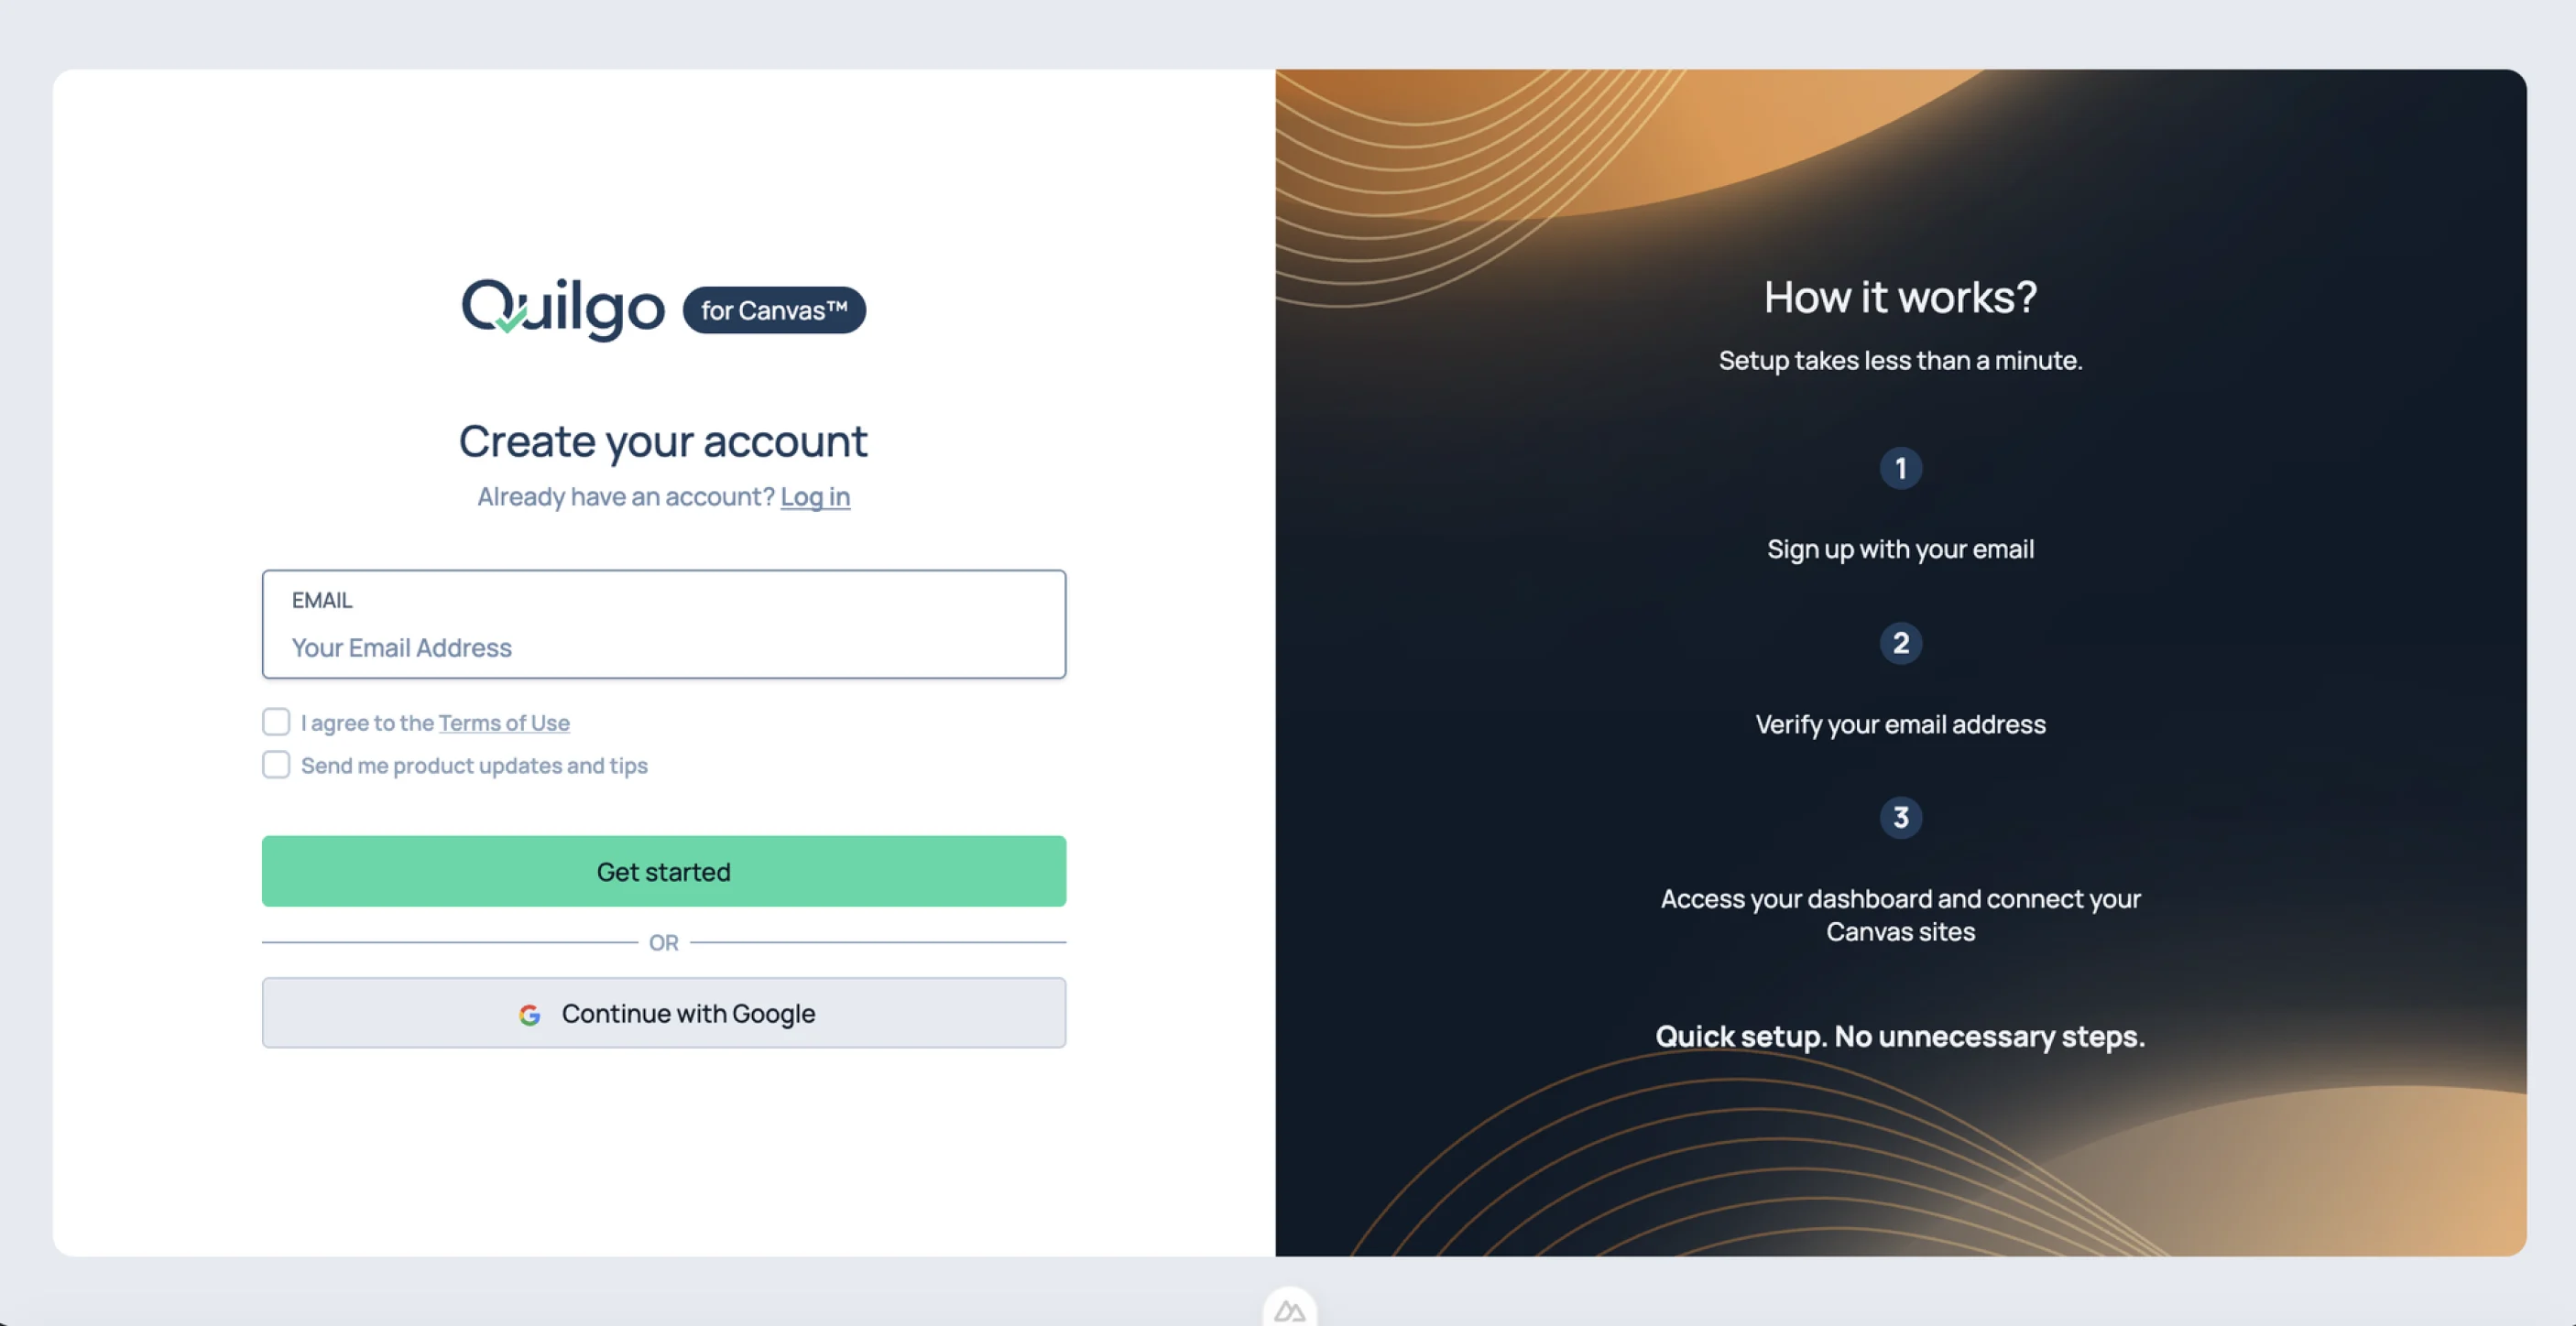
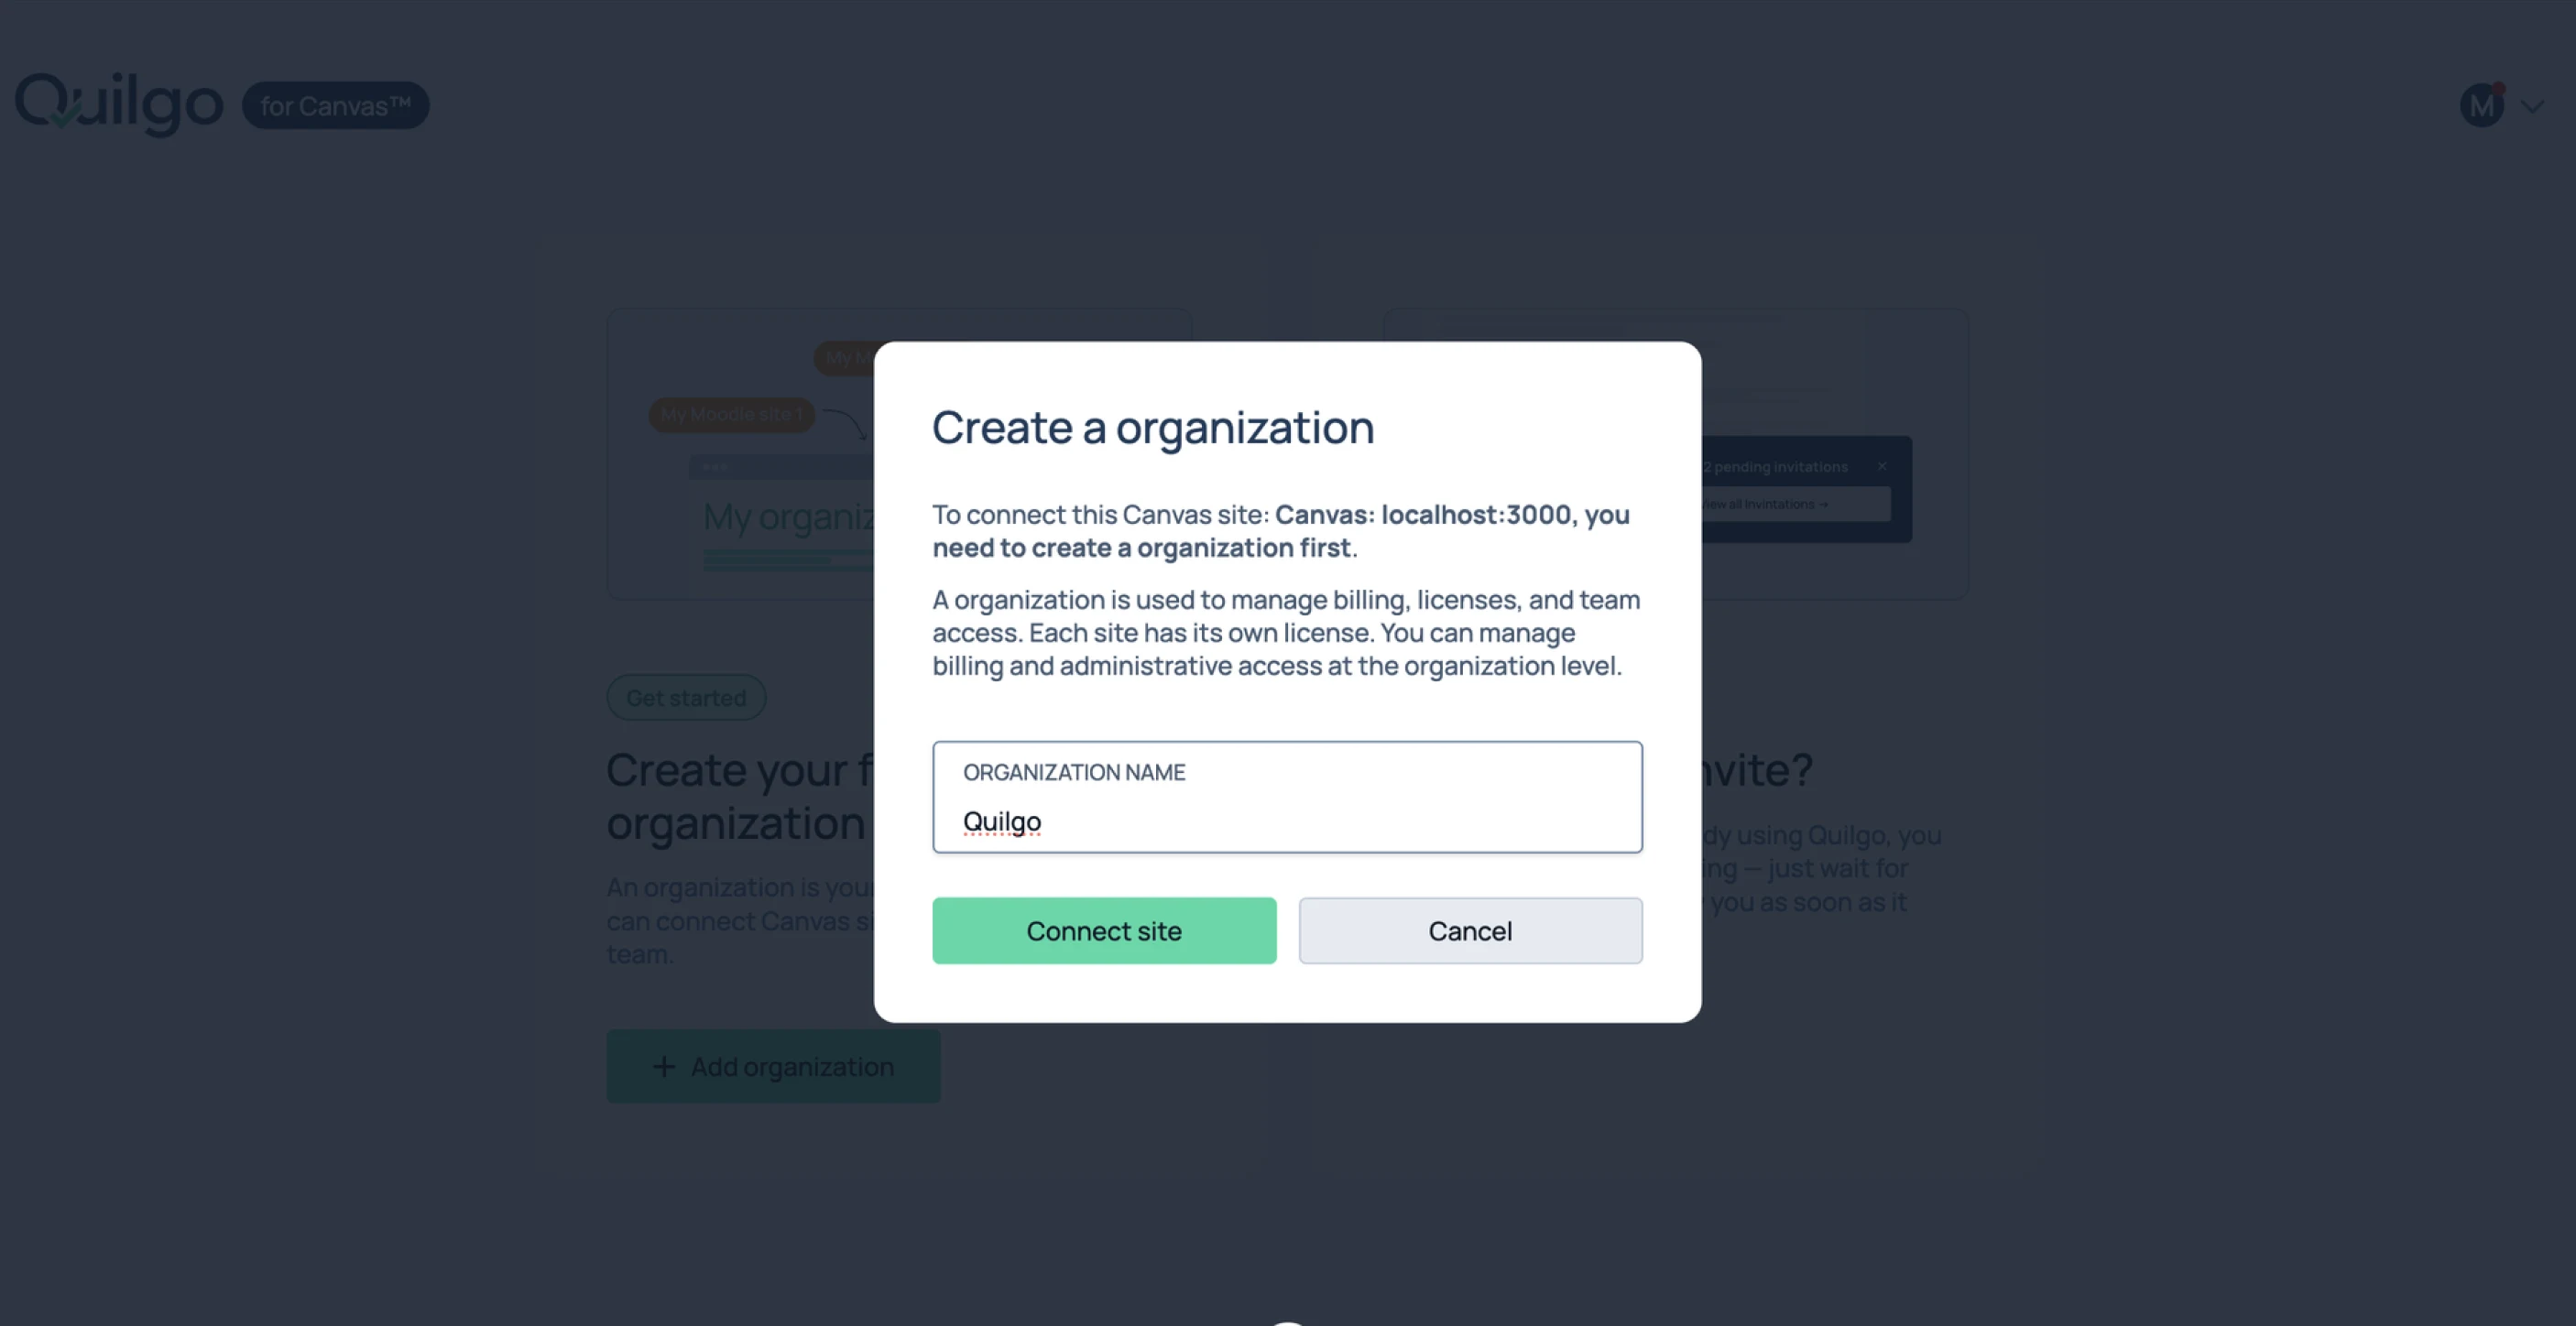
2. Create your Quilgo account there (or log in if you already have one) and confirm your email. The dashboard already knows which Canvas site you arrived from — create an organization (it holds billing, licences and team access) and click Connect site to finish the link.
Sign up with an email address, or continue with Google.
After confirming the email, click Log into my dashboard.
The Canvas site is already identified; name the organization and click Connect site.
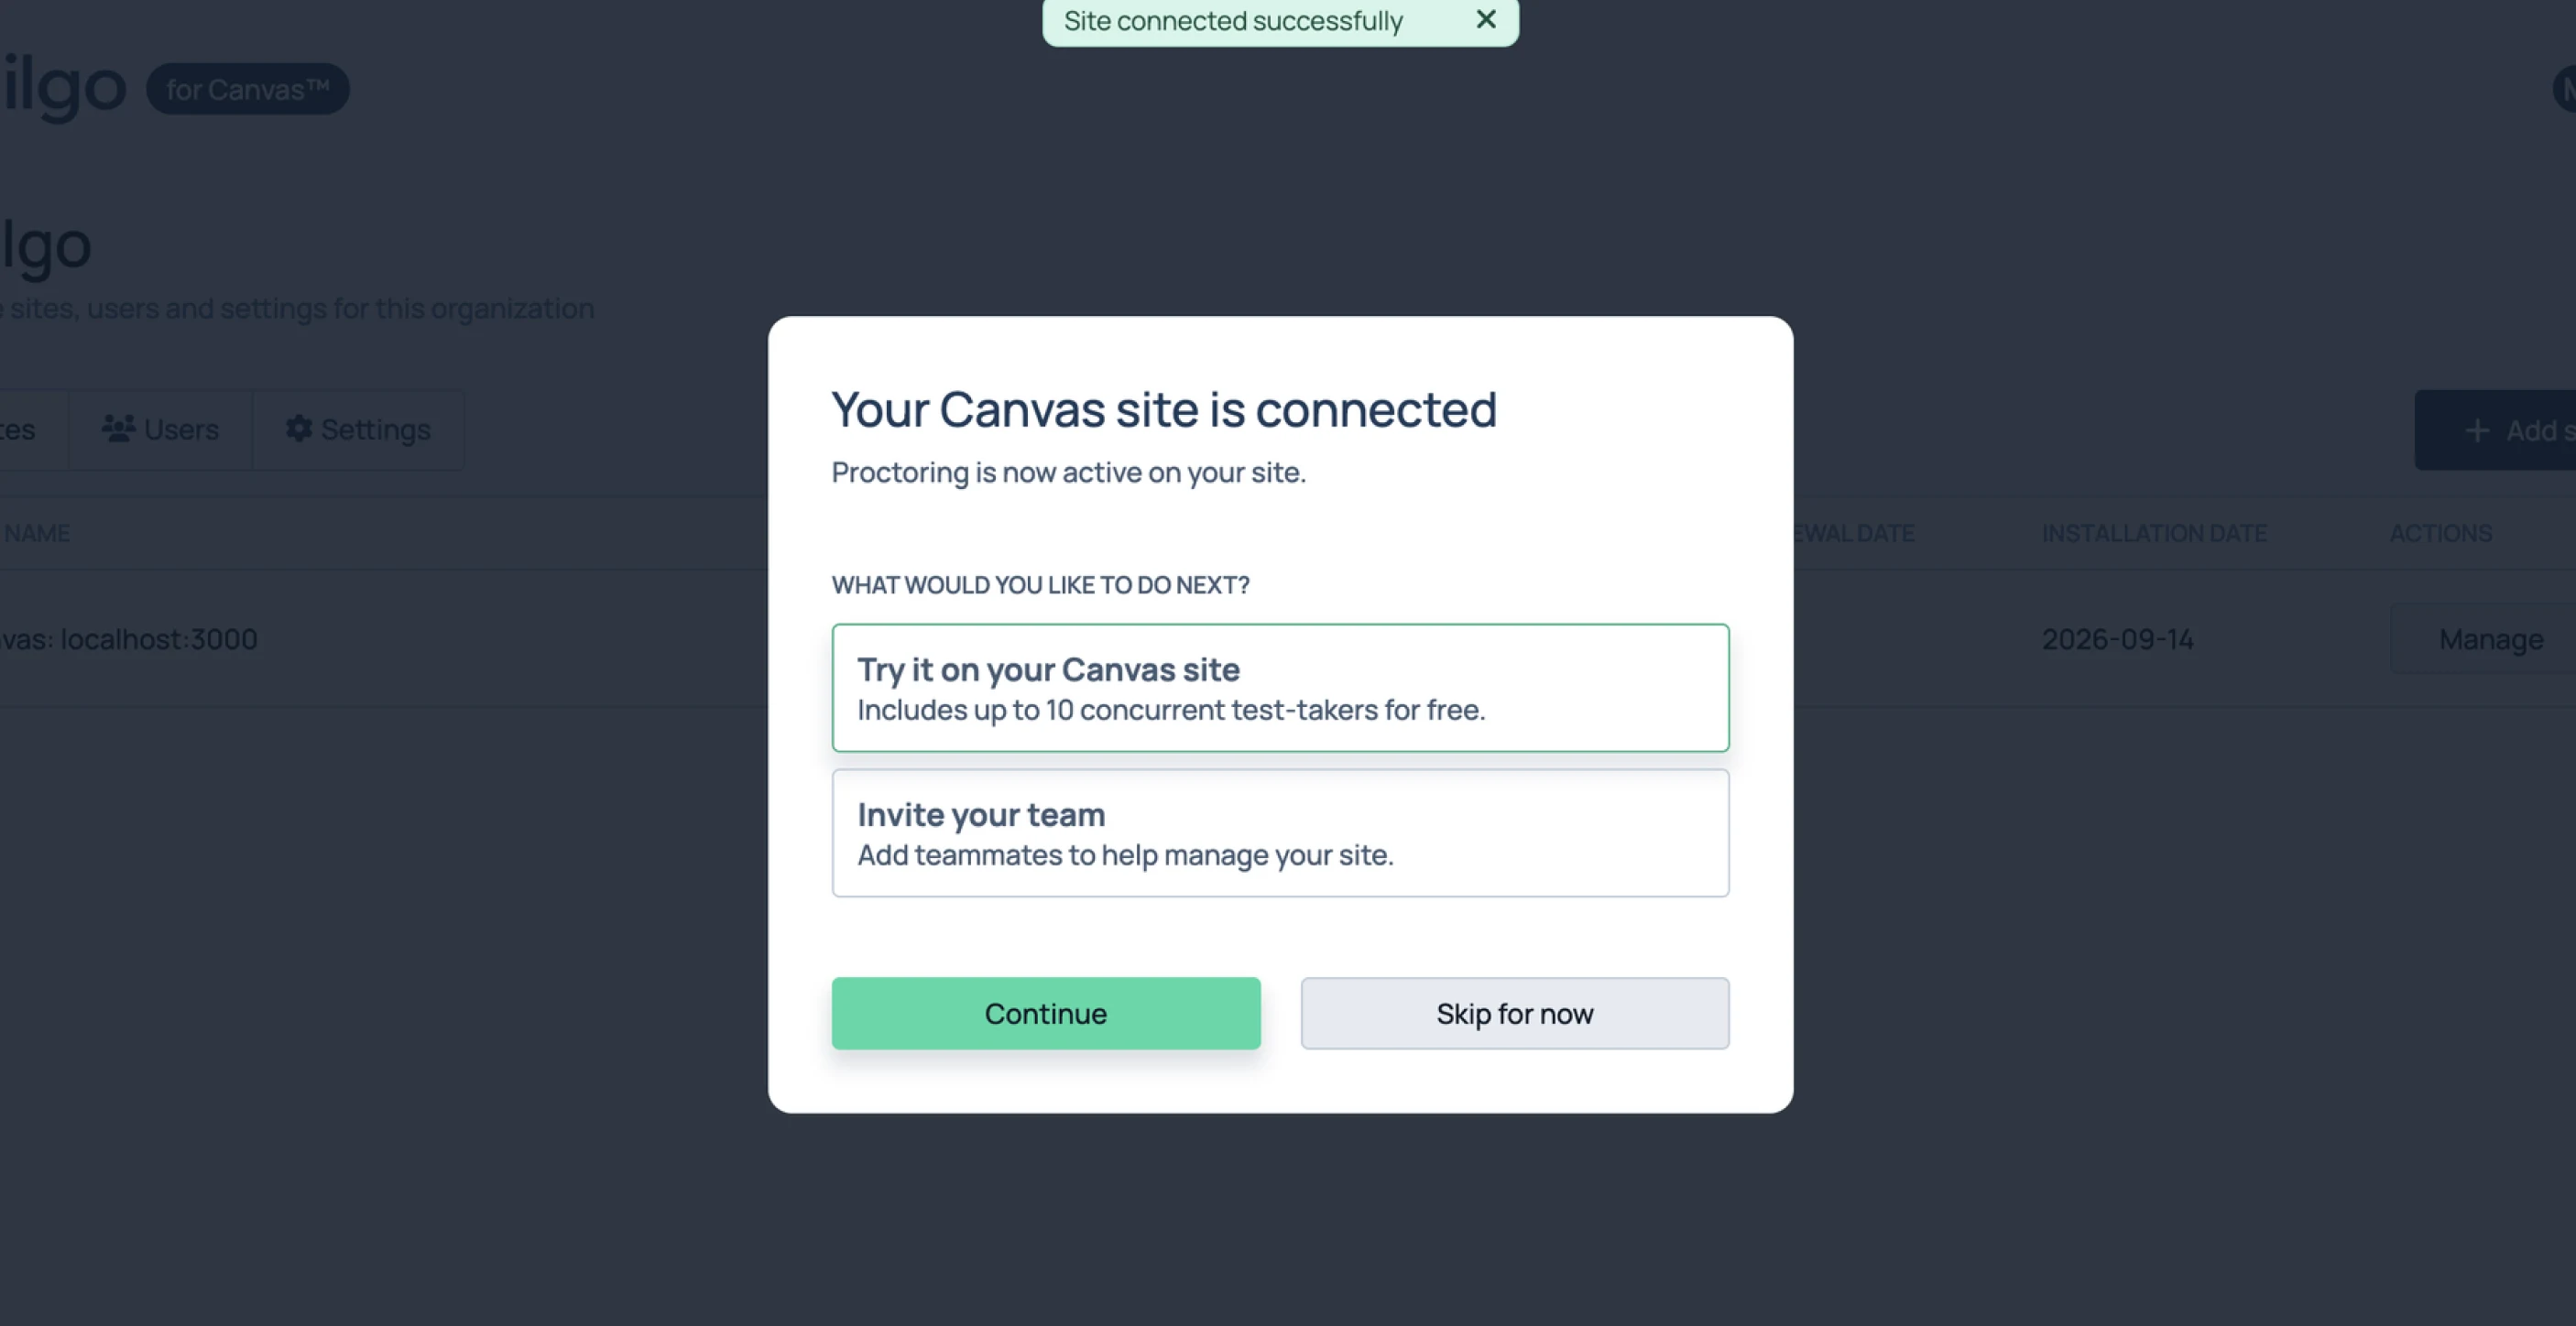
Confirmation that proctoring is now active on the site.
3. Back in Canvas, refresh the Quilgo Proctoring page — the Activation account row in Integration & Install Health should turn Active, and proctoring settings unlock for teachers.
5. Verify the installation
1. In the Canvas Admin sidebar, open Quilgo Proctoring.
2. Check the Integration & Install Health panel: Registration, Activation account and Proctoring integration should all read Active, and Theme file last seen should show a recent time (it refreshes within a few minutes of anyone viewing a Canvas page — reload a Canvas page, then refresh this panel).
A finished installation: all three rows Active, a recent Theme file last seen, and the plan visible in Subscription Overview.
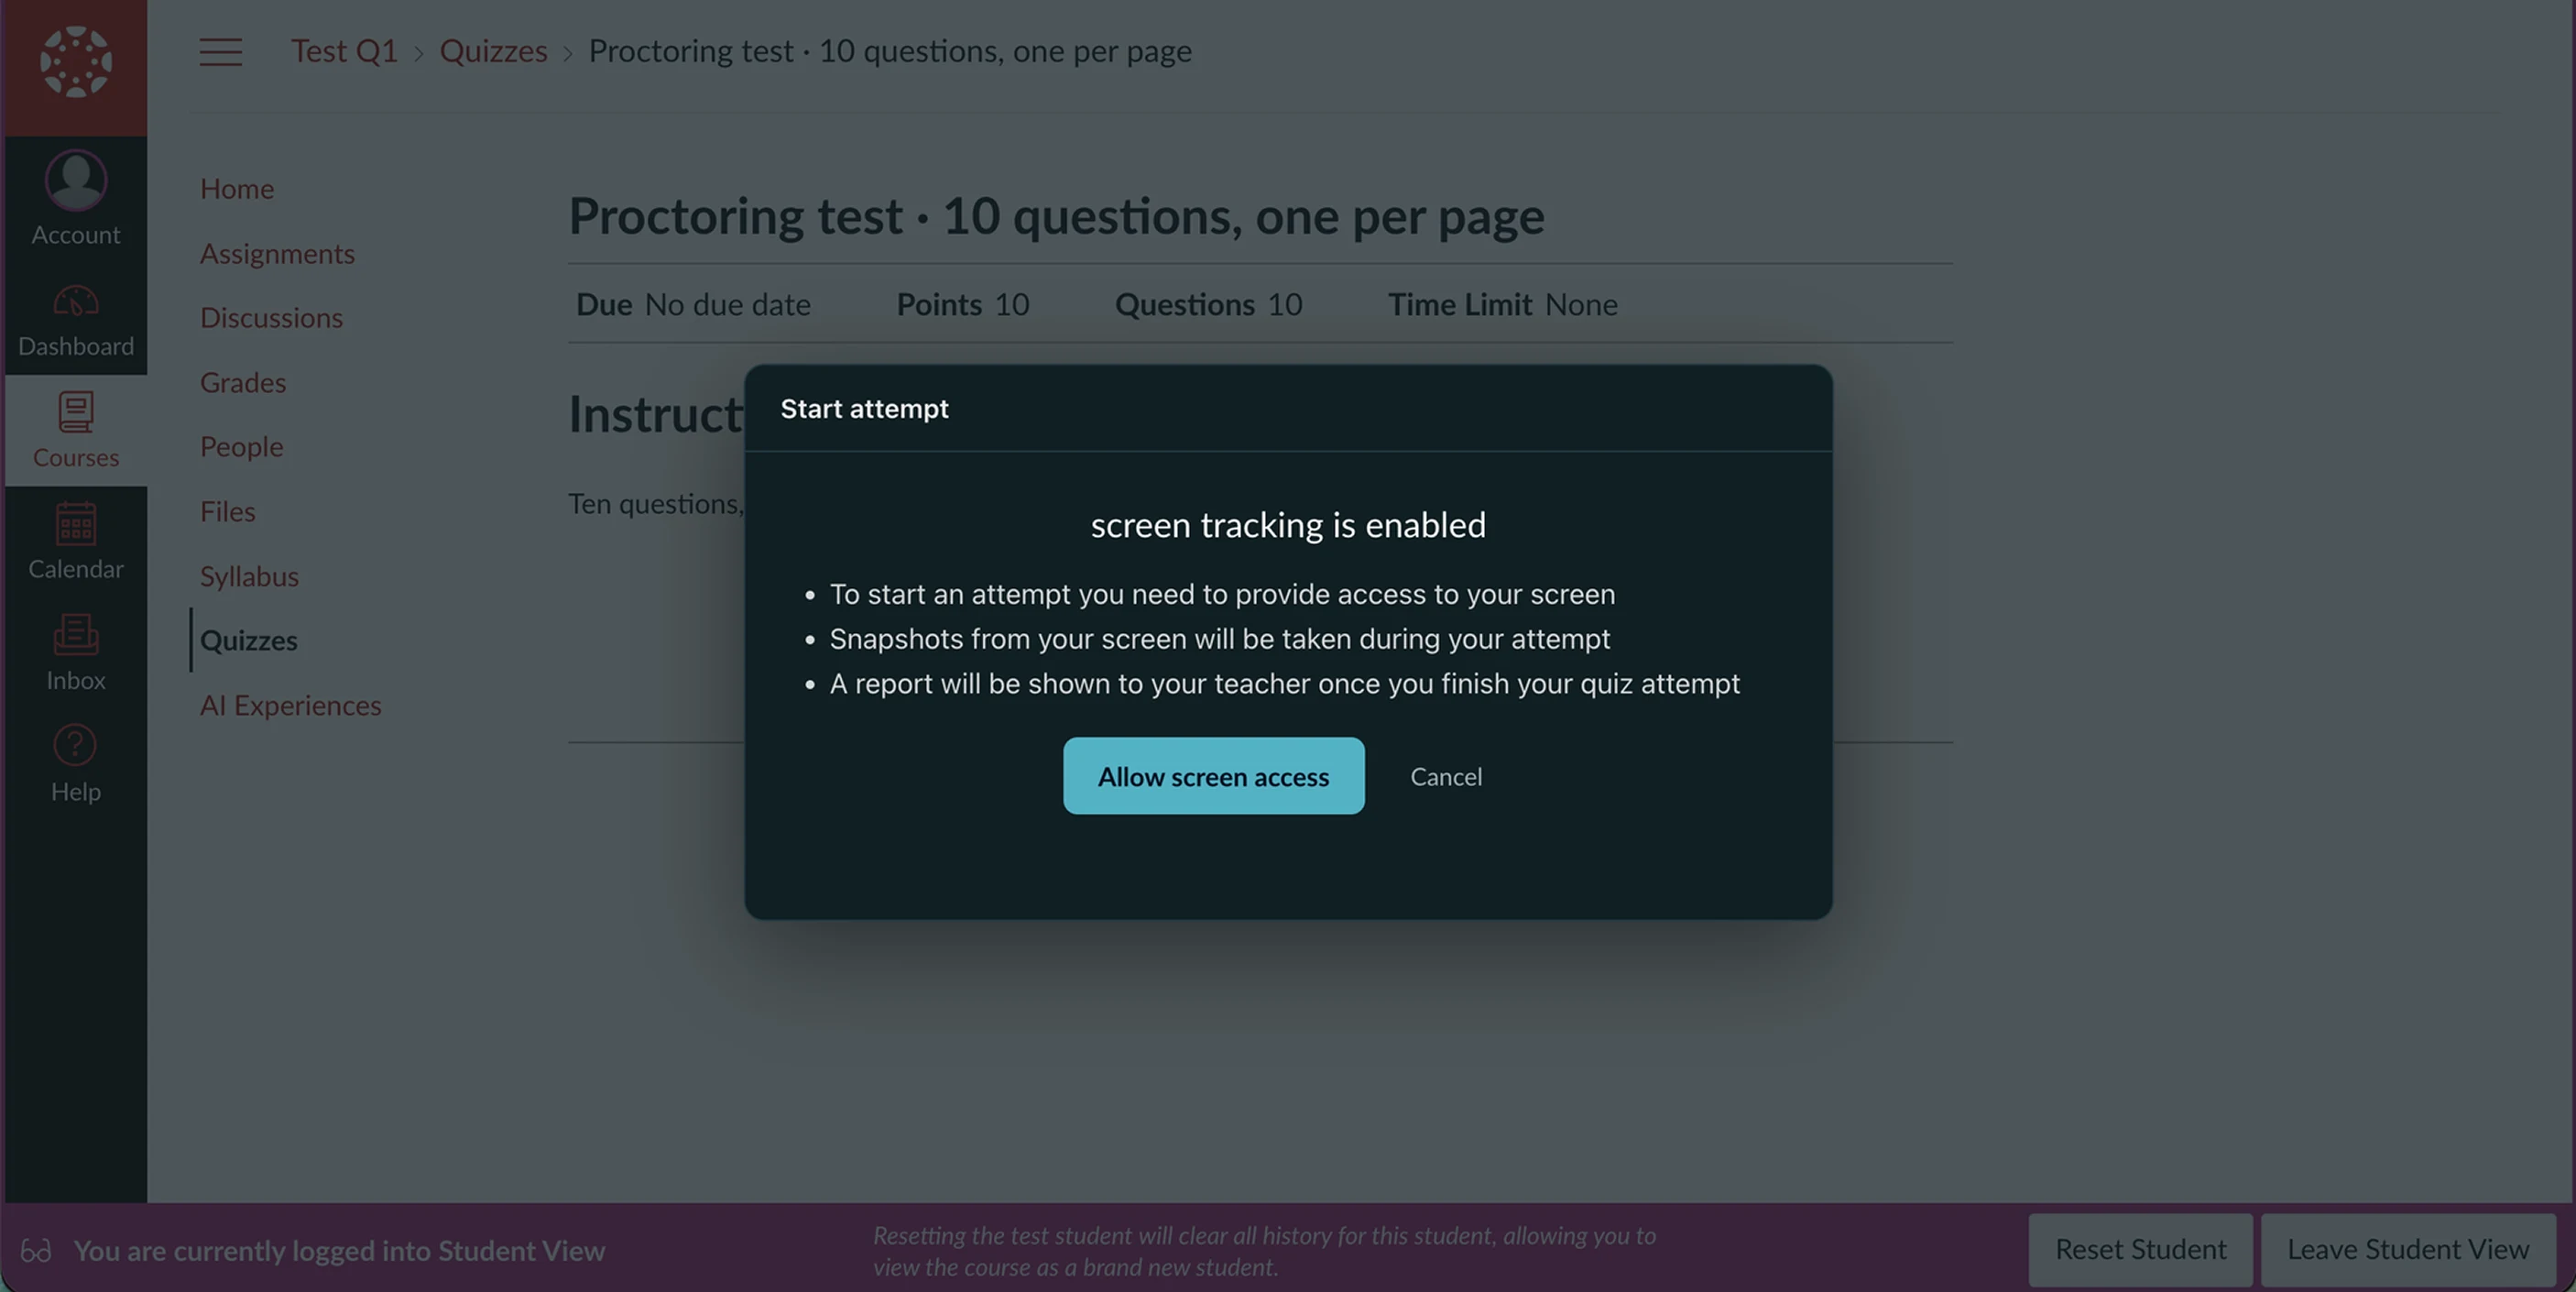
2. Run a real test: open any quiz, choose Quilgo Proctoring from the quiz menu, tick Enable proctoring, pick the tracking methods and Save, then take the quiz as a test student. Open it with View as Student: before the attempt starts, a Start attempt dialog lists the tracking you switched on and asks for exactly those permissions — screen, camera, or both. Nothing is requested for methods you left off.
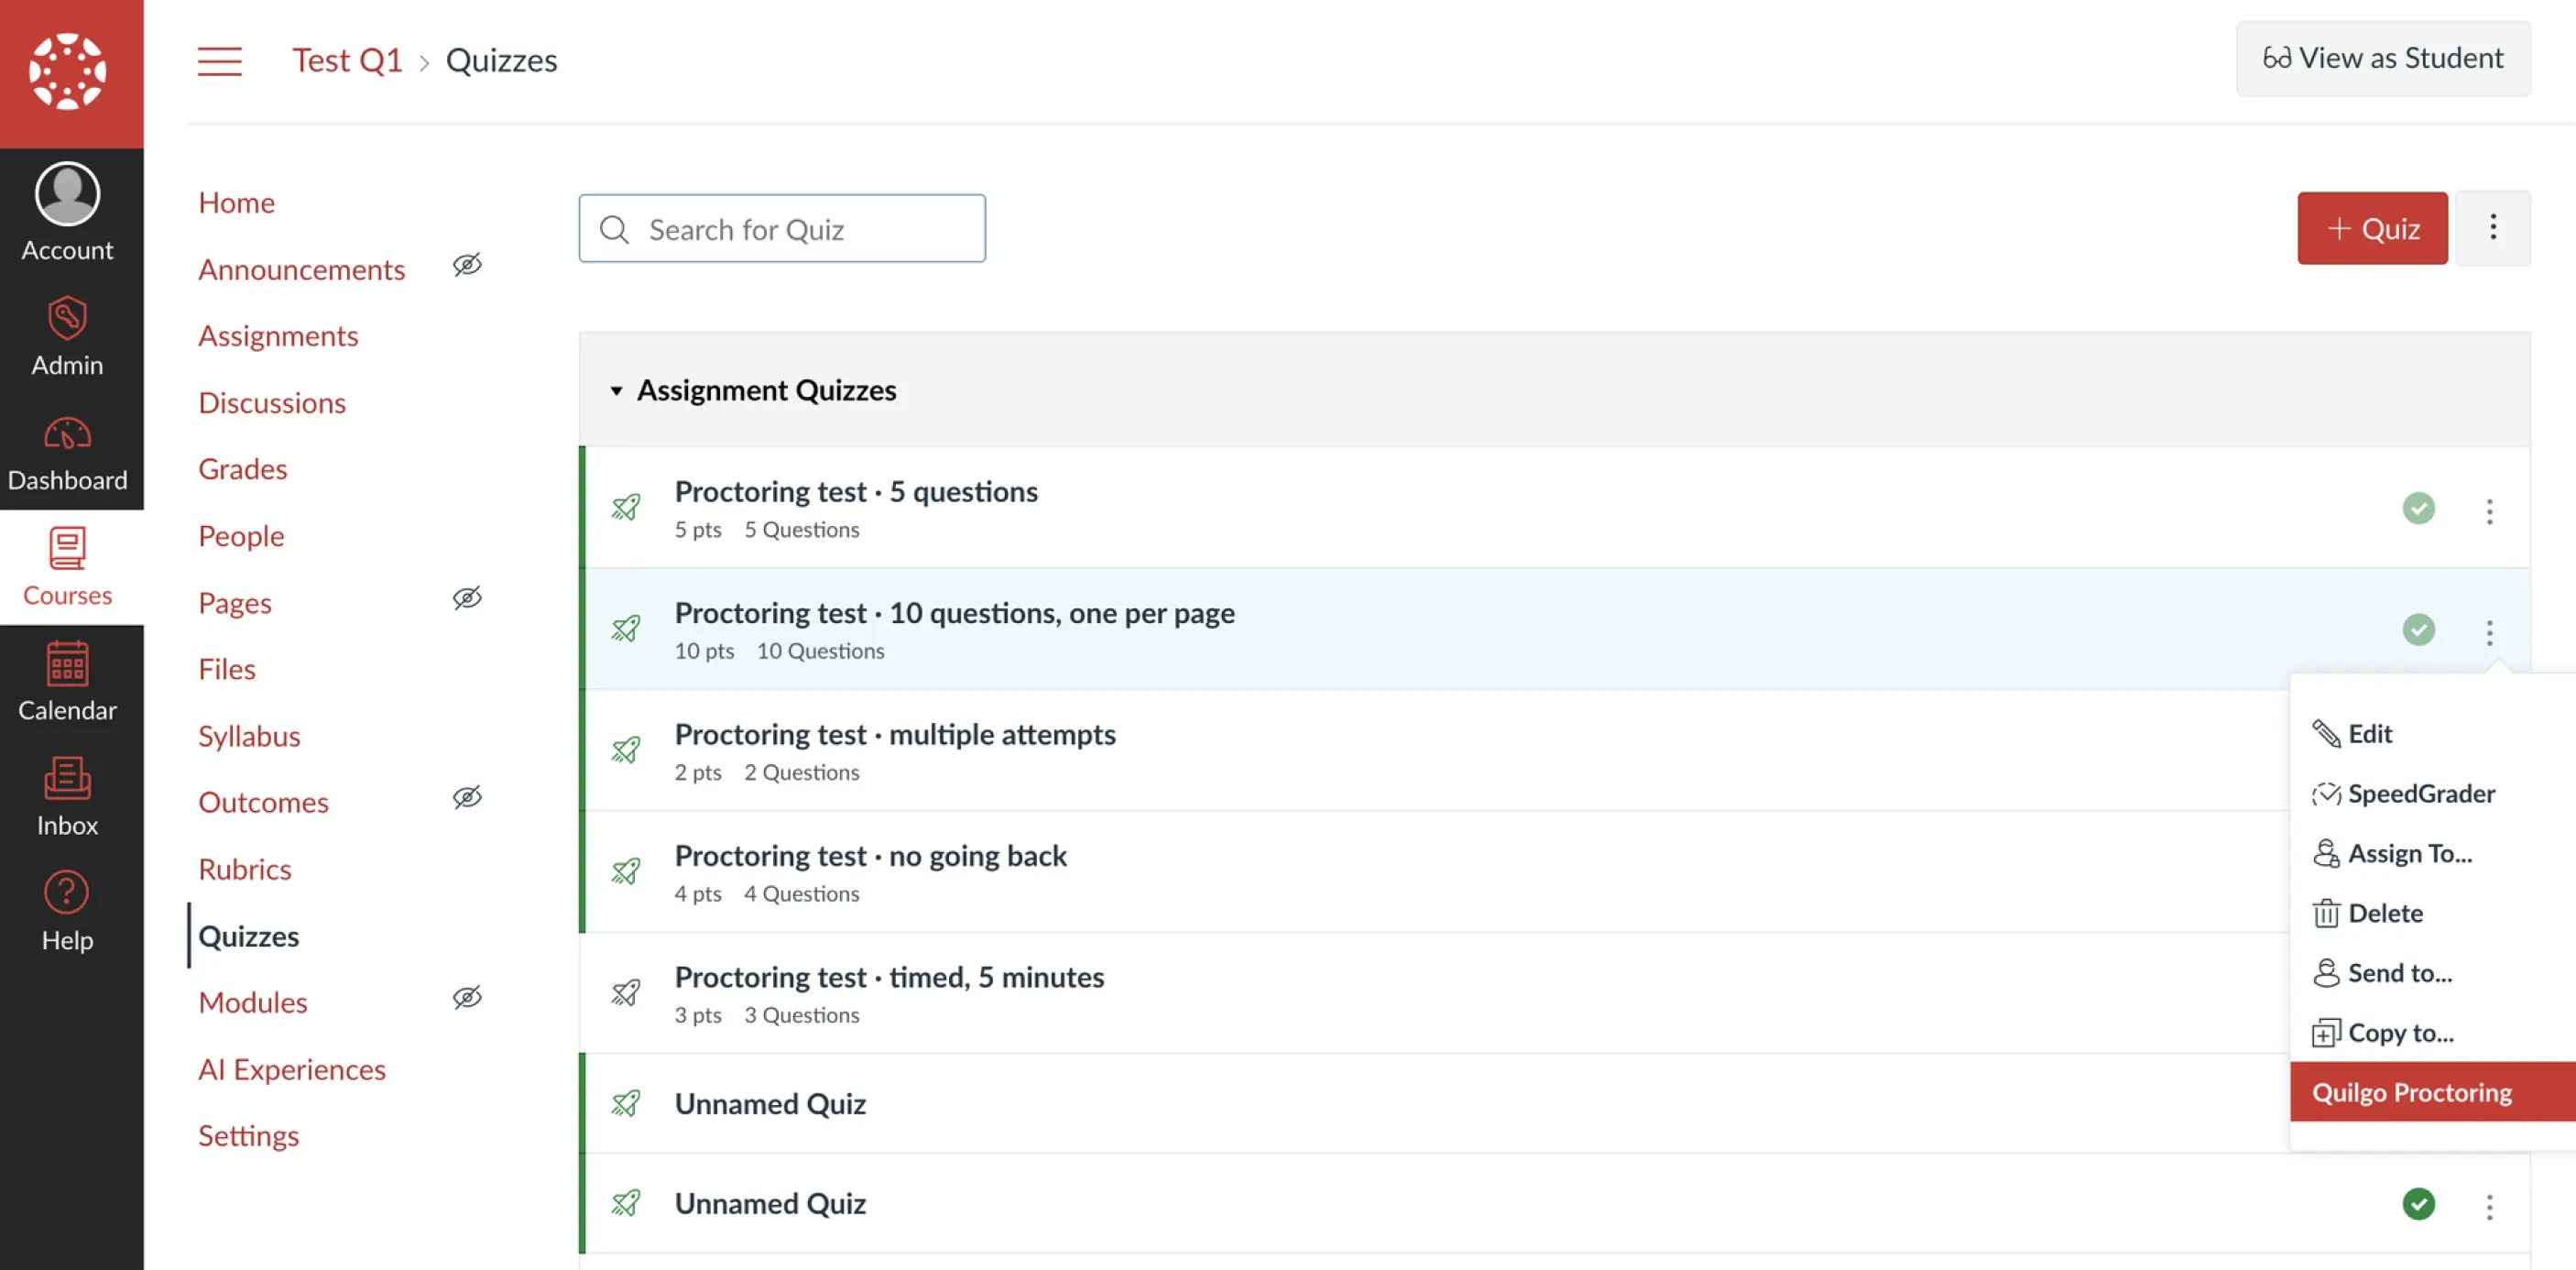
The quiz ⋮ menu in Quizzes — Quilgo Proctoring is the last entry.
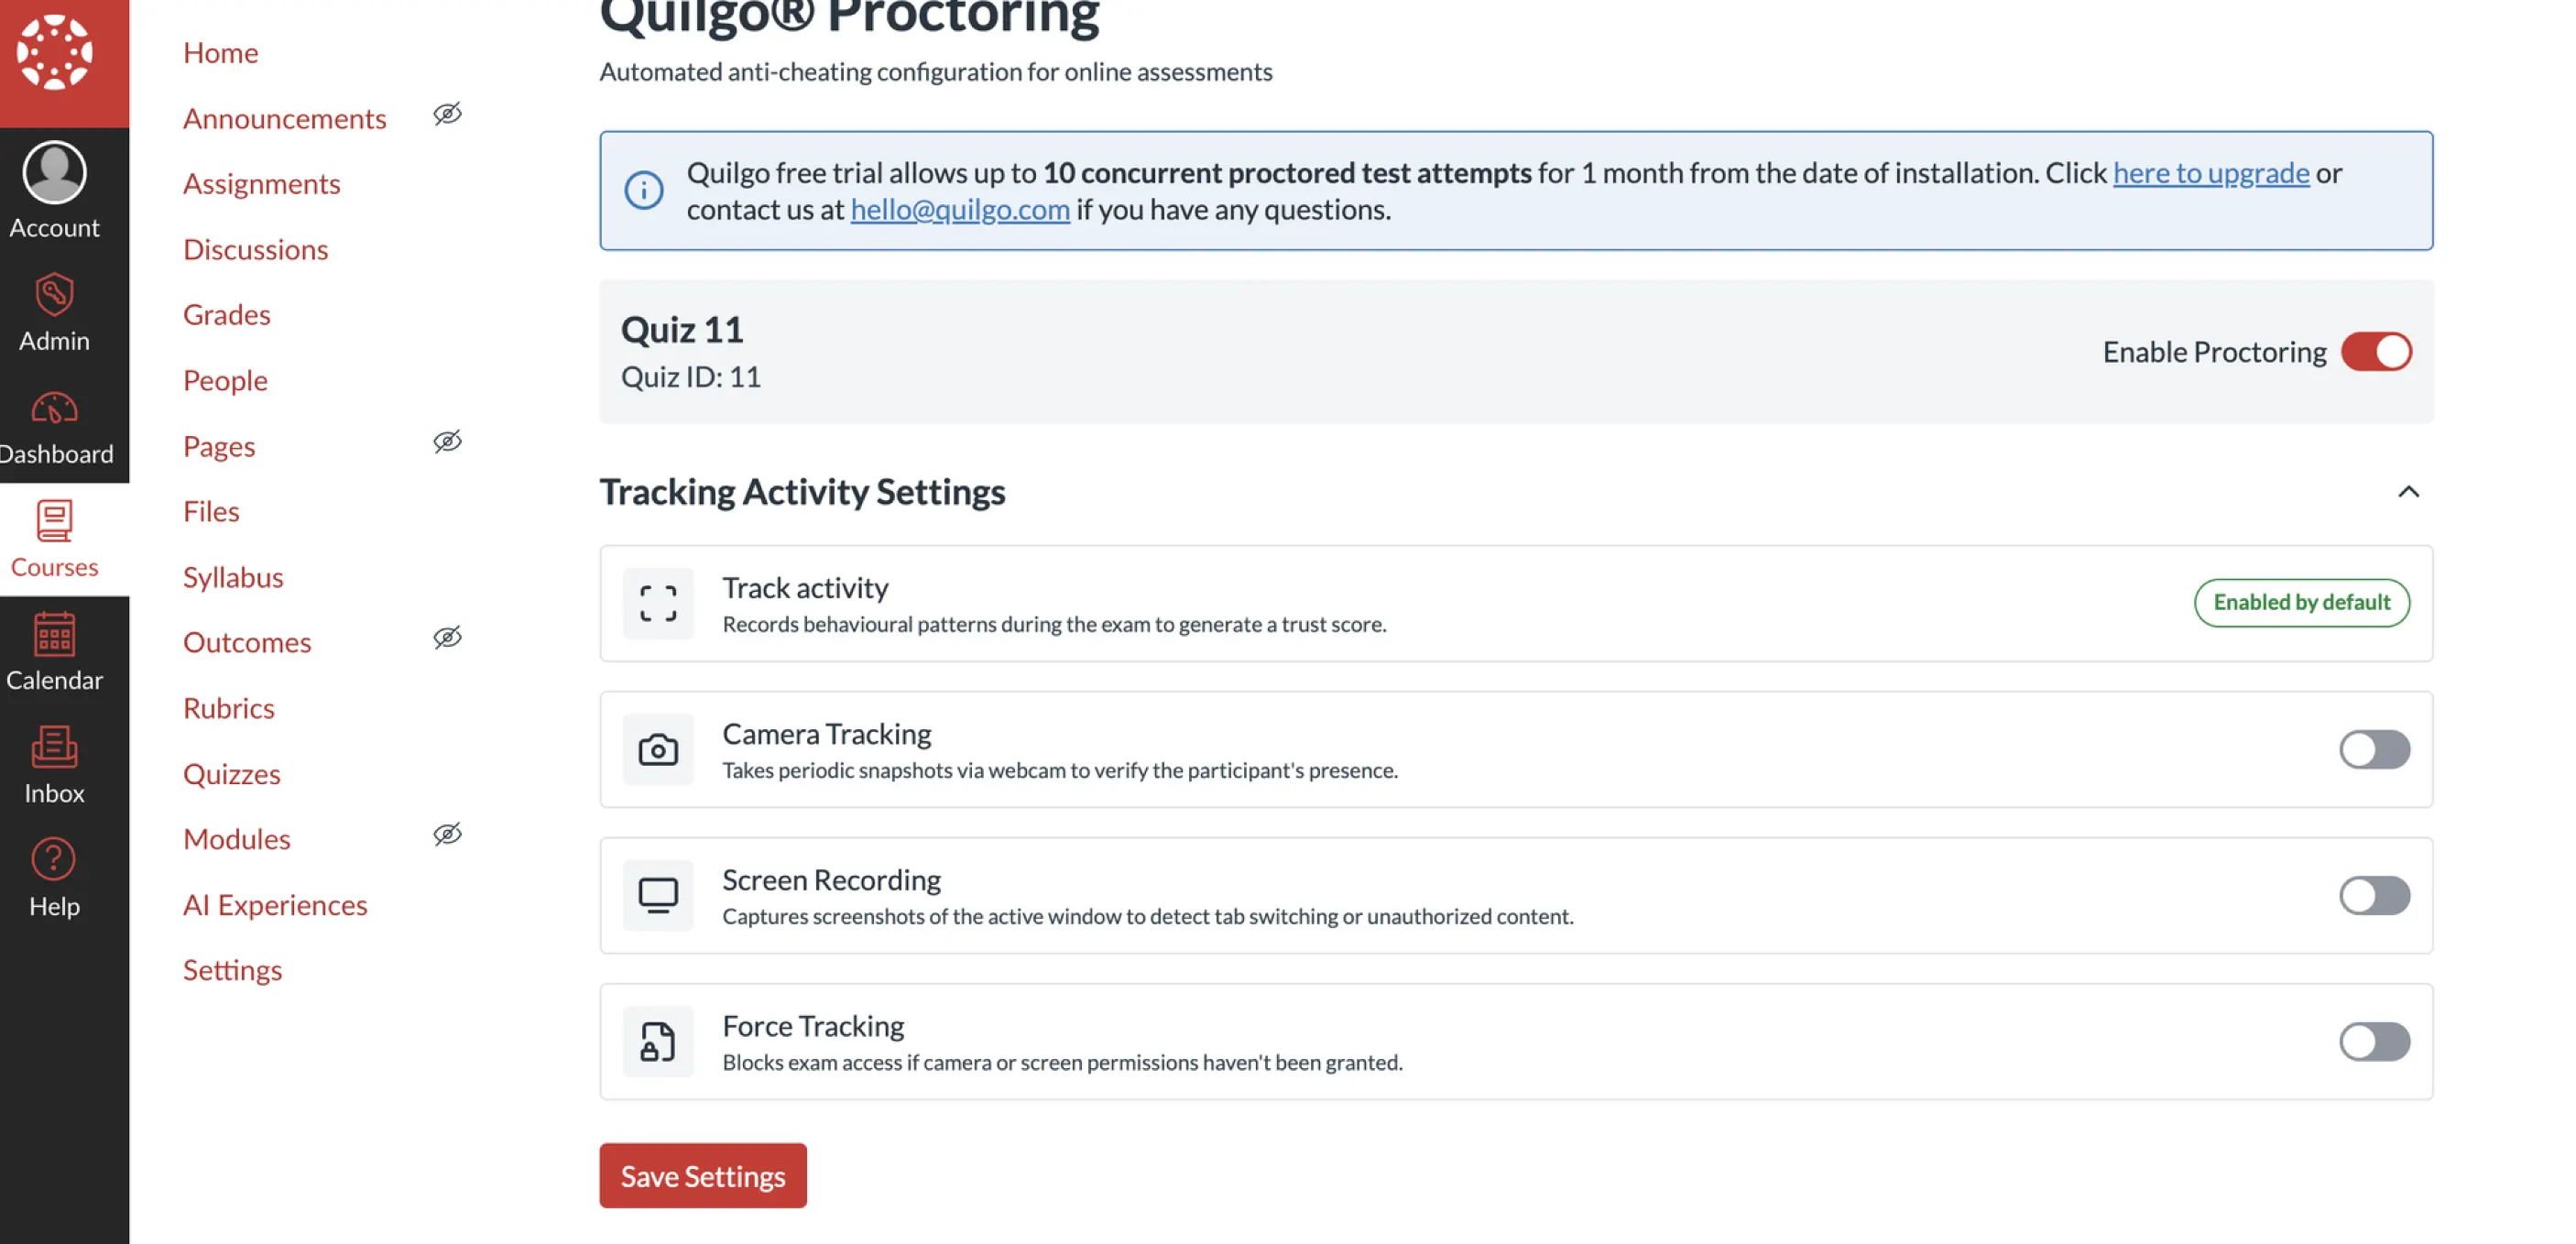
Turn Enable Proctoring on, then pick the tracking methods and Save Settings.
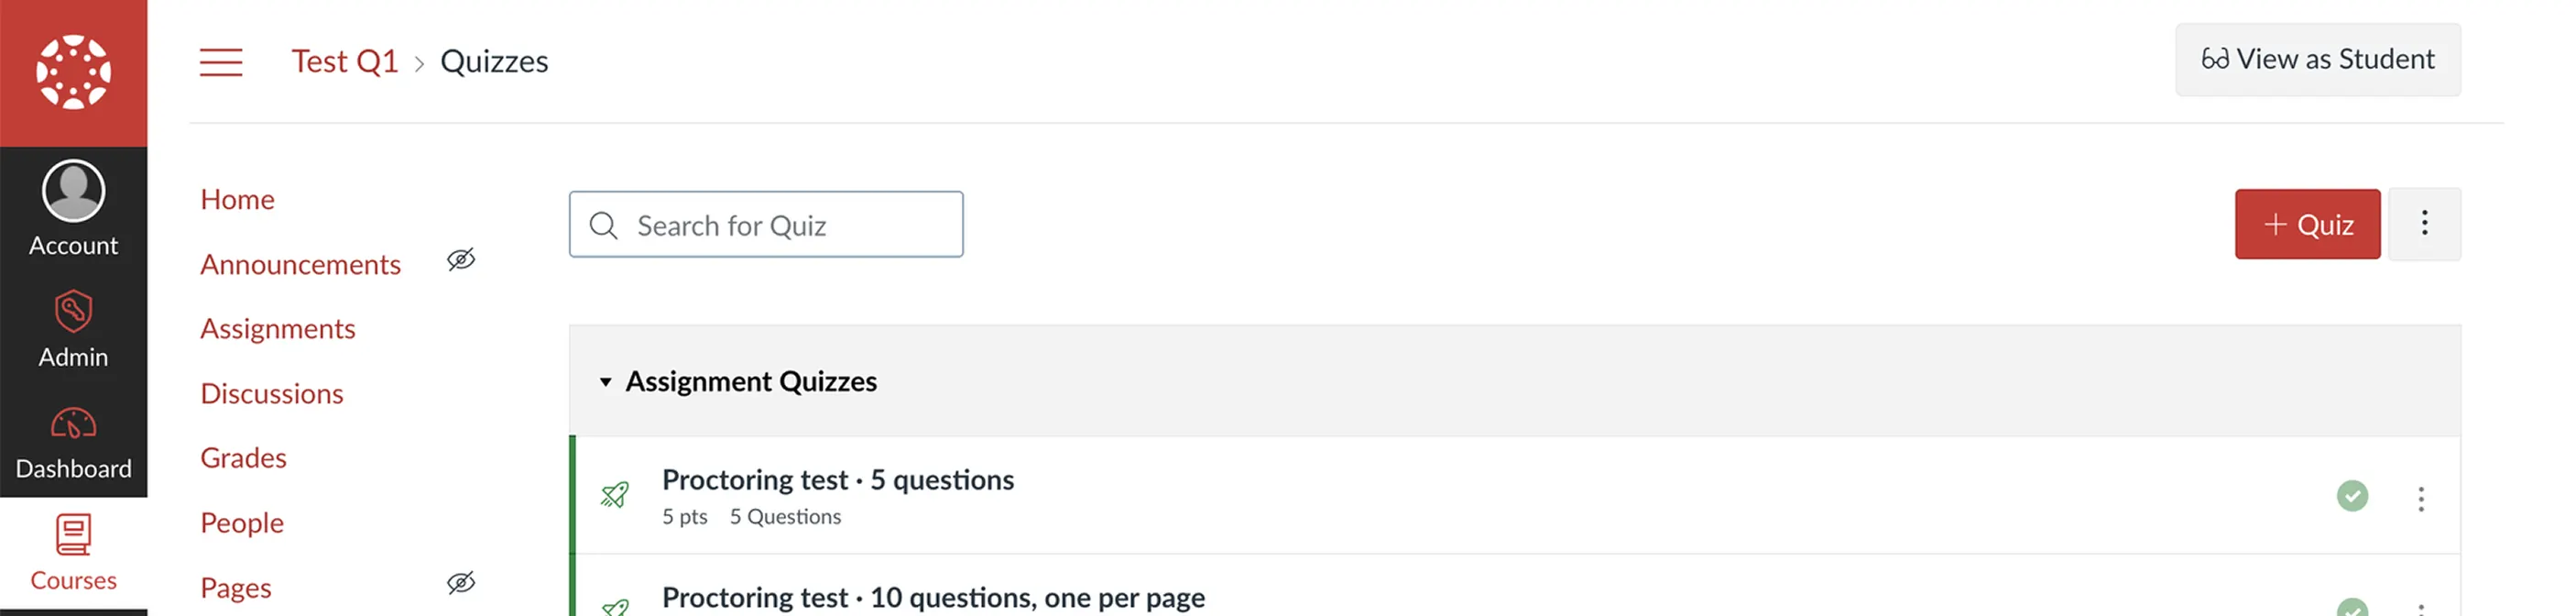
View as Student, top right of the course, opens Canvas as a test student.
The student's Start attempt dialog — here only screen tracking was on, so it asks for screen access.
That’s the whole installation. From here teachers just tick Enable proctoring per quiz — no per-course setup is needed.
Where teachers find it
Classic Quizzes: open the quiz and click the three-dot menu (⋮) in the top-right corner — Quilgo Proctoring appears there.
New Quizzes: open the assignment — Quilgo Proctoring appears in the assignment menu.
Administrators: the account-level page (Admin sidebar → Quilgo Proctoring) shows install health and results.
Students never open the tool. Proctoring starts on the quiz page itself when the teacher has switched it on.
Troubleshooting
The registration window shows an error
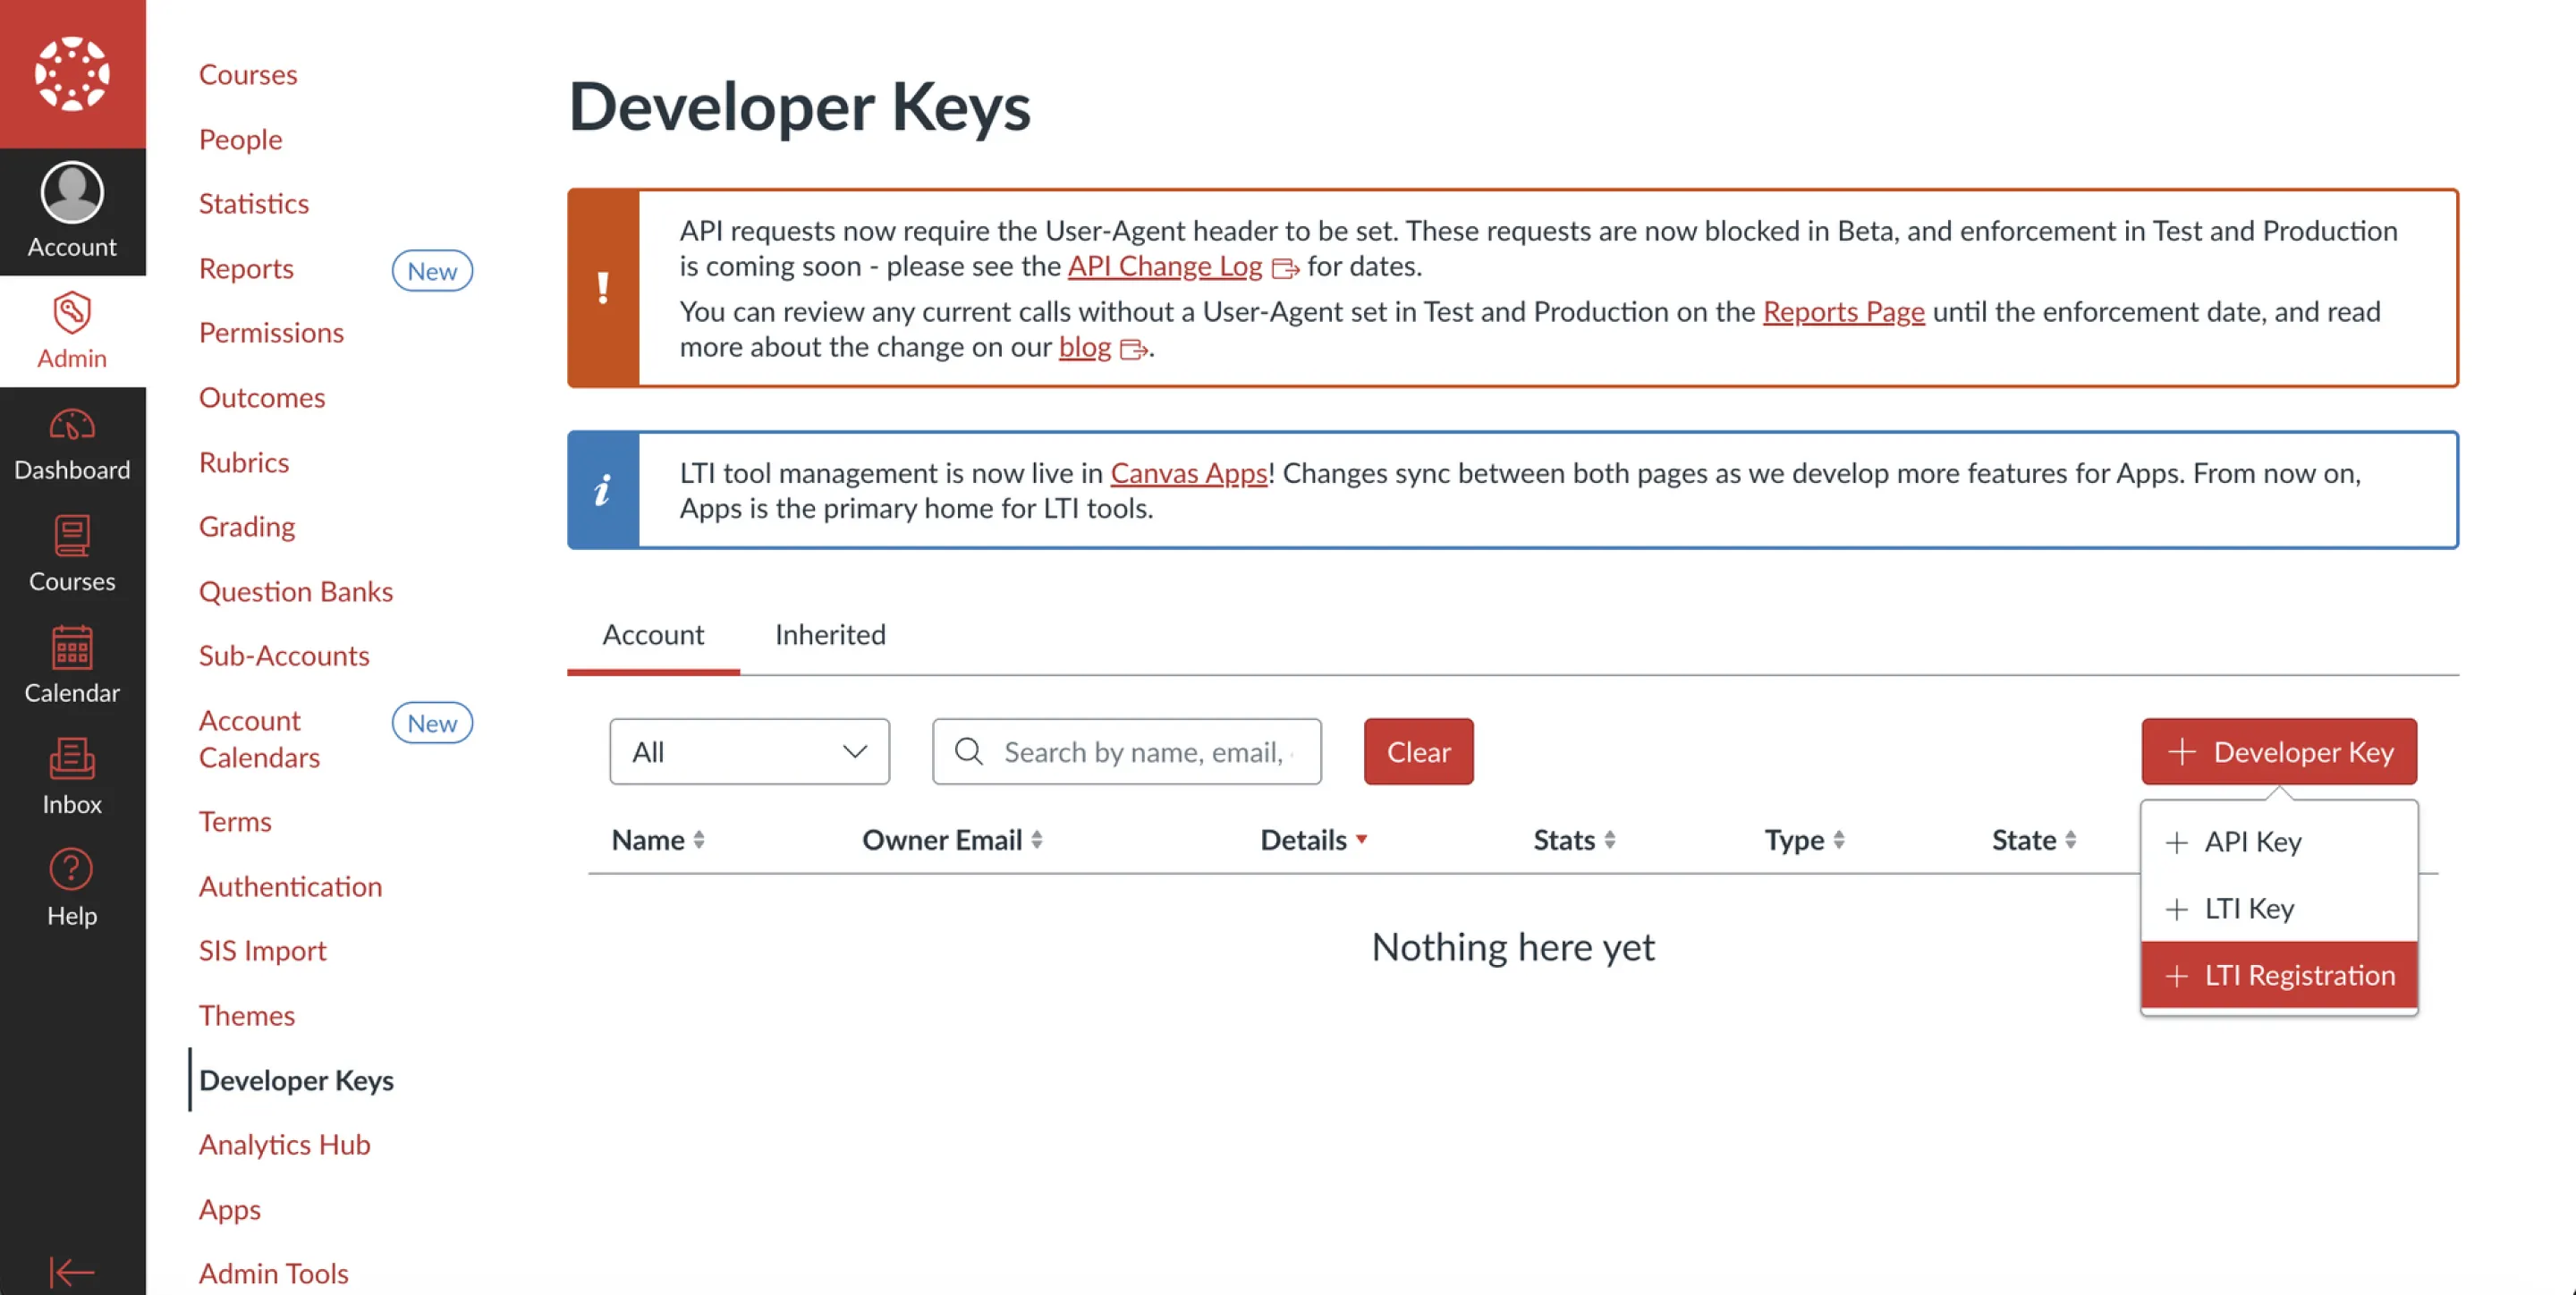
The registration link Canvas issues is valid for one attempt only. Close the dialog and start again from Admin → Developer Keys → + Developer Key → LTI Registration.
No Upload tab (or no JavaScript slot) in the Theme Editor
Custom JavaScript uploads are disabled on your account. Go to Admin → Settings, scroll to the bottom of the account settings page, tick Custom CSS/JavaScript overrides, save, then reopen the Theme Editor — the Upload tab appears. On a self-hosted Canvas, if the tab is still missing after that, check item 2 of the self-hosted prerequisites.
“Theme file last seen: never”, or nothing is recorded
The theme file is missing or the theme was saved but not applied. Re-open the Theme Editor, confirm quilgo-canvas.js is uploaded under JavaScript, and click Apply theme. The panel updates within a few minutes of the first page view.
Browser console says “[Quilgo] this Canvas is not a known installation”
The theme file is in place, but your Canvas domain isn’t linked to a registration yet. Open Quilgo Proctoring from the Admin sidebar once (this links the domain automatically), or contact us if it persists.
“This app has been locked by an administrator and is not available for installation”
Appears on + App → By Client ID when your Canvas has the “Lock LTI Registrations” feature enabled and the app is marked as locked for client-ID deployment. Either unlock the app on its page in Canvas Apps (Admin → Apps → Manage), or skip the legacy install entirely and make the app available there via Availability and Exceptions — both paths end in the same installed state.
A student sees “Students are proctored through the quiz page, not this launch”
Expected — the student opened the tool link directly. They should simply take the quiz; proctoring starts there.
Anything else
Write to hello@quilgo.com — include your Canvas domain and a screenshot of the Integration & Install Health panel if you can.
Manual installation (fallback)
Use this only if automatic registration is unavailable on your Canvas instance — for example, if your institution has disabled dynamic registration.
1. Go to Admin → Developer Keys → + Developer Key → + LTI Key.
2. In Method, choose Enter URL and paste:
https://quilgo-host/lti/canvas-config.json
With Enter URL, your Canvas server fetches this address itself. If saving fails — common on self-hosted servers that block outbound traffic — open the URL in your browser, copy the JSON, and use the Paste JSON method instead.
3. Set Key Name to Quilgo Proctoring and save. Switch the key’s State to ON.
4. Copy the key’s Client ID — the long number shown in the Details column.
5. Add the app to your account: Admin → Settings → Apps → View App Configurations → + App, set Configuration Type to By Client ID, paste the Client ID, then Submit → Install.
6. Email the Client ID and your Canvas domain (for example canvas.school.edu) to hello@quilgo.com — we activate the installation on our side.
Why this step exists: a manually created key is known only to Canvas — unlike automatic registration, nothing tells Quilgo about it. Your installation still connects itself the first time someone opens Quilgo Proctoring in Canvas, but until then the proctoring snippet in your theme has nothing to attach to. Sending us the Client ID and domain activates the installation ahead of that first launch, so recording works immediately. On a self-hosted Canvas this step is essential rather than optional: self-hosted instances issue non-unique Client IDs, and the domain (together with the issuer from the prerequisites) is what distinguishes your installation from another school’s.
Quilgo works on any Canvas. Canvas Cloud (*.instructure.com) needs none of this — skip this section. A self-hosted Canvas must have the following configured. All of it is standard Canvas administration required by any LTI 1.3 tool, and every item can be verified in about ten minutes — before installing anything.
1 · LTI signing keys
Check: open this address in a browser:
https://your-canvas/api/lti/security/jwks
It must return one or more keys. {"keys":[]} means Canvas has nothing to sign launches with — every LTI 1.3 tool will fail.
Fix (Canvas server): generate three keys in the Rails console (bundle exec rails console) by running this three times:
Place the three outputs in config/dynamic_settings.yml under store.canvas.lti-keys as jwk-past.json, jwk-present.json and jwk-future.json, then restart Canvas.
2 · Theme JavaScript delivery
Check: in Admin → Settings (bottom of the page) enable Custom CSS/JavaScript overrides — without it the Upload tab in the Theme Editor does not exist. Upload any JS file in the Theme Editor and apply the theme, then open any Canvas page, view its source, find the js_overrides script tag and open its URL. It must return the script, not an error page. A 4xx here means Canvas’s file storage cannot serve uploads.
Fix (Canvas server): file storage configuration in config/file_store.yml (local path and permissions, or S3 credentials); the exact failure is in the Canvas production logs for that download request.
3 · LTI 1.3 machinery
Check: in Admin → Developer Keys create any LTI key, then open any LTI placement. A “Something broke” error at either step appears before the external tool is contacted and indicates a Canvas configuration problem, not a tool problem.
Fix (Canvas server): the stack trace is in the Canvas error logs; typical causes are a missing or broken Rails cache (Redis) or an absent dynamic_settings.yml.
4 · Stable issuer
Check (Canvas server): run grep lti_iss config/security.yml and send us the value. Launches are validated against it, and changing it later invalidates the installation. The default is https://canvas.instructure.com, but self-hosted instances can change it.
5 · Environment basics
Recent Canvas version — run a current open-source release; old releases are an untested failure class.
HTTPS with a valid certificate on the Canvas domain — the tool runs in an iframe and browsers refuse mixed content.
Server clock synced via NTP — LTI launches are short-lived signed tokens; minutes of skew make every launch “expired”.
Outbound HTTPS from the Canvas server to your Quilgo server — Canvas fetches the tool configuration during registration and its JWKS when issuing service tokens.
Reverse proxy passes headers through — Quilgo identifies which Canvas a request came from by Origin/Referer; a proxy stripping them breaks identification. A restrictive Content-Security-Policy in front of Canvas must allow scripts from your Quilgo server’s domain.
Data and permissions
Quilgo receives the name and email of the user in each signed launch (Canvas privacy level “Public”).
The app requests exactly one LTI service: course membership, read-only (Names and Role Provisioning Service) — used to match attempts to students.
Quilgo never writes grades and requests no gradebook or Canvas API scopes.
Installing again (for example after re-running registration) does not create a second account — Canvas instances are recognised and merged automatically.
Technical reference
For change-management or security review. All URLs are on your Quilgo server.
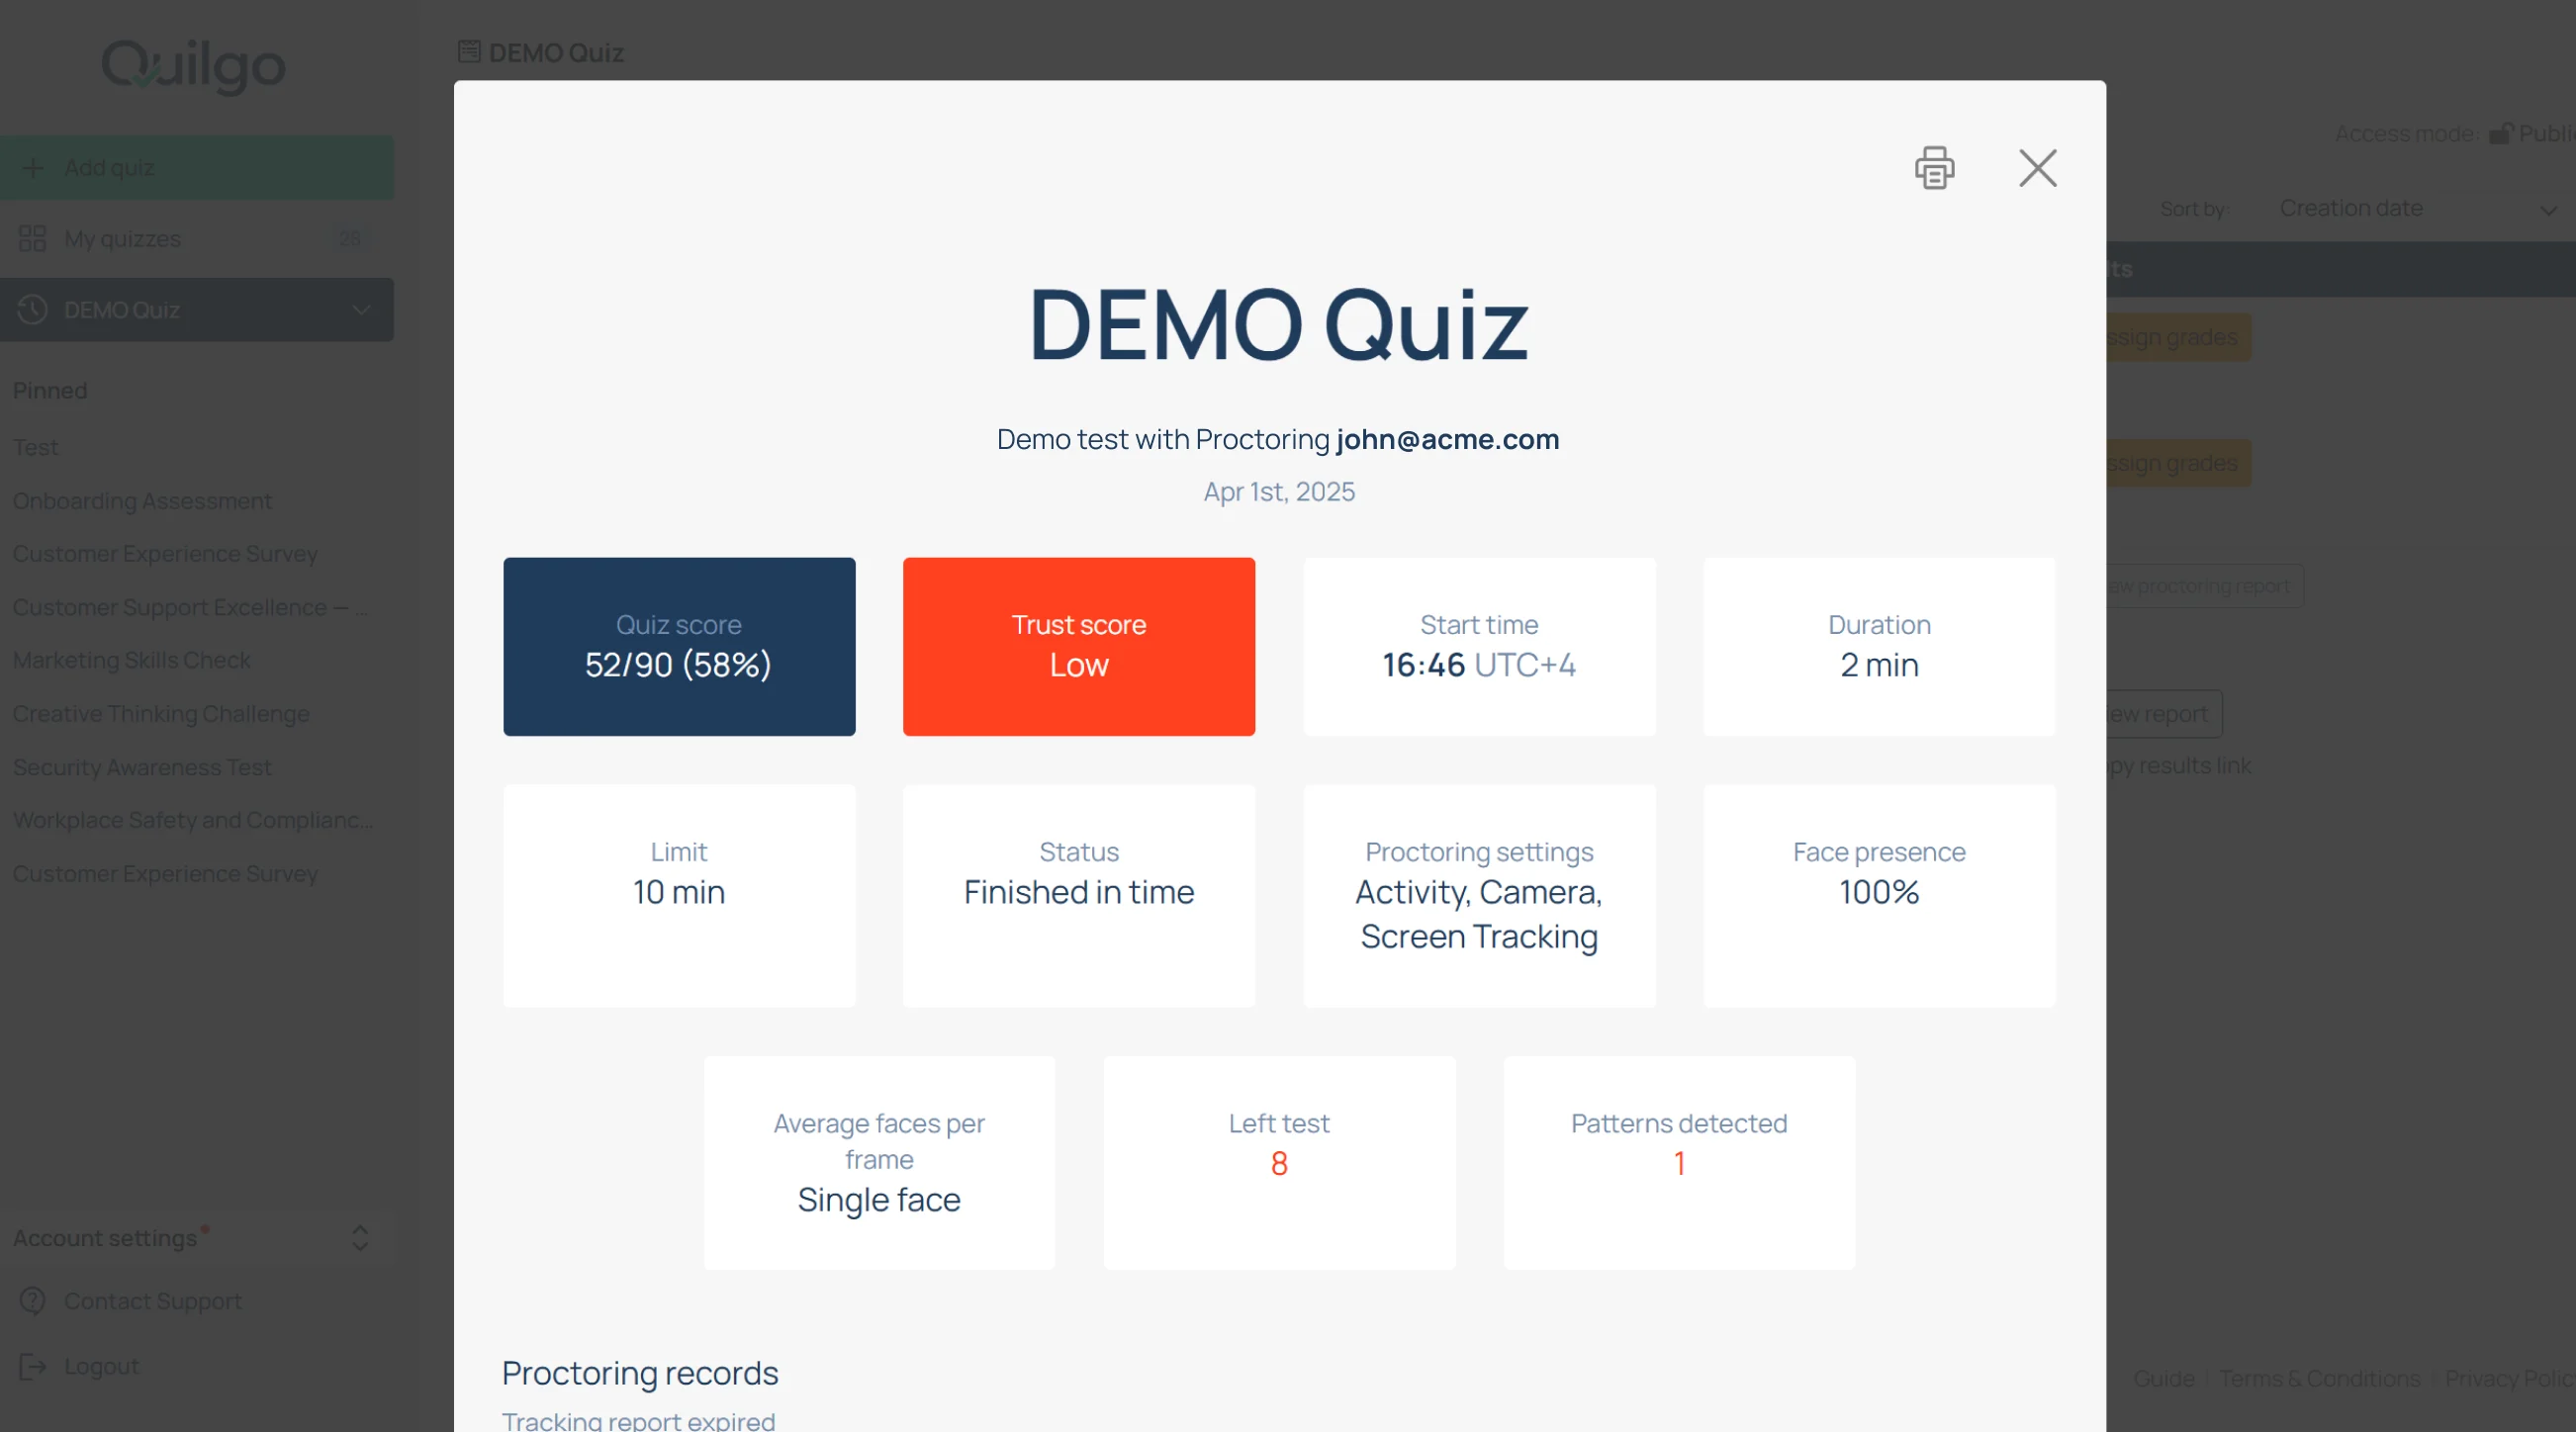
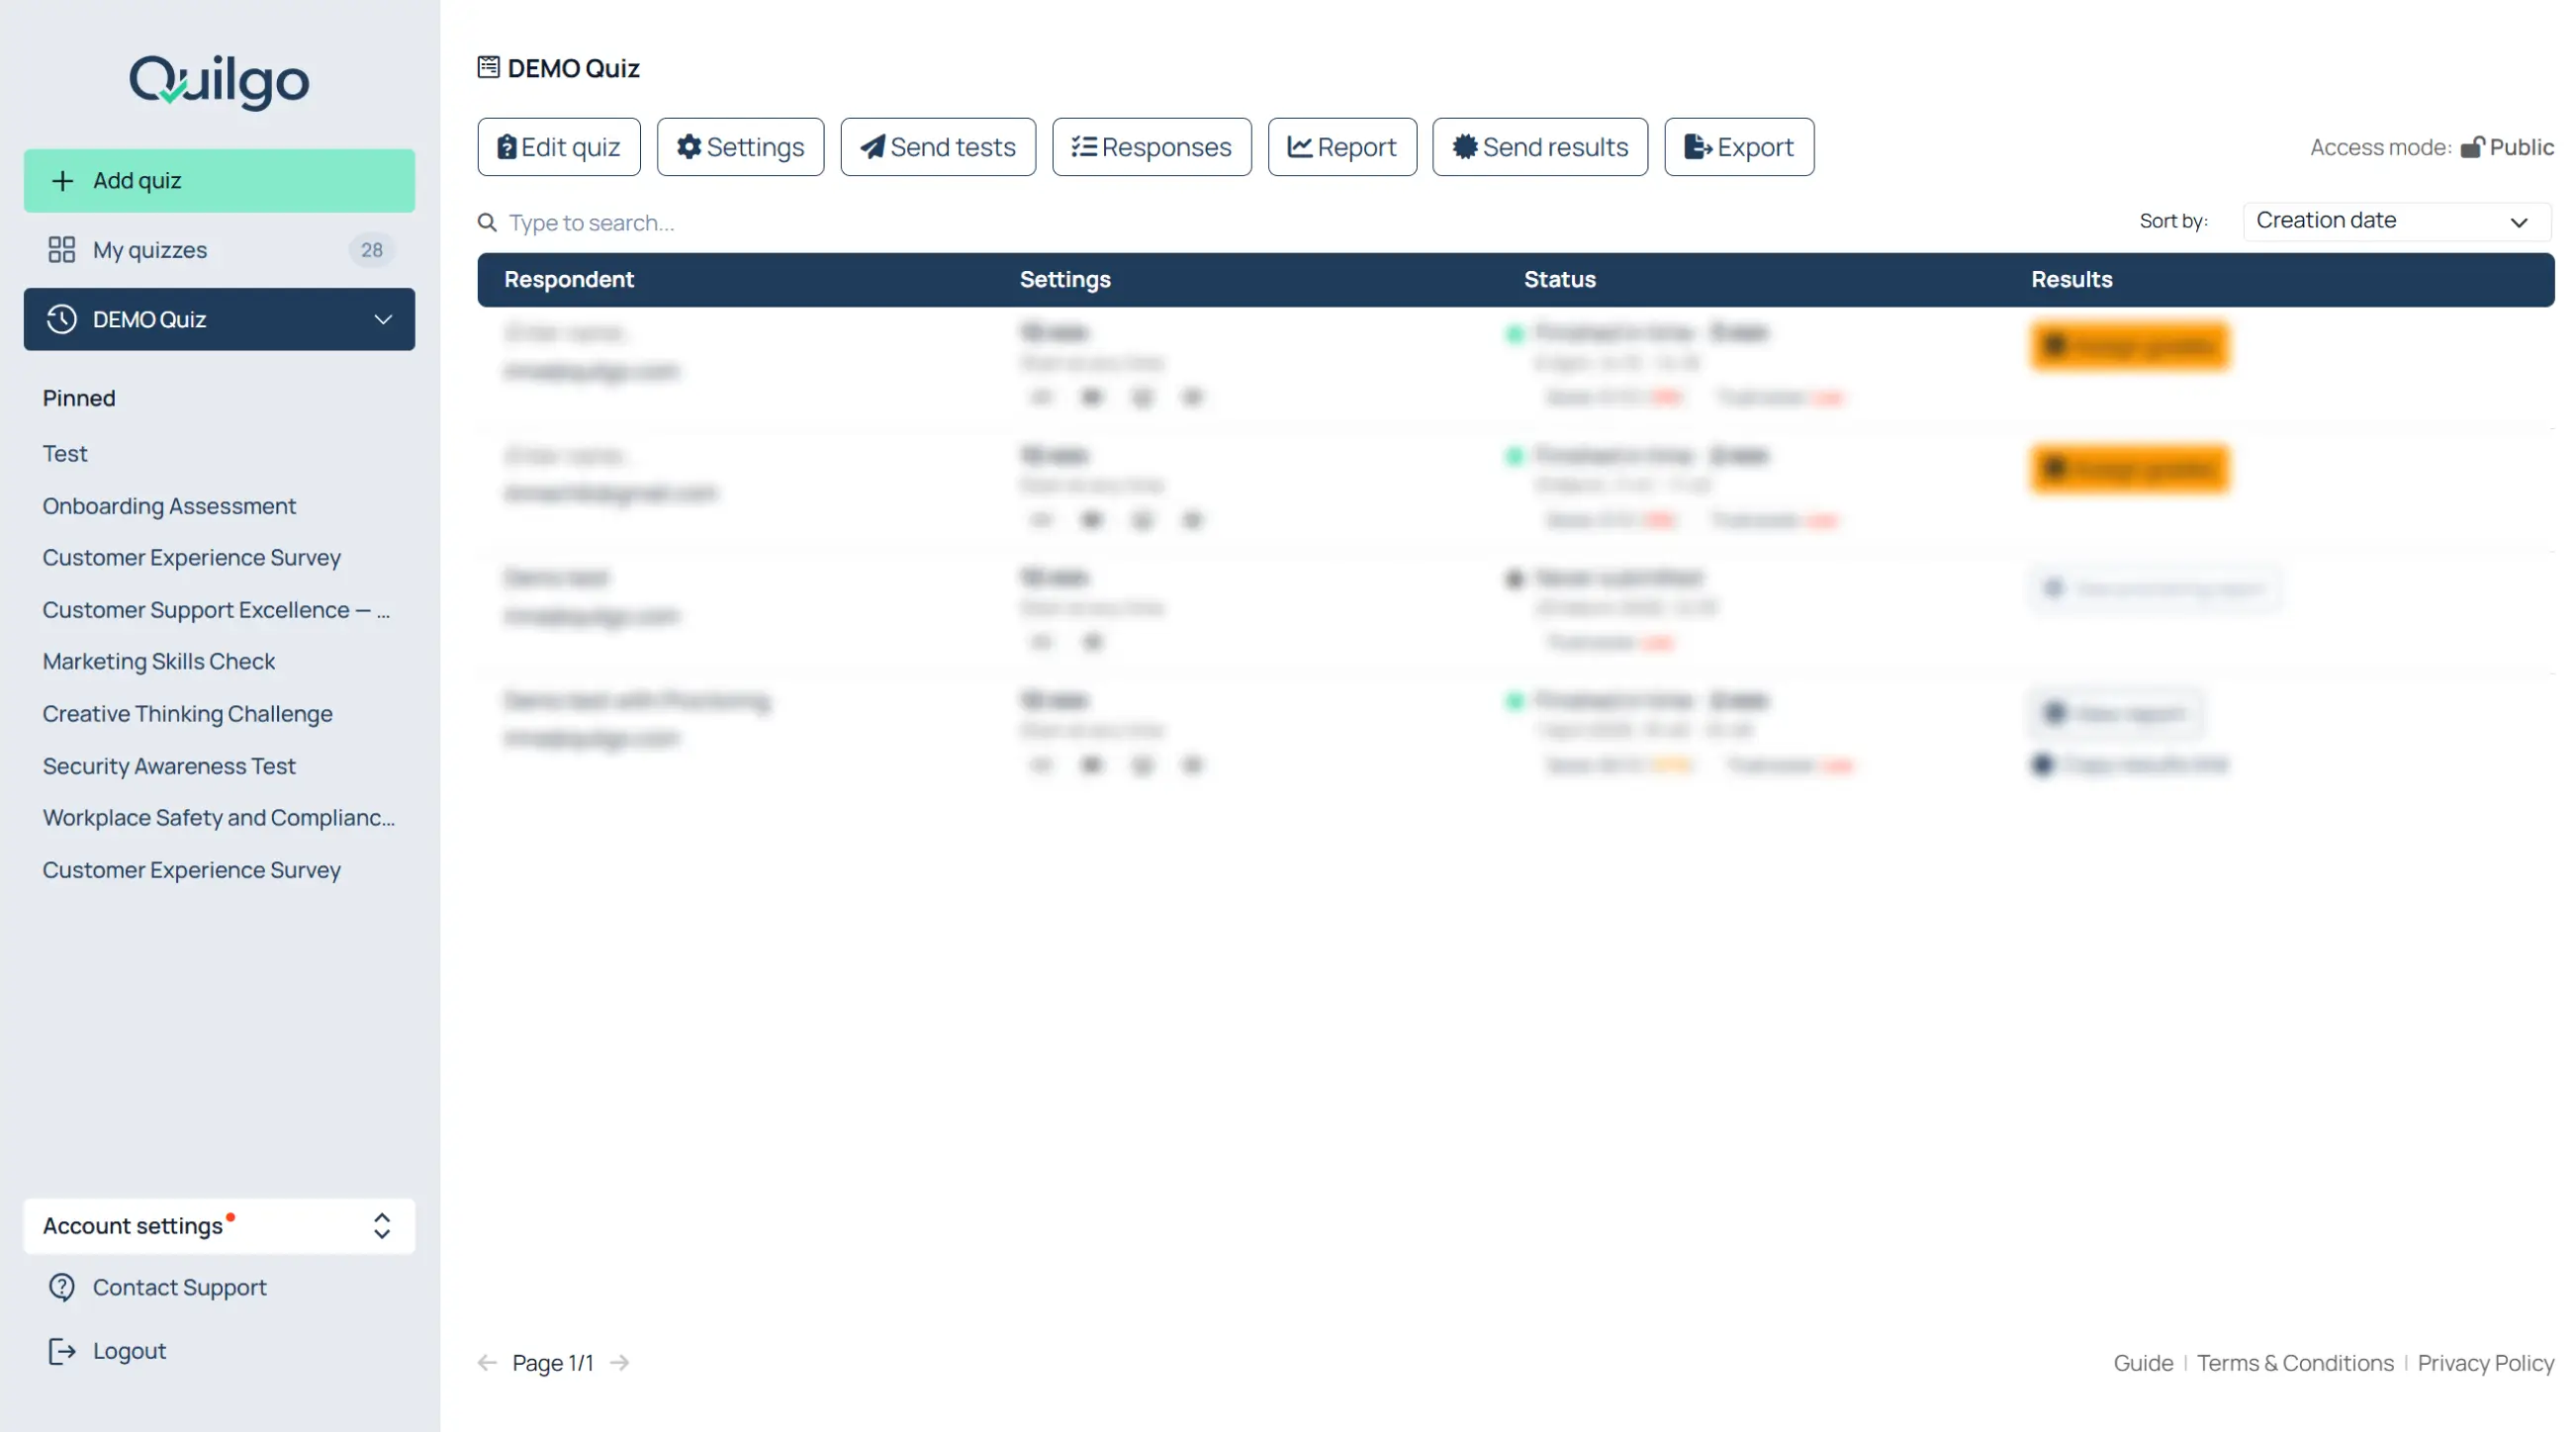
When you create a new Quilgo account, the dashboard already contains a “DEMO Quiz”.
The demo quiz helps you understand both the standard respondent experience and the proctored workflow.
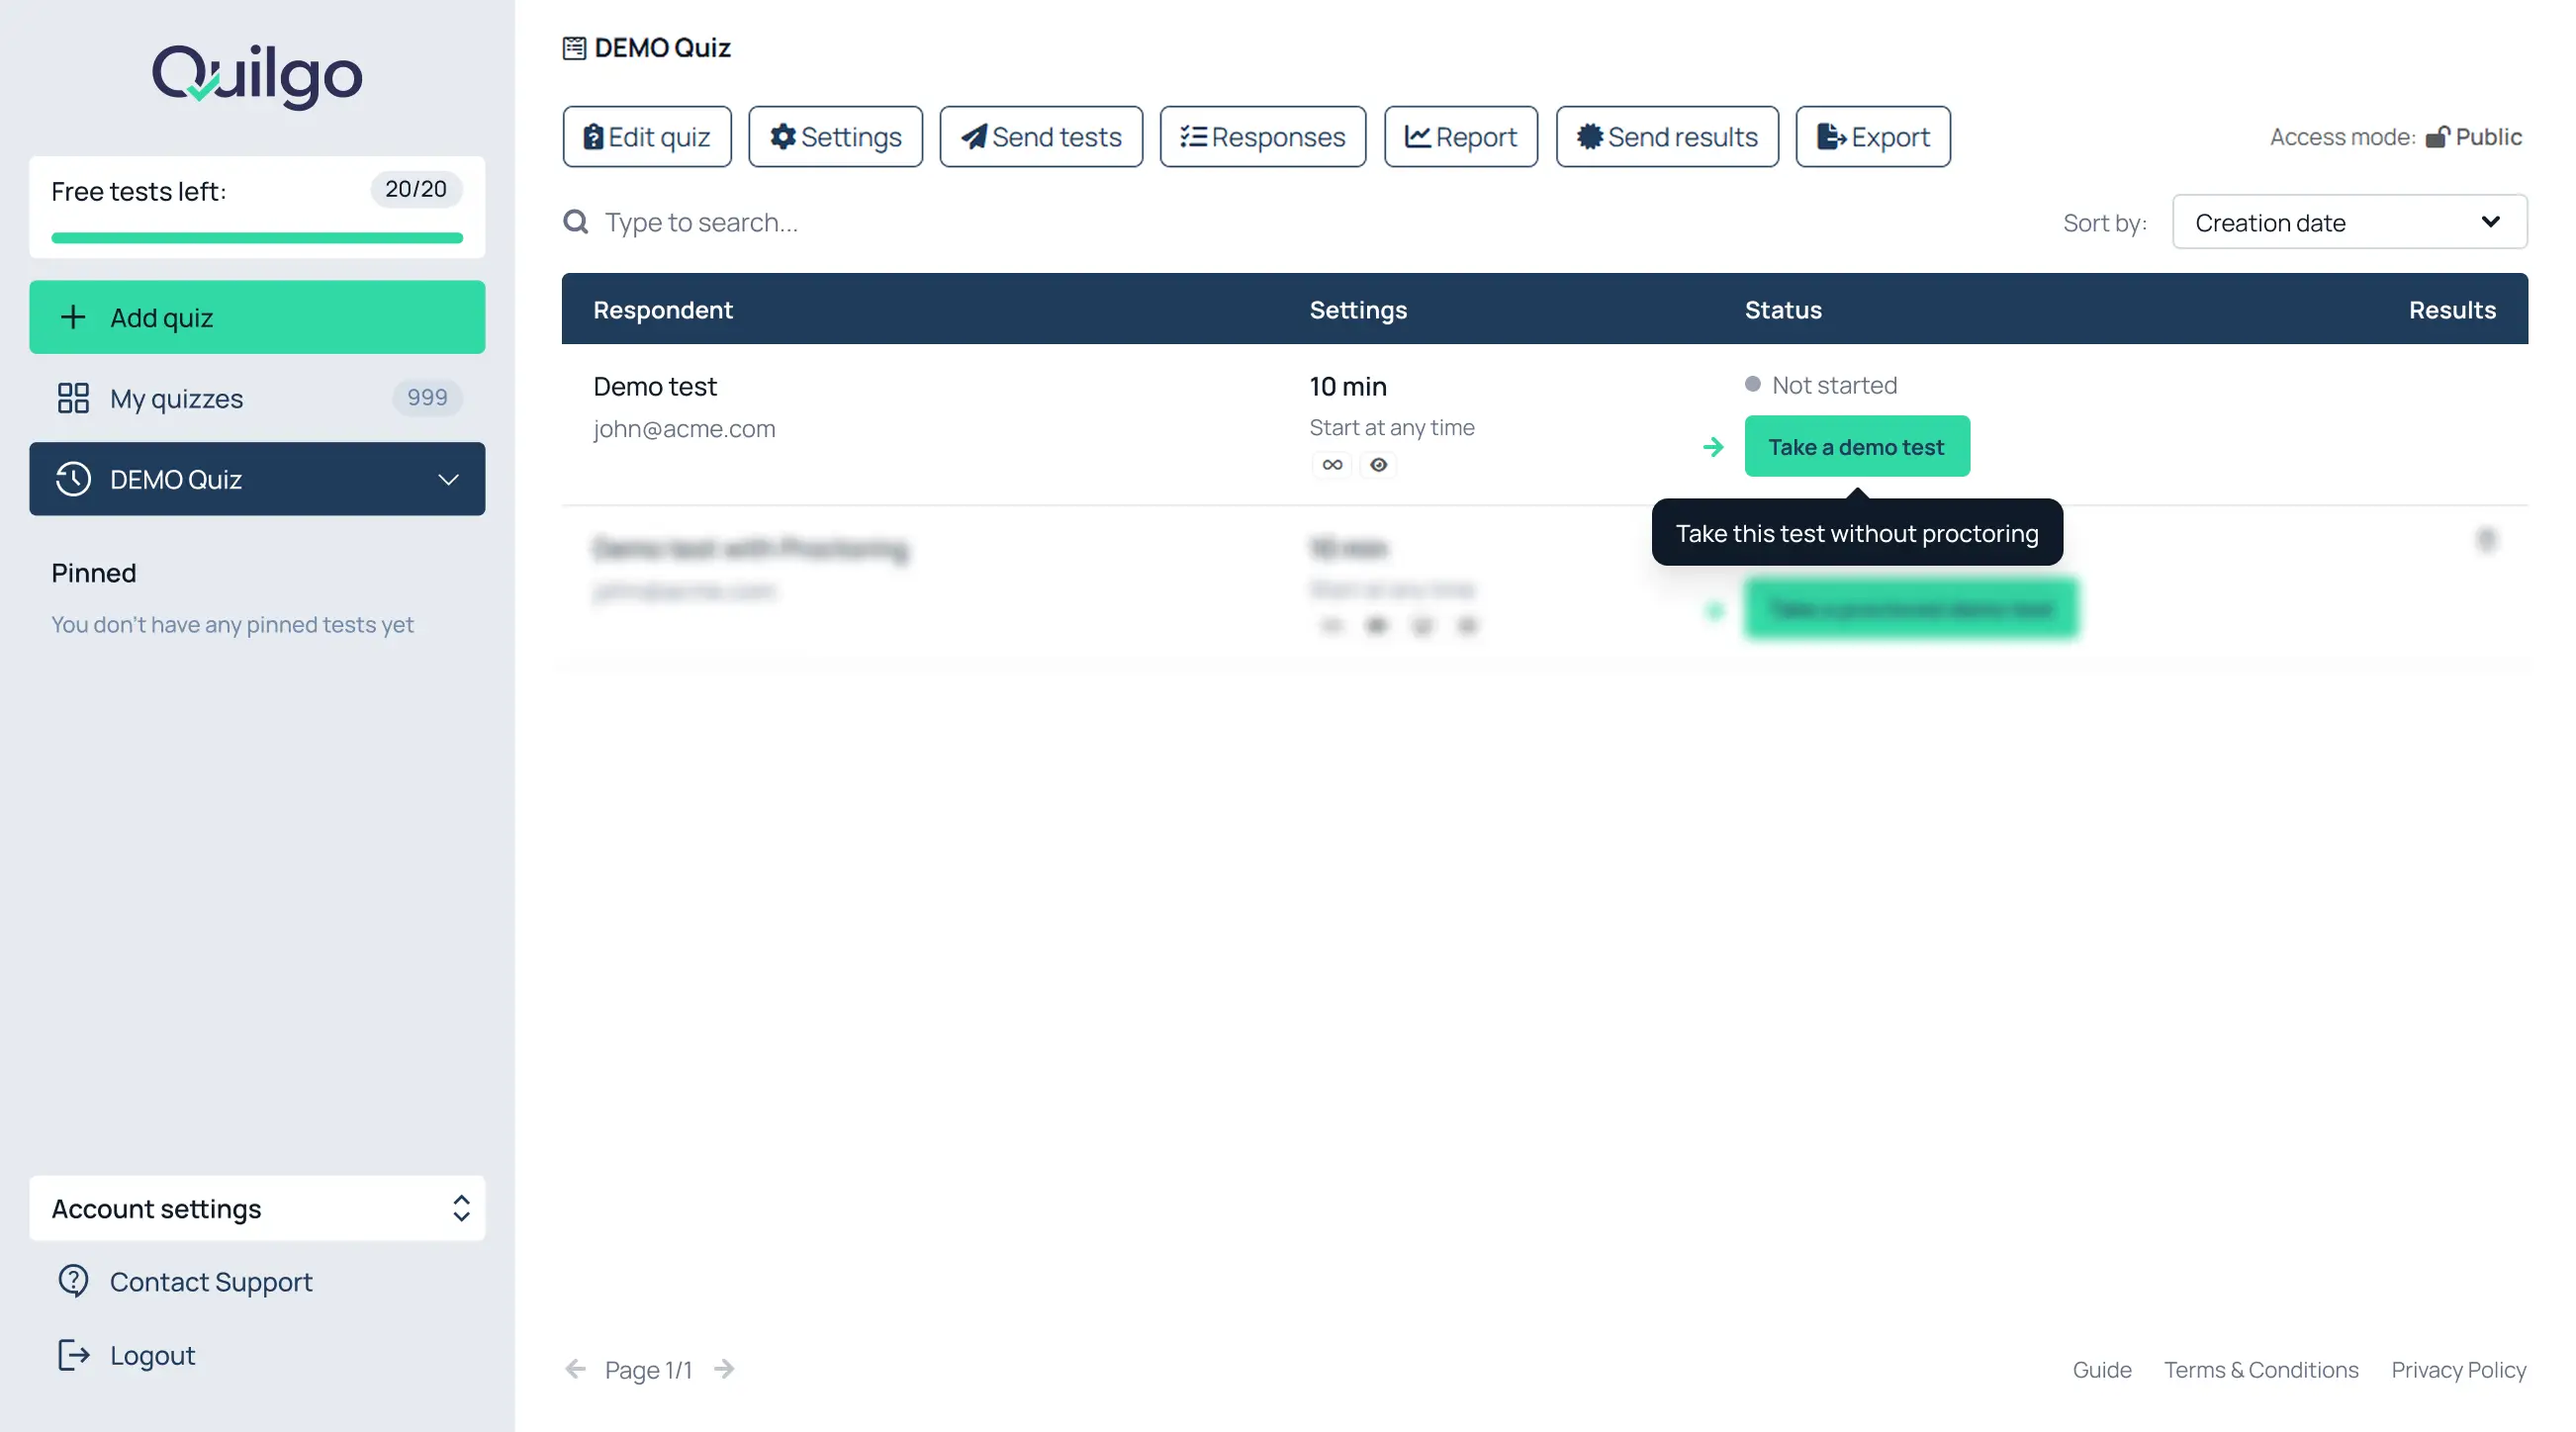
Take a regular demo test
Open the “DEMO Quiz”;
Click “Take a demo test”;
Complete the test as a respondent;
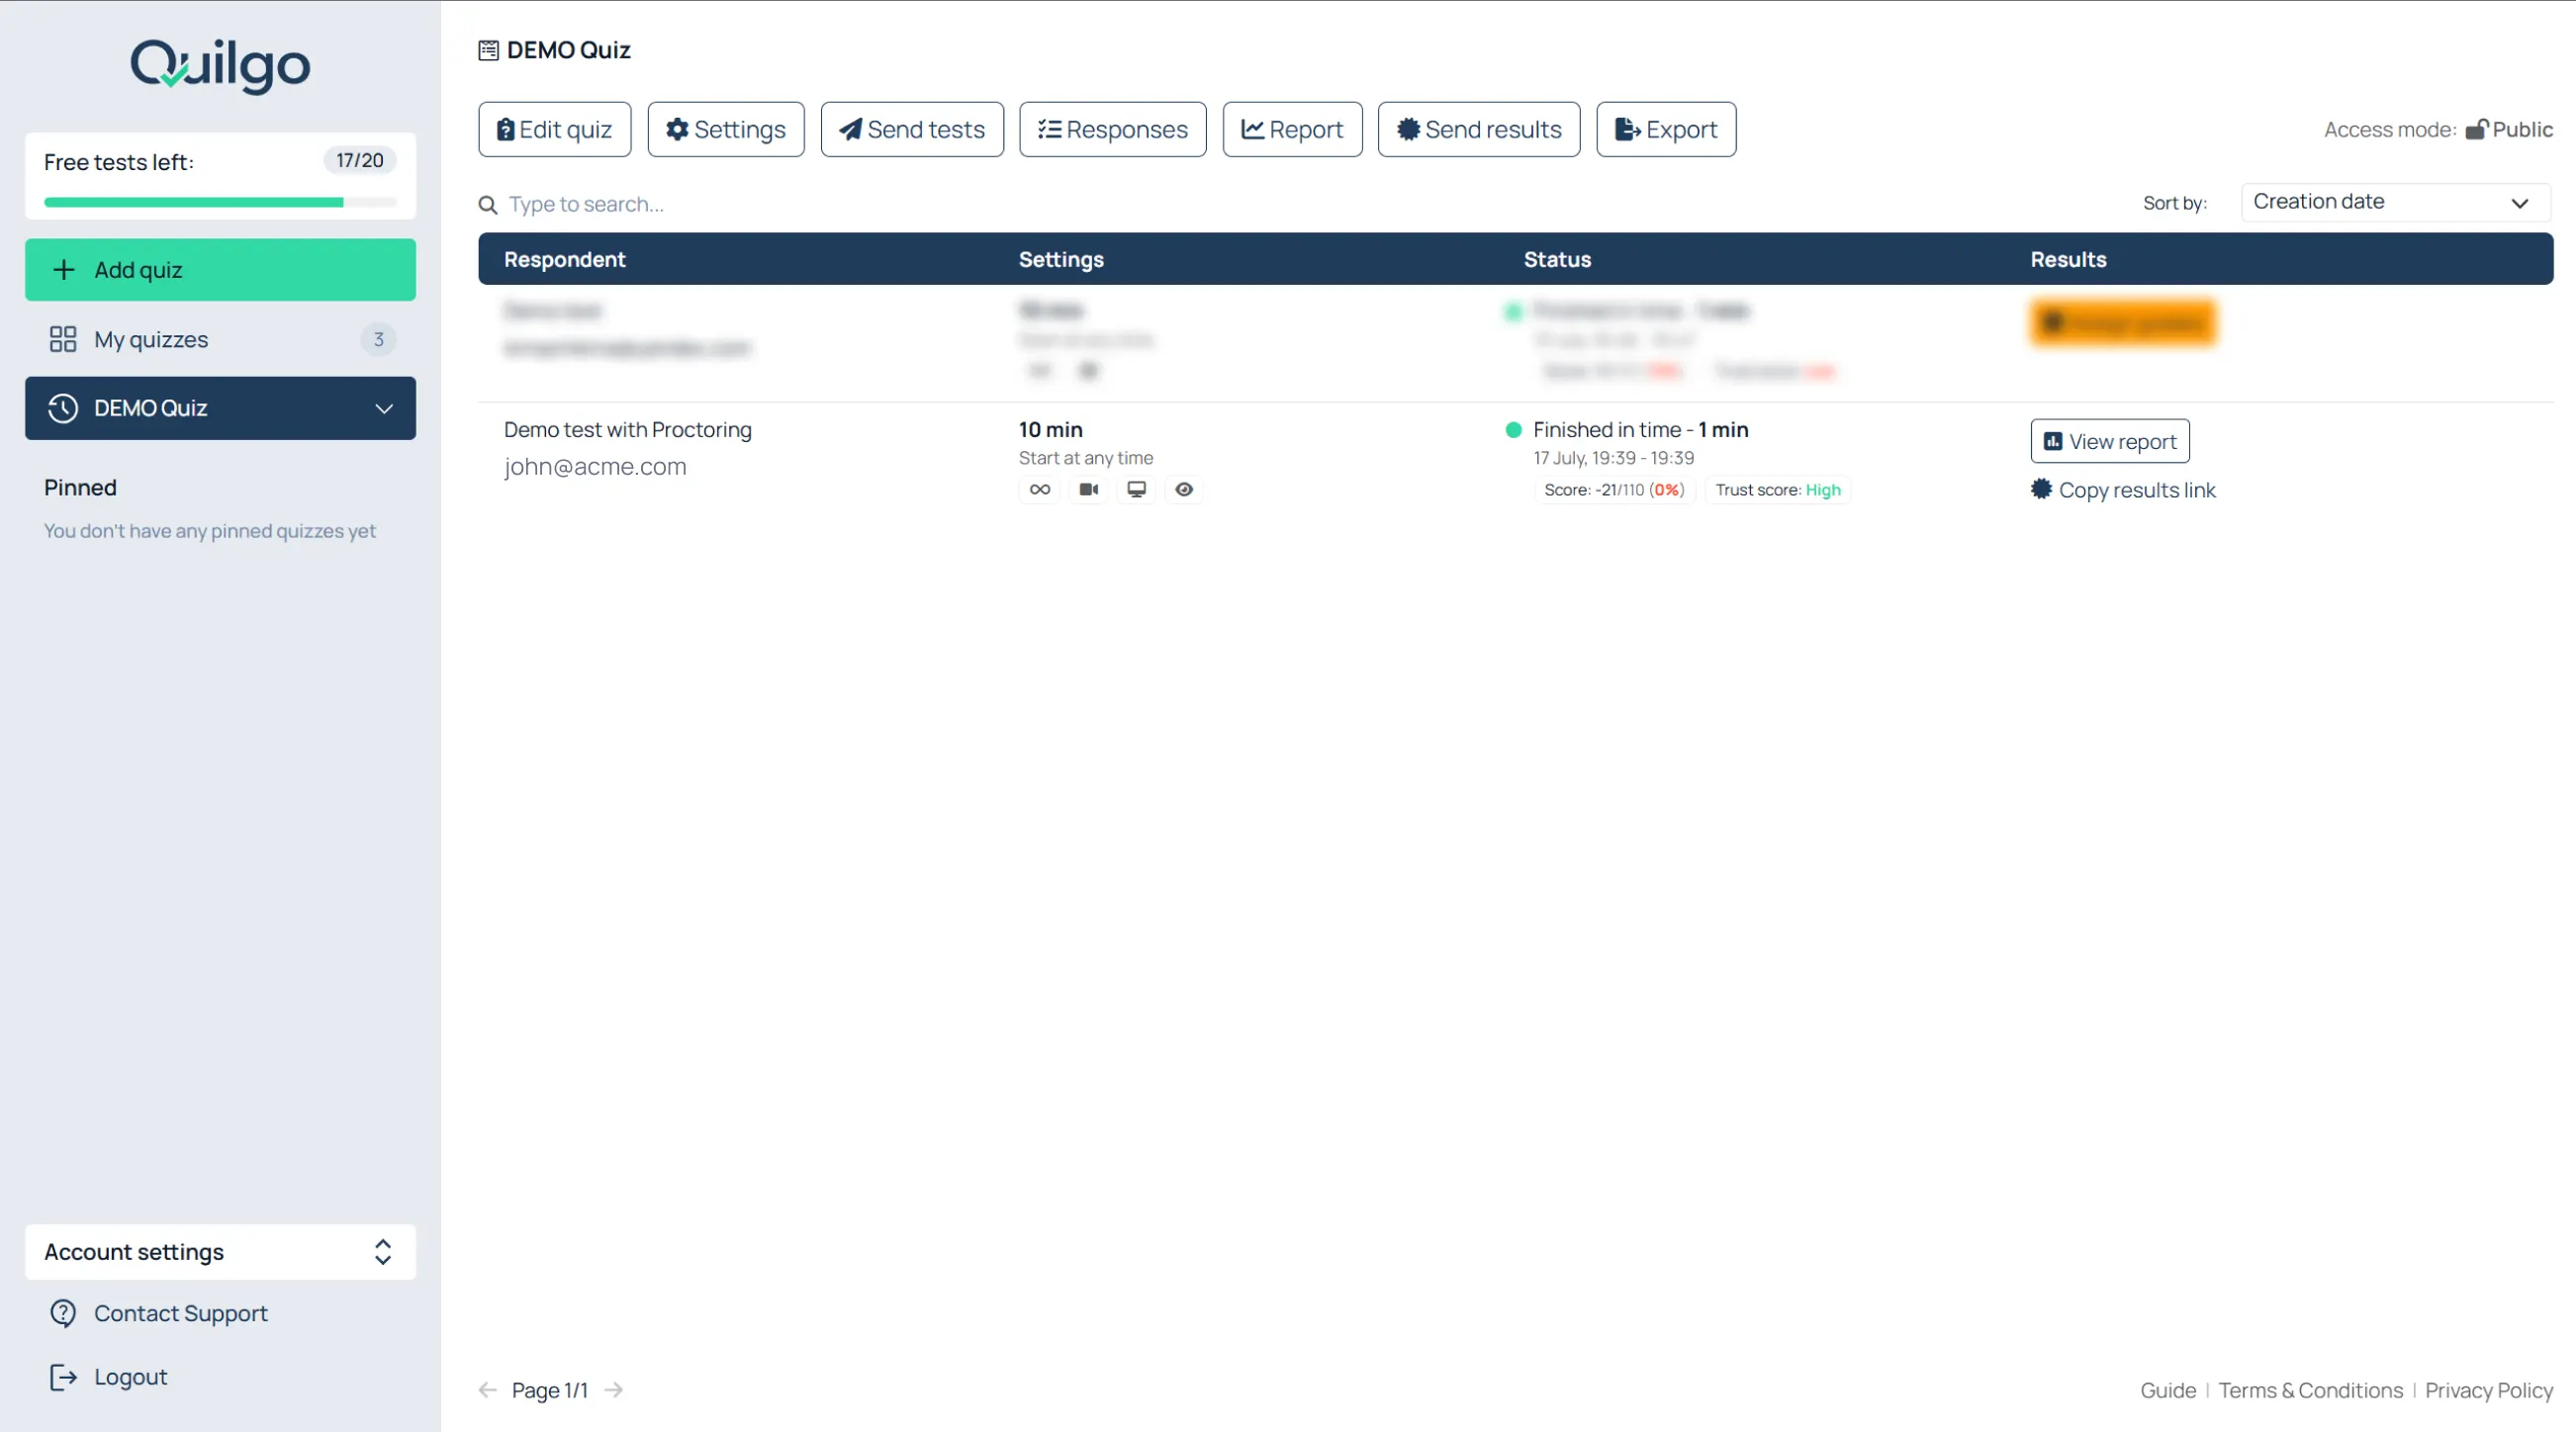
Return to the dashboard and review the generated result.
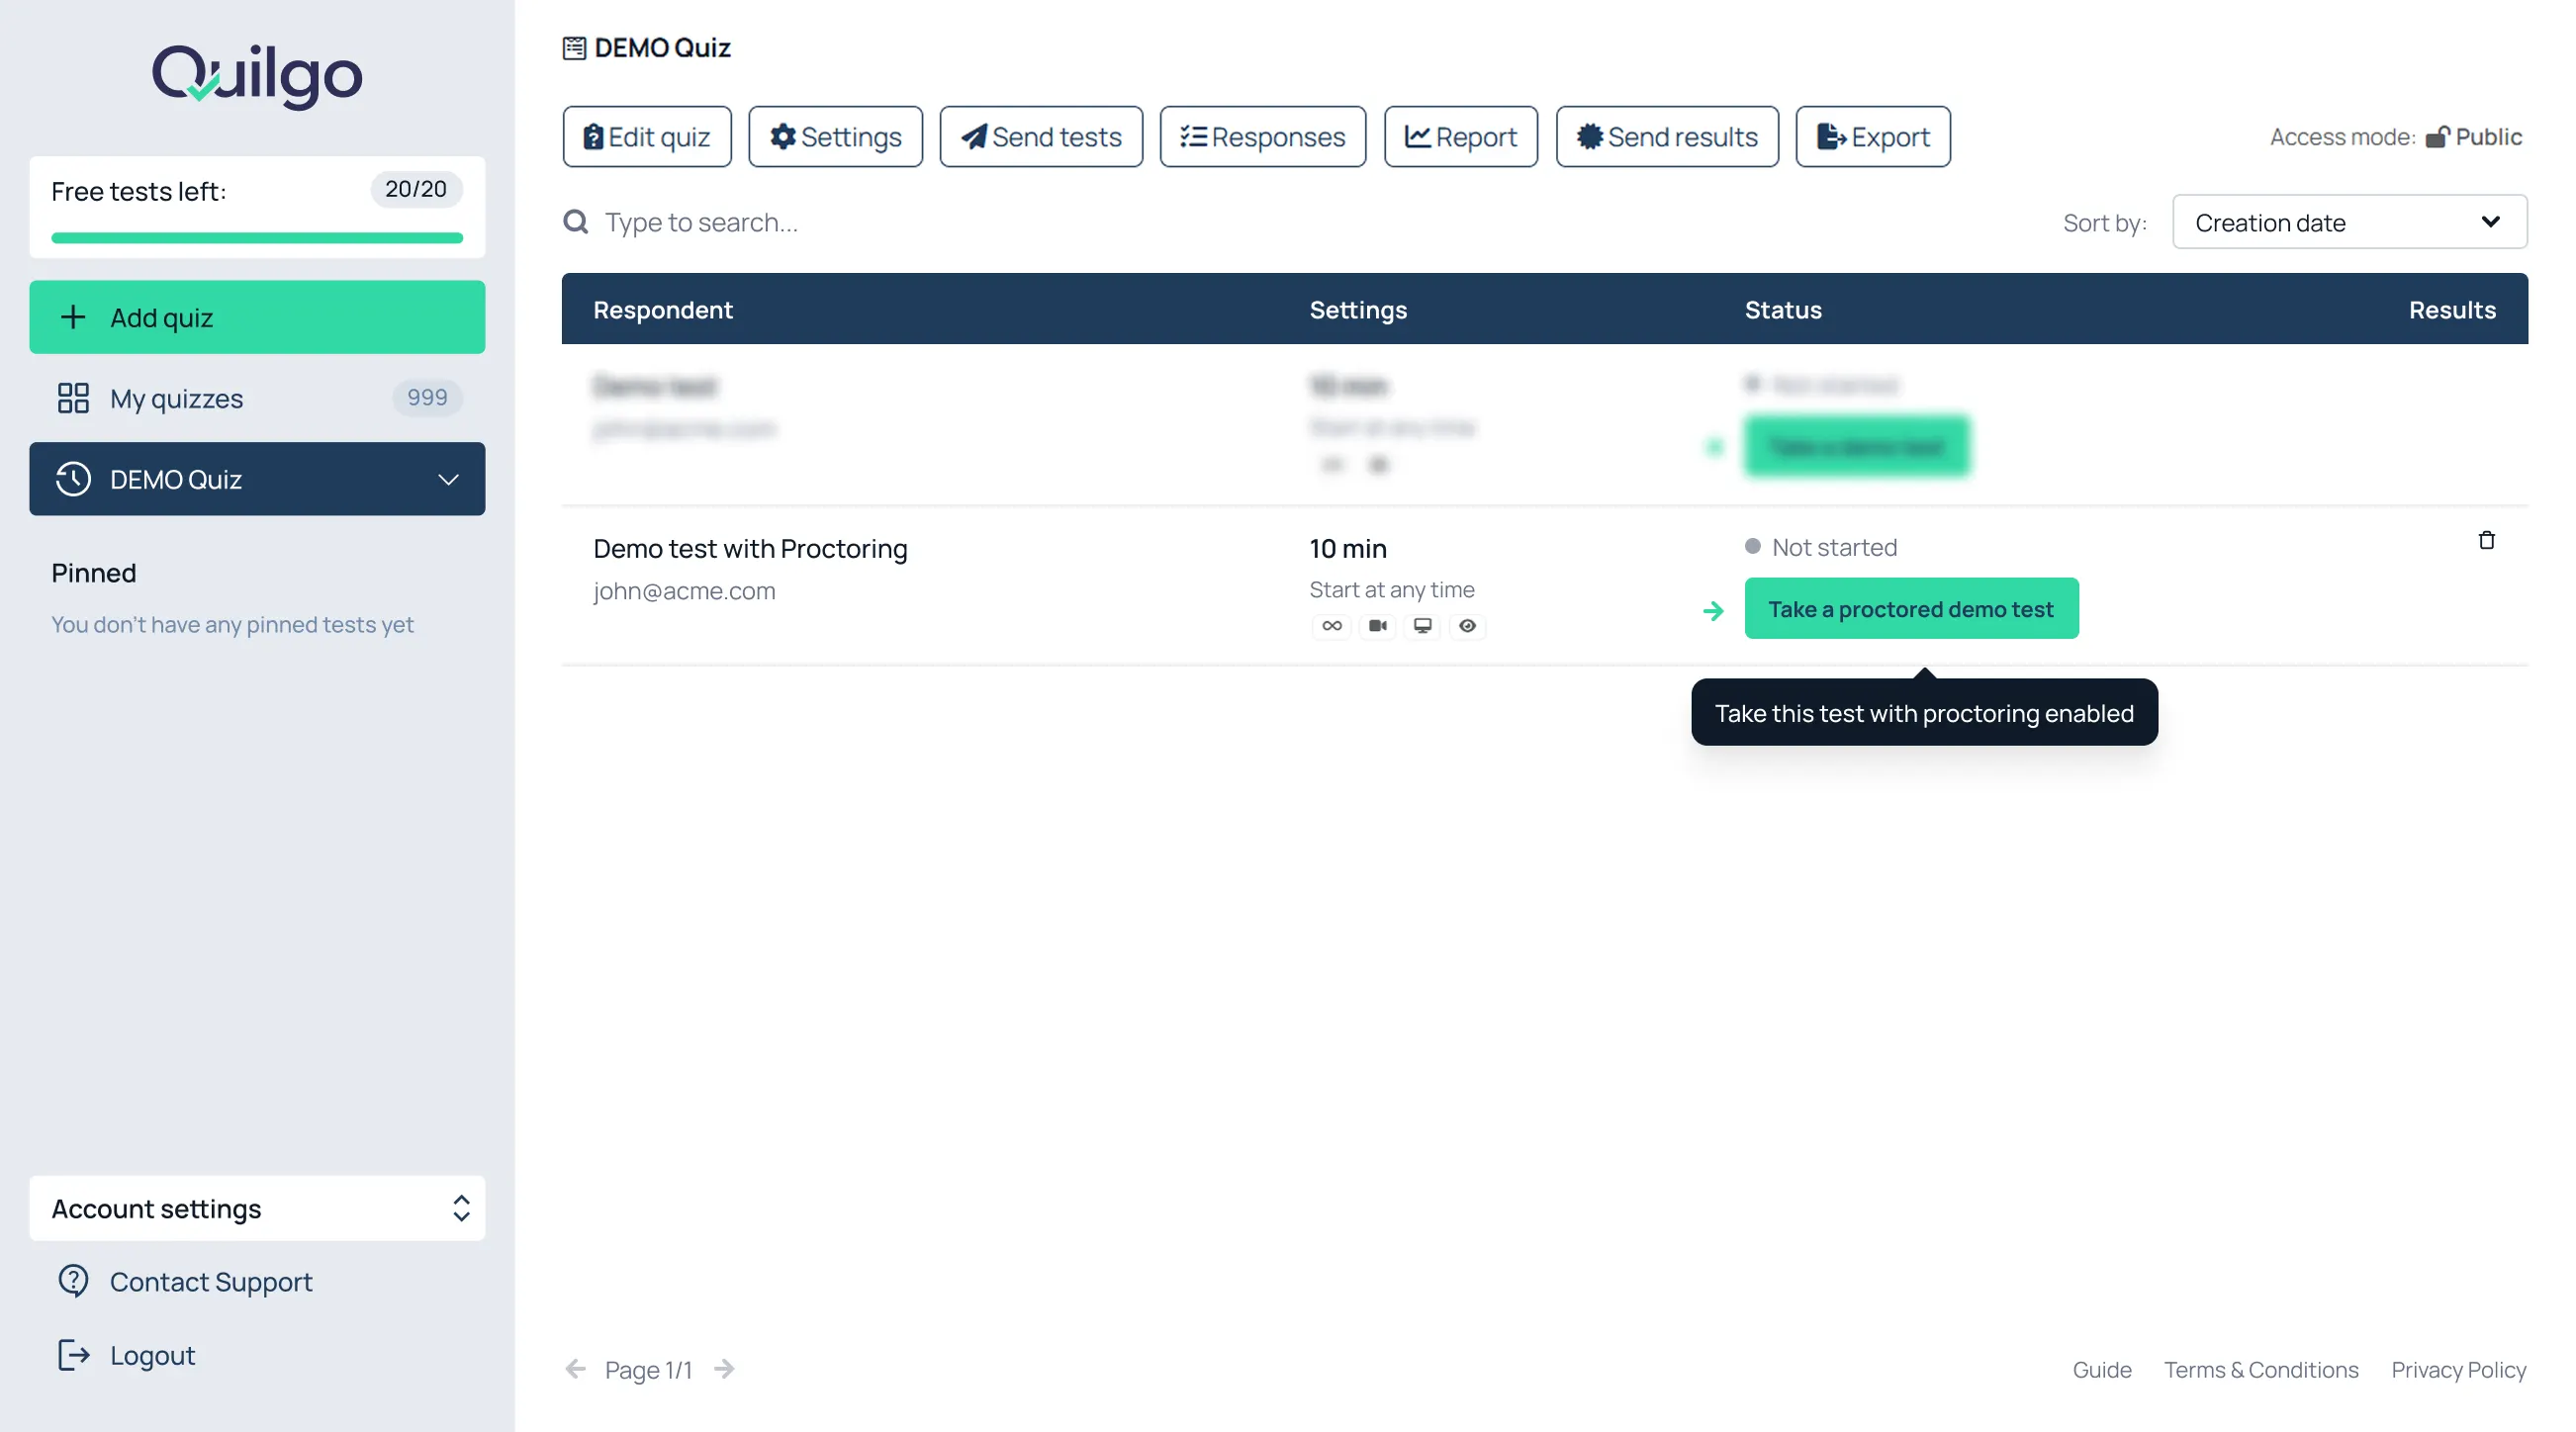
Take a proctored demo test
Open the “DEMO Quiz”;
Click “Take a proctored demo test”;
Allow camera and screen access when asked;
Complete the test;
Open the generated report.
Use the proctored demo to understand:
camera tracking;
screen tracking;
snapshots;
suspicious activity detection;
trust score reports.
Create a Quiz
Start a New Quiz
To create a new quiz:
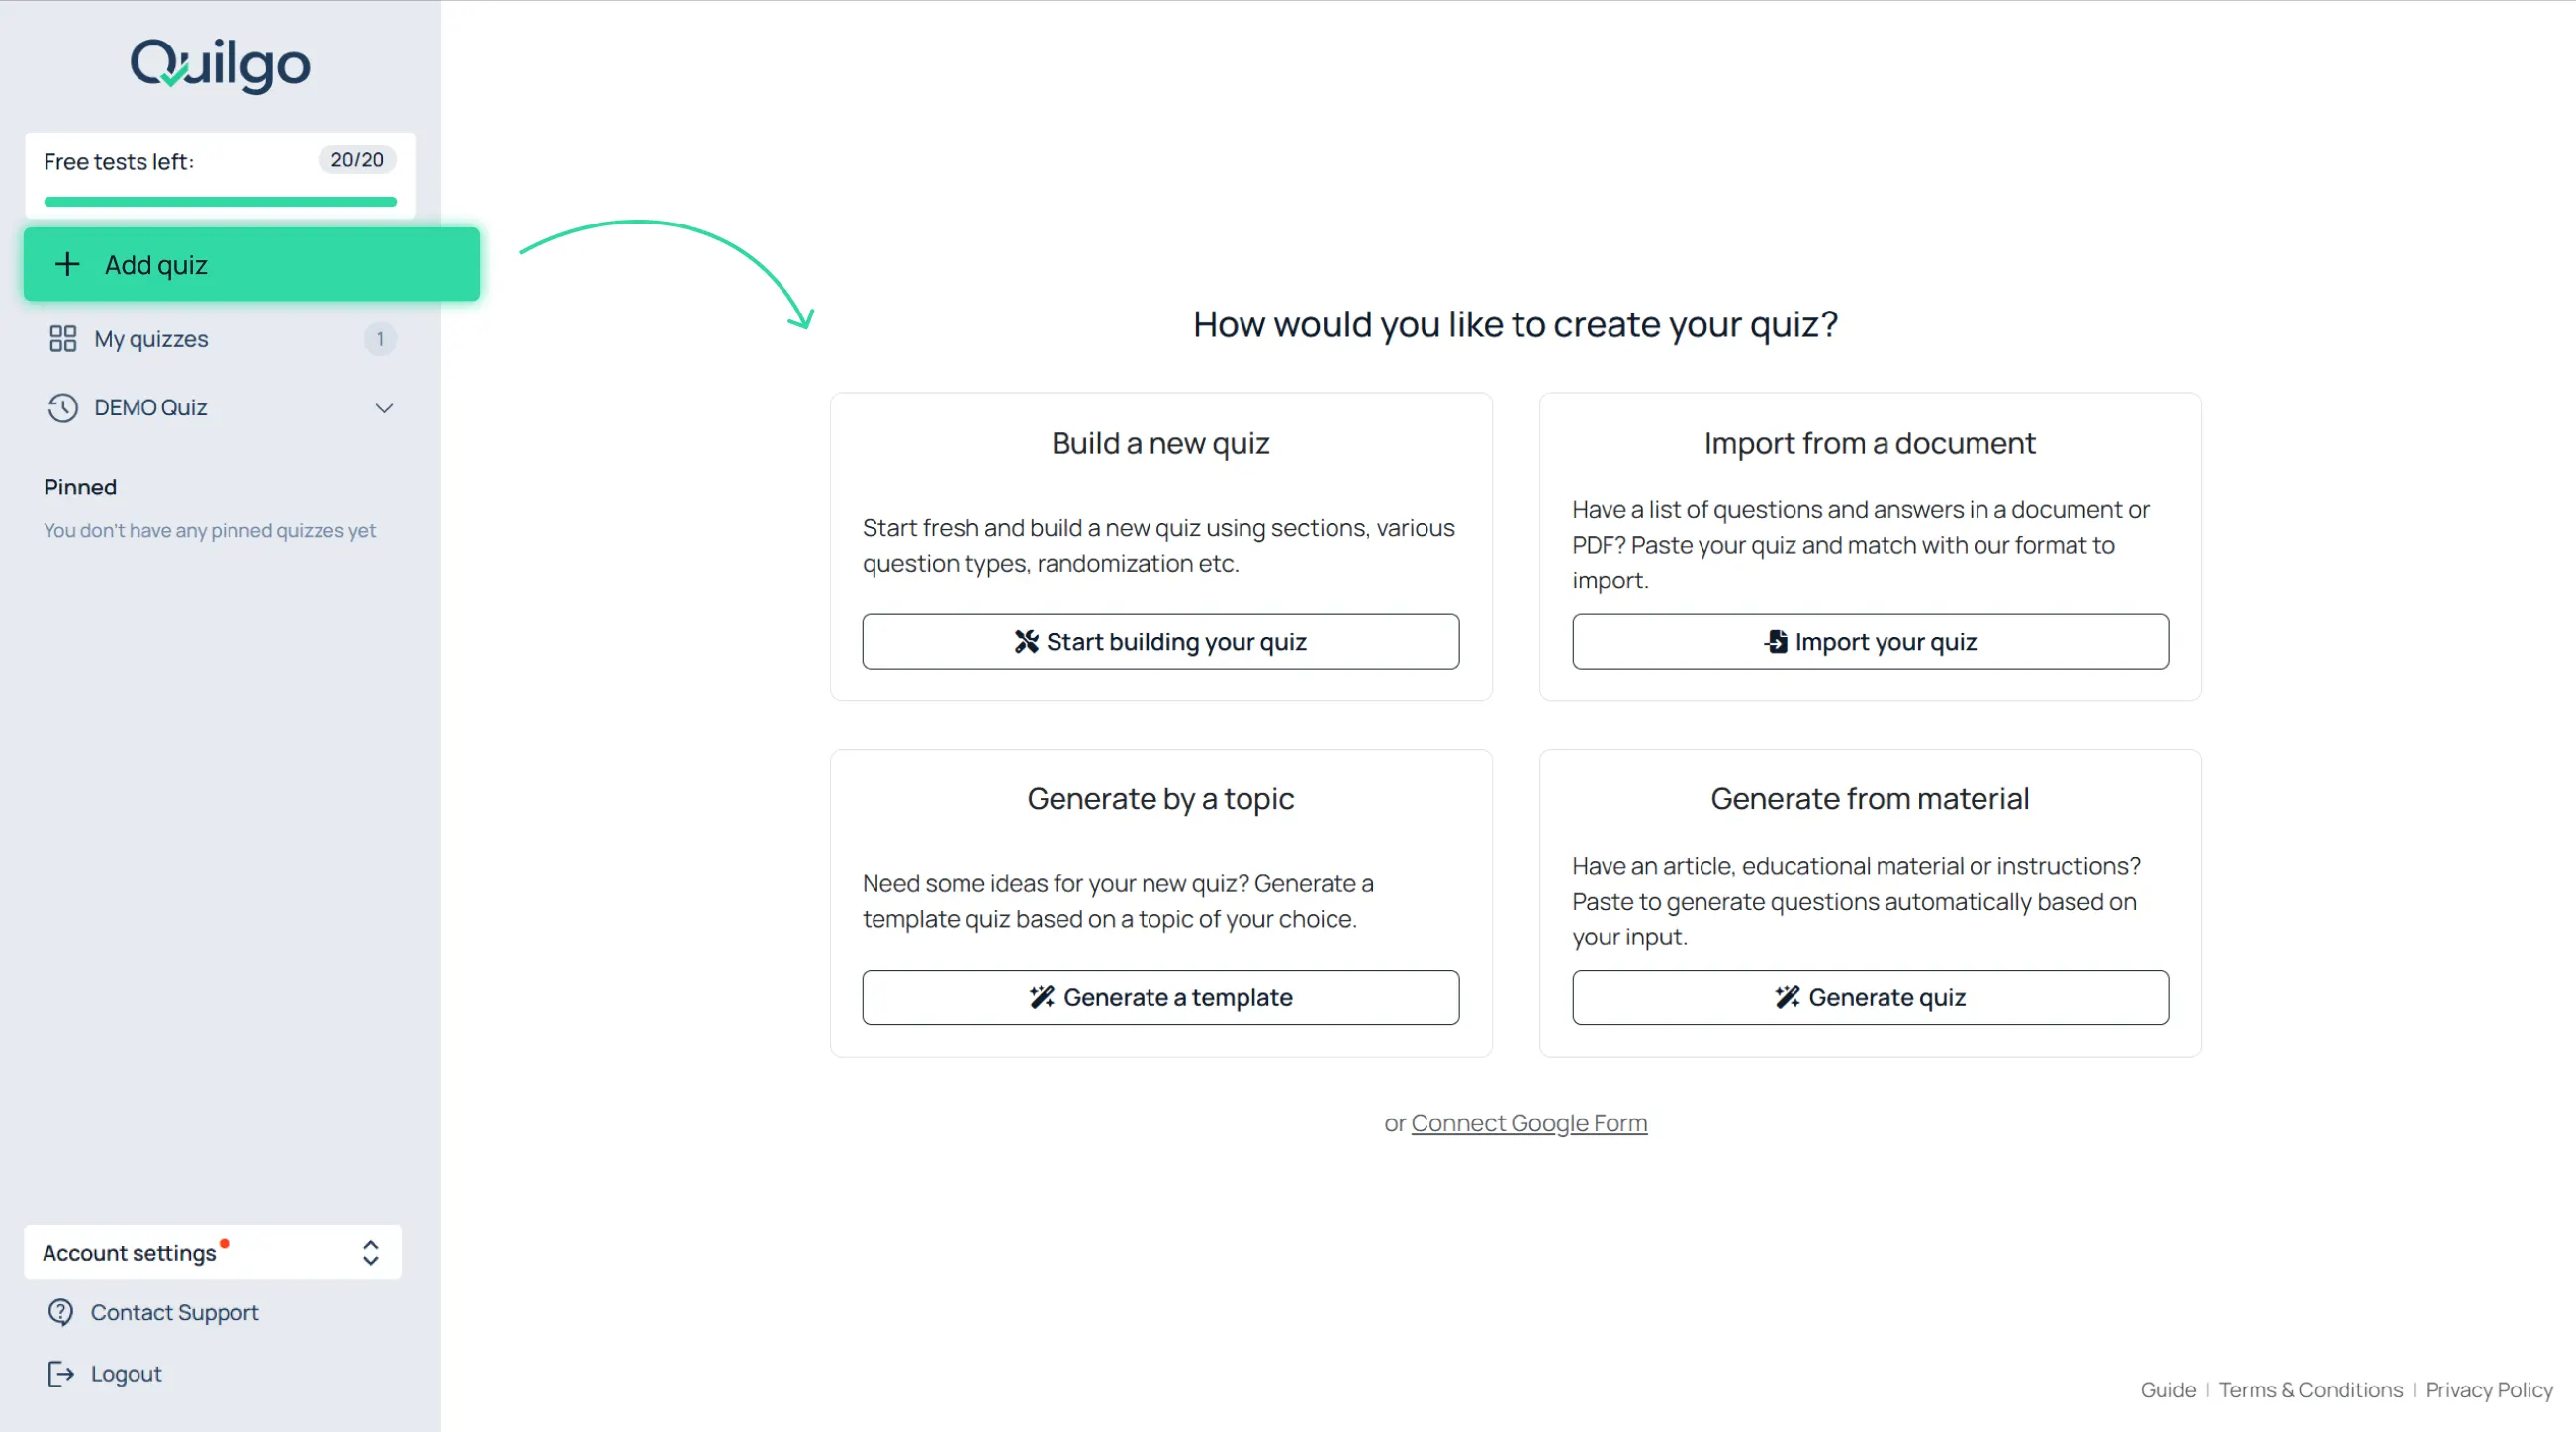
Click “+ Add quiz” in the left sidebar;
Choose how you want to create the quiz.
The main creation methods are:
“Build a new quiz”;
“Import from a document”.
For a new manual quiz:
Click “Build a new quiz”;
Enter the quiz title;
Click “Start building your quiz”.
Build Questions
Choose a Question Type
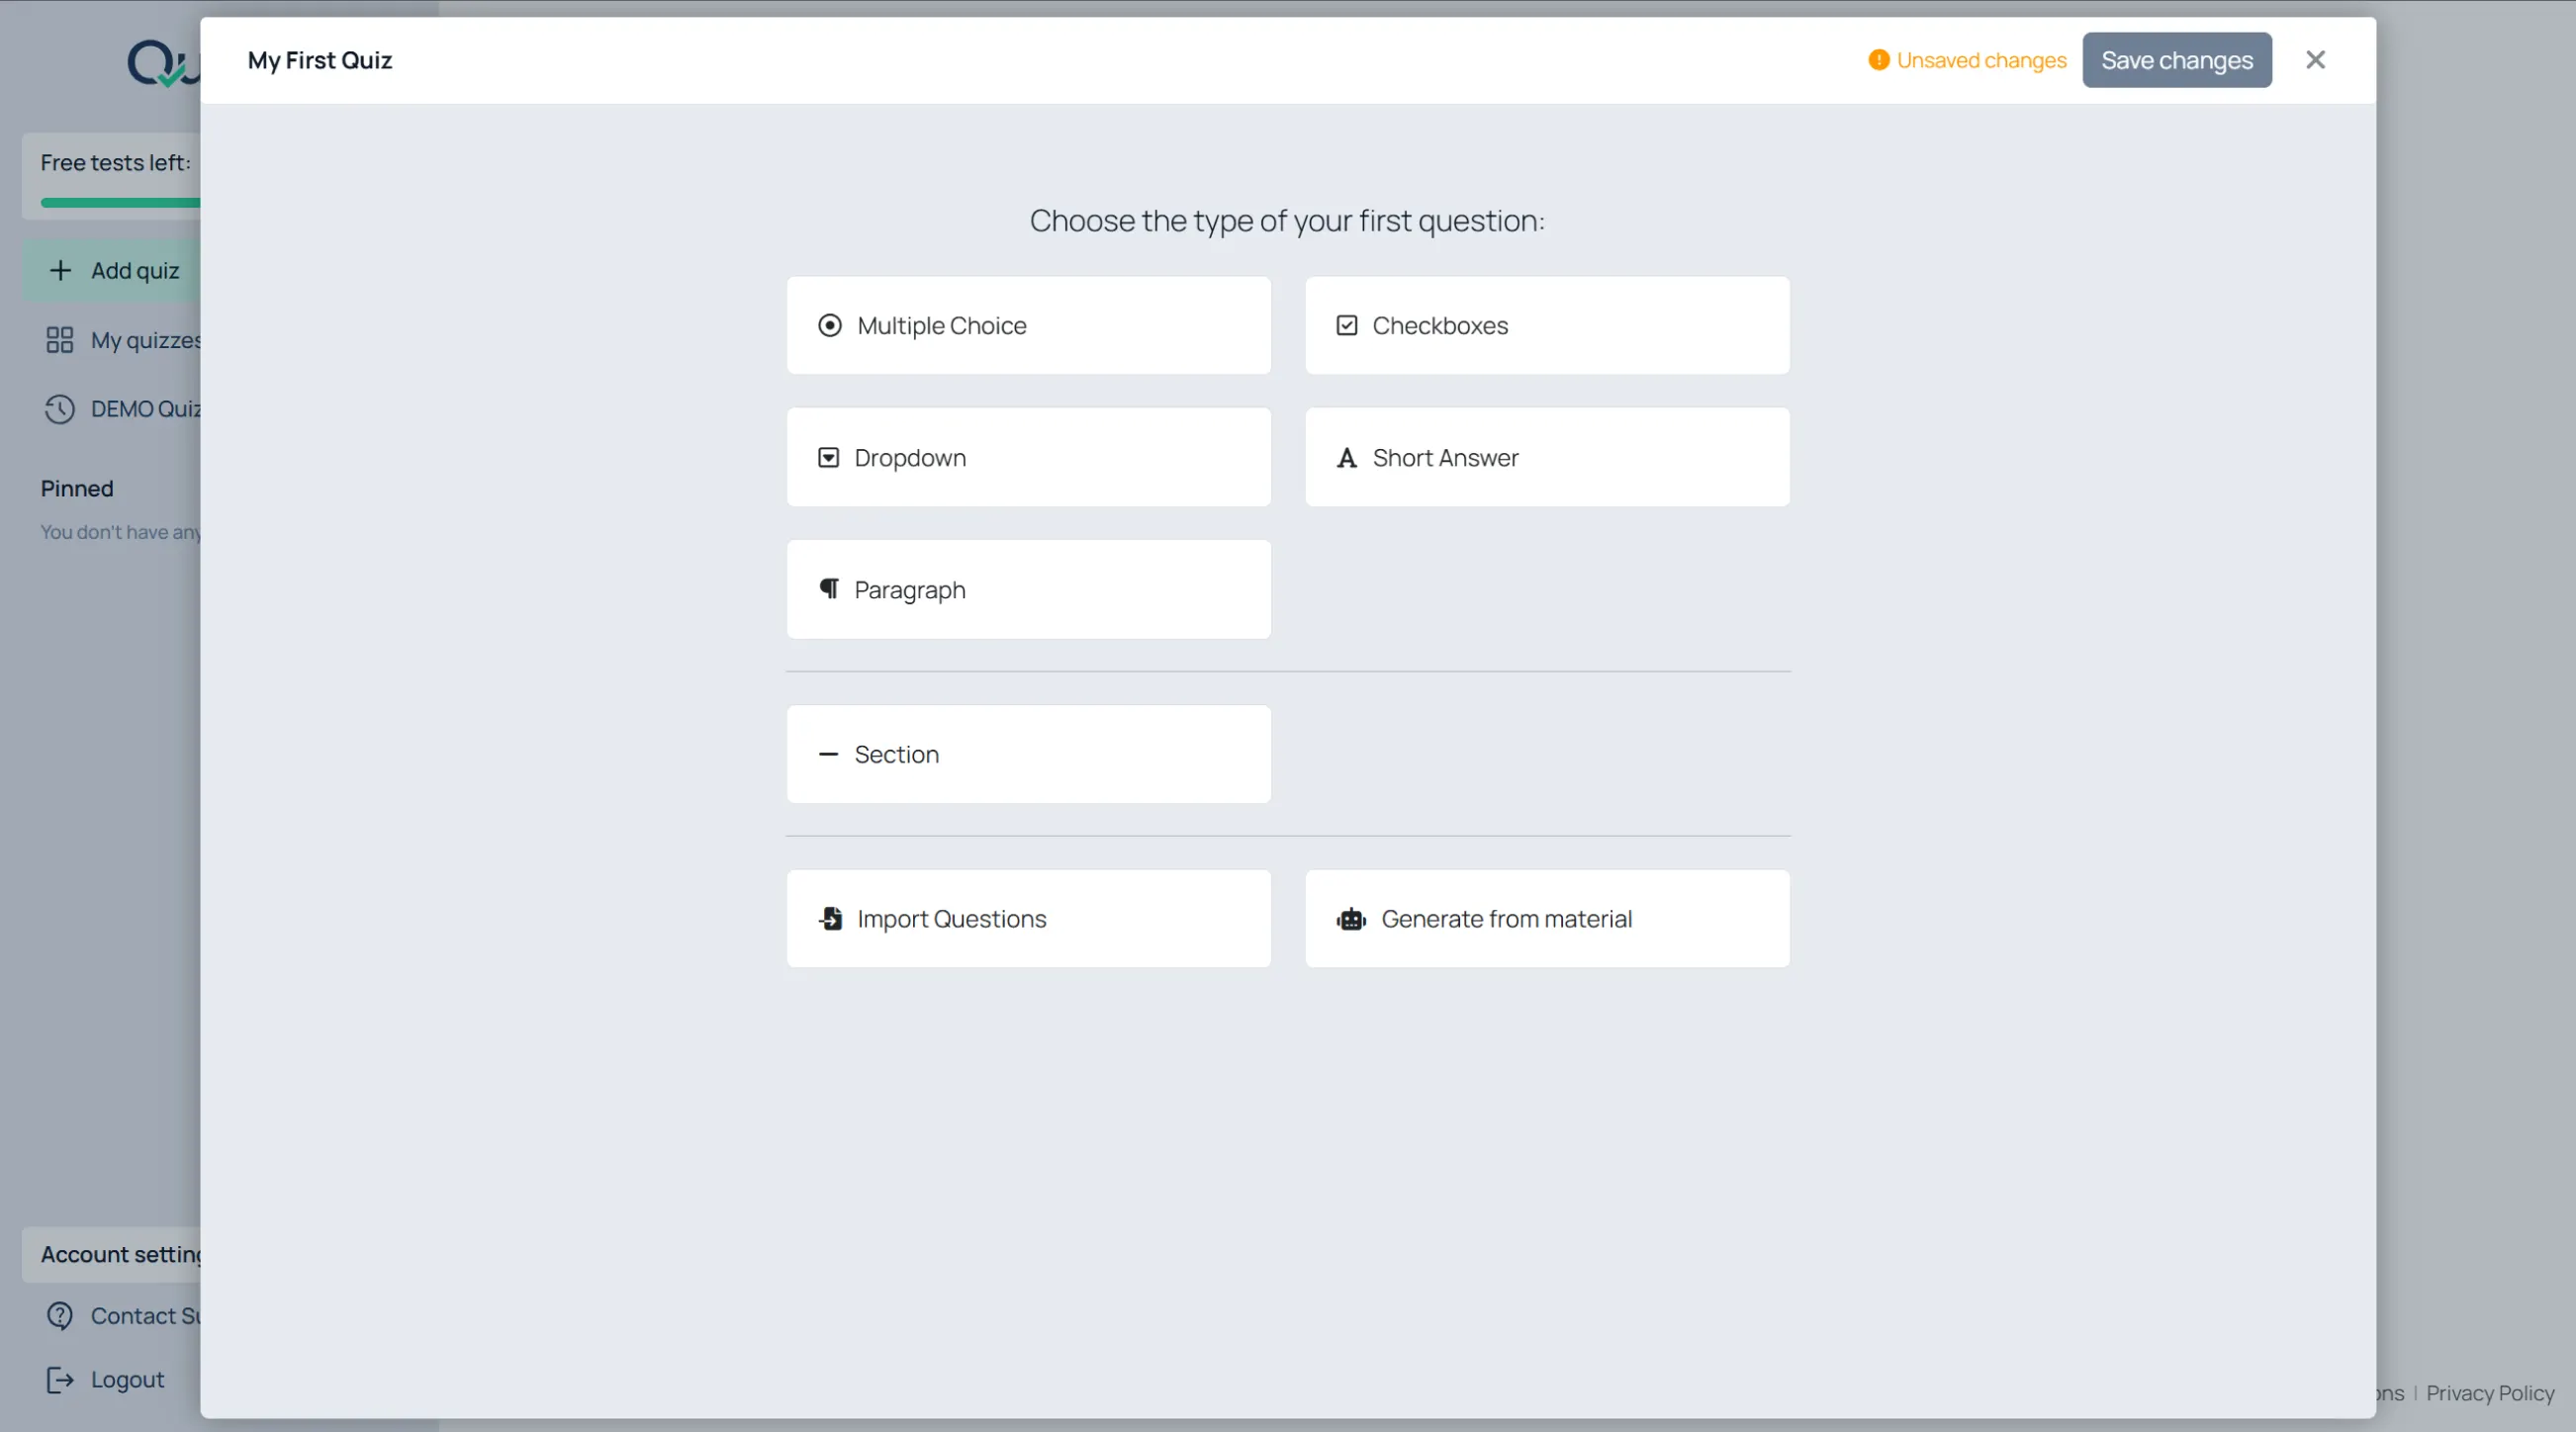
After entering the quiz title, Quilgo asks you to choose the first question type.
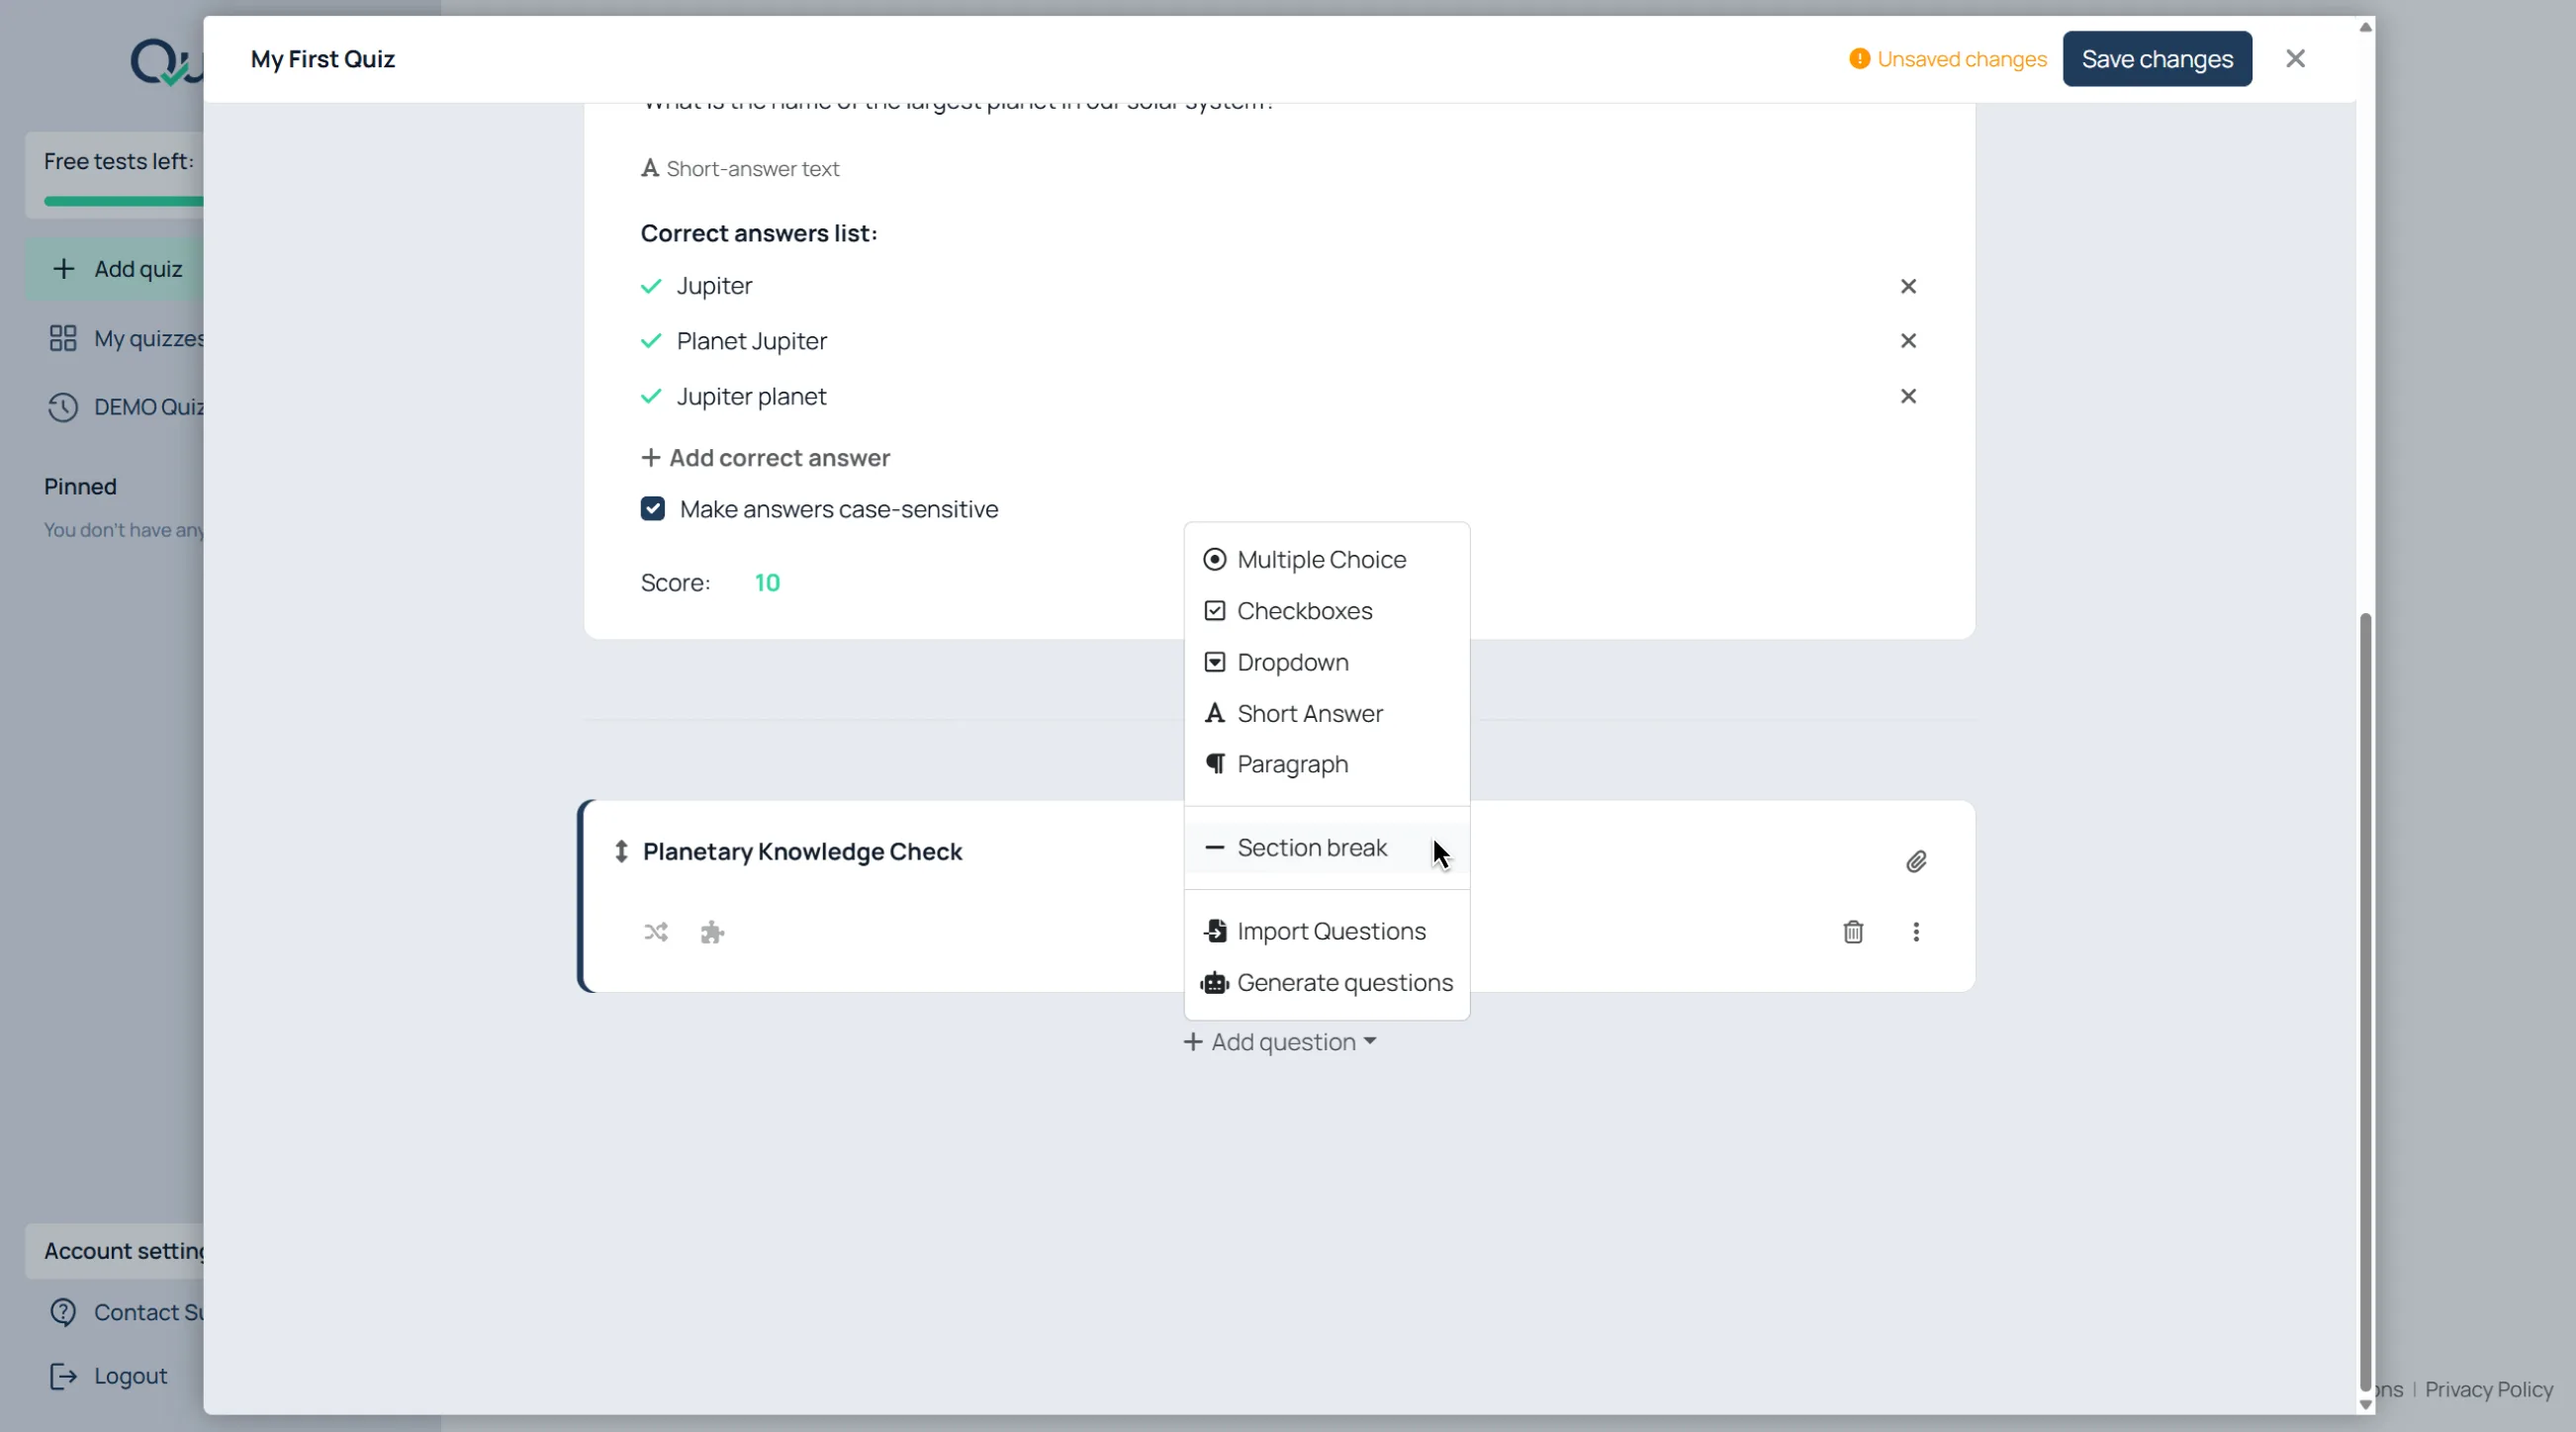
Supported question types:
“Multiple Choice”;
“Checkboxes”;
“Dropdown”;
“Short Answer”;
“Paragraph”;
“Section break”.
Additional actions:
“Import Questions”;
“Generate questions”.
Create Choice-Based Questions
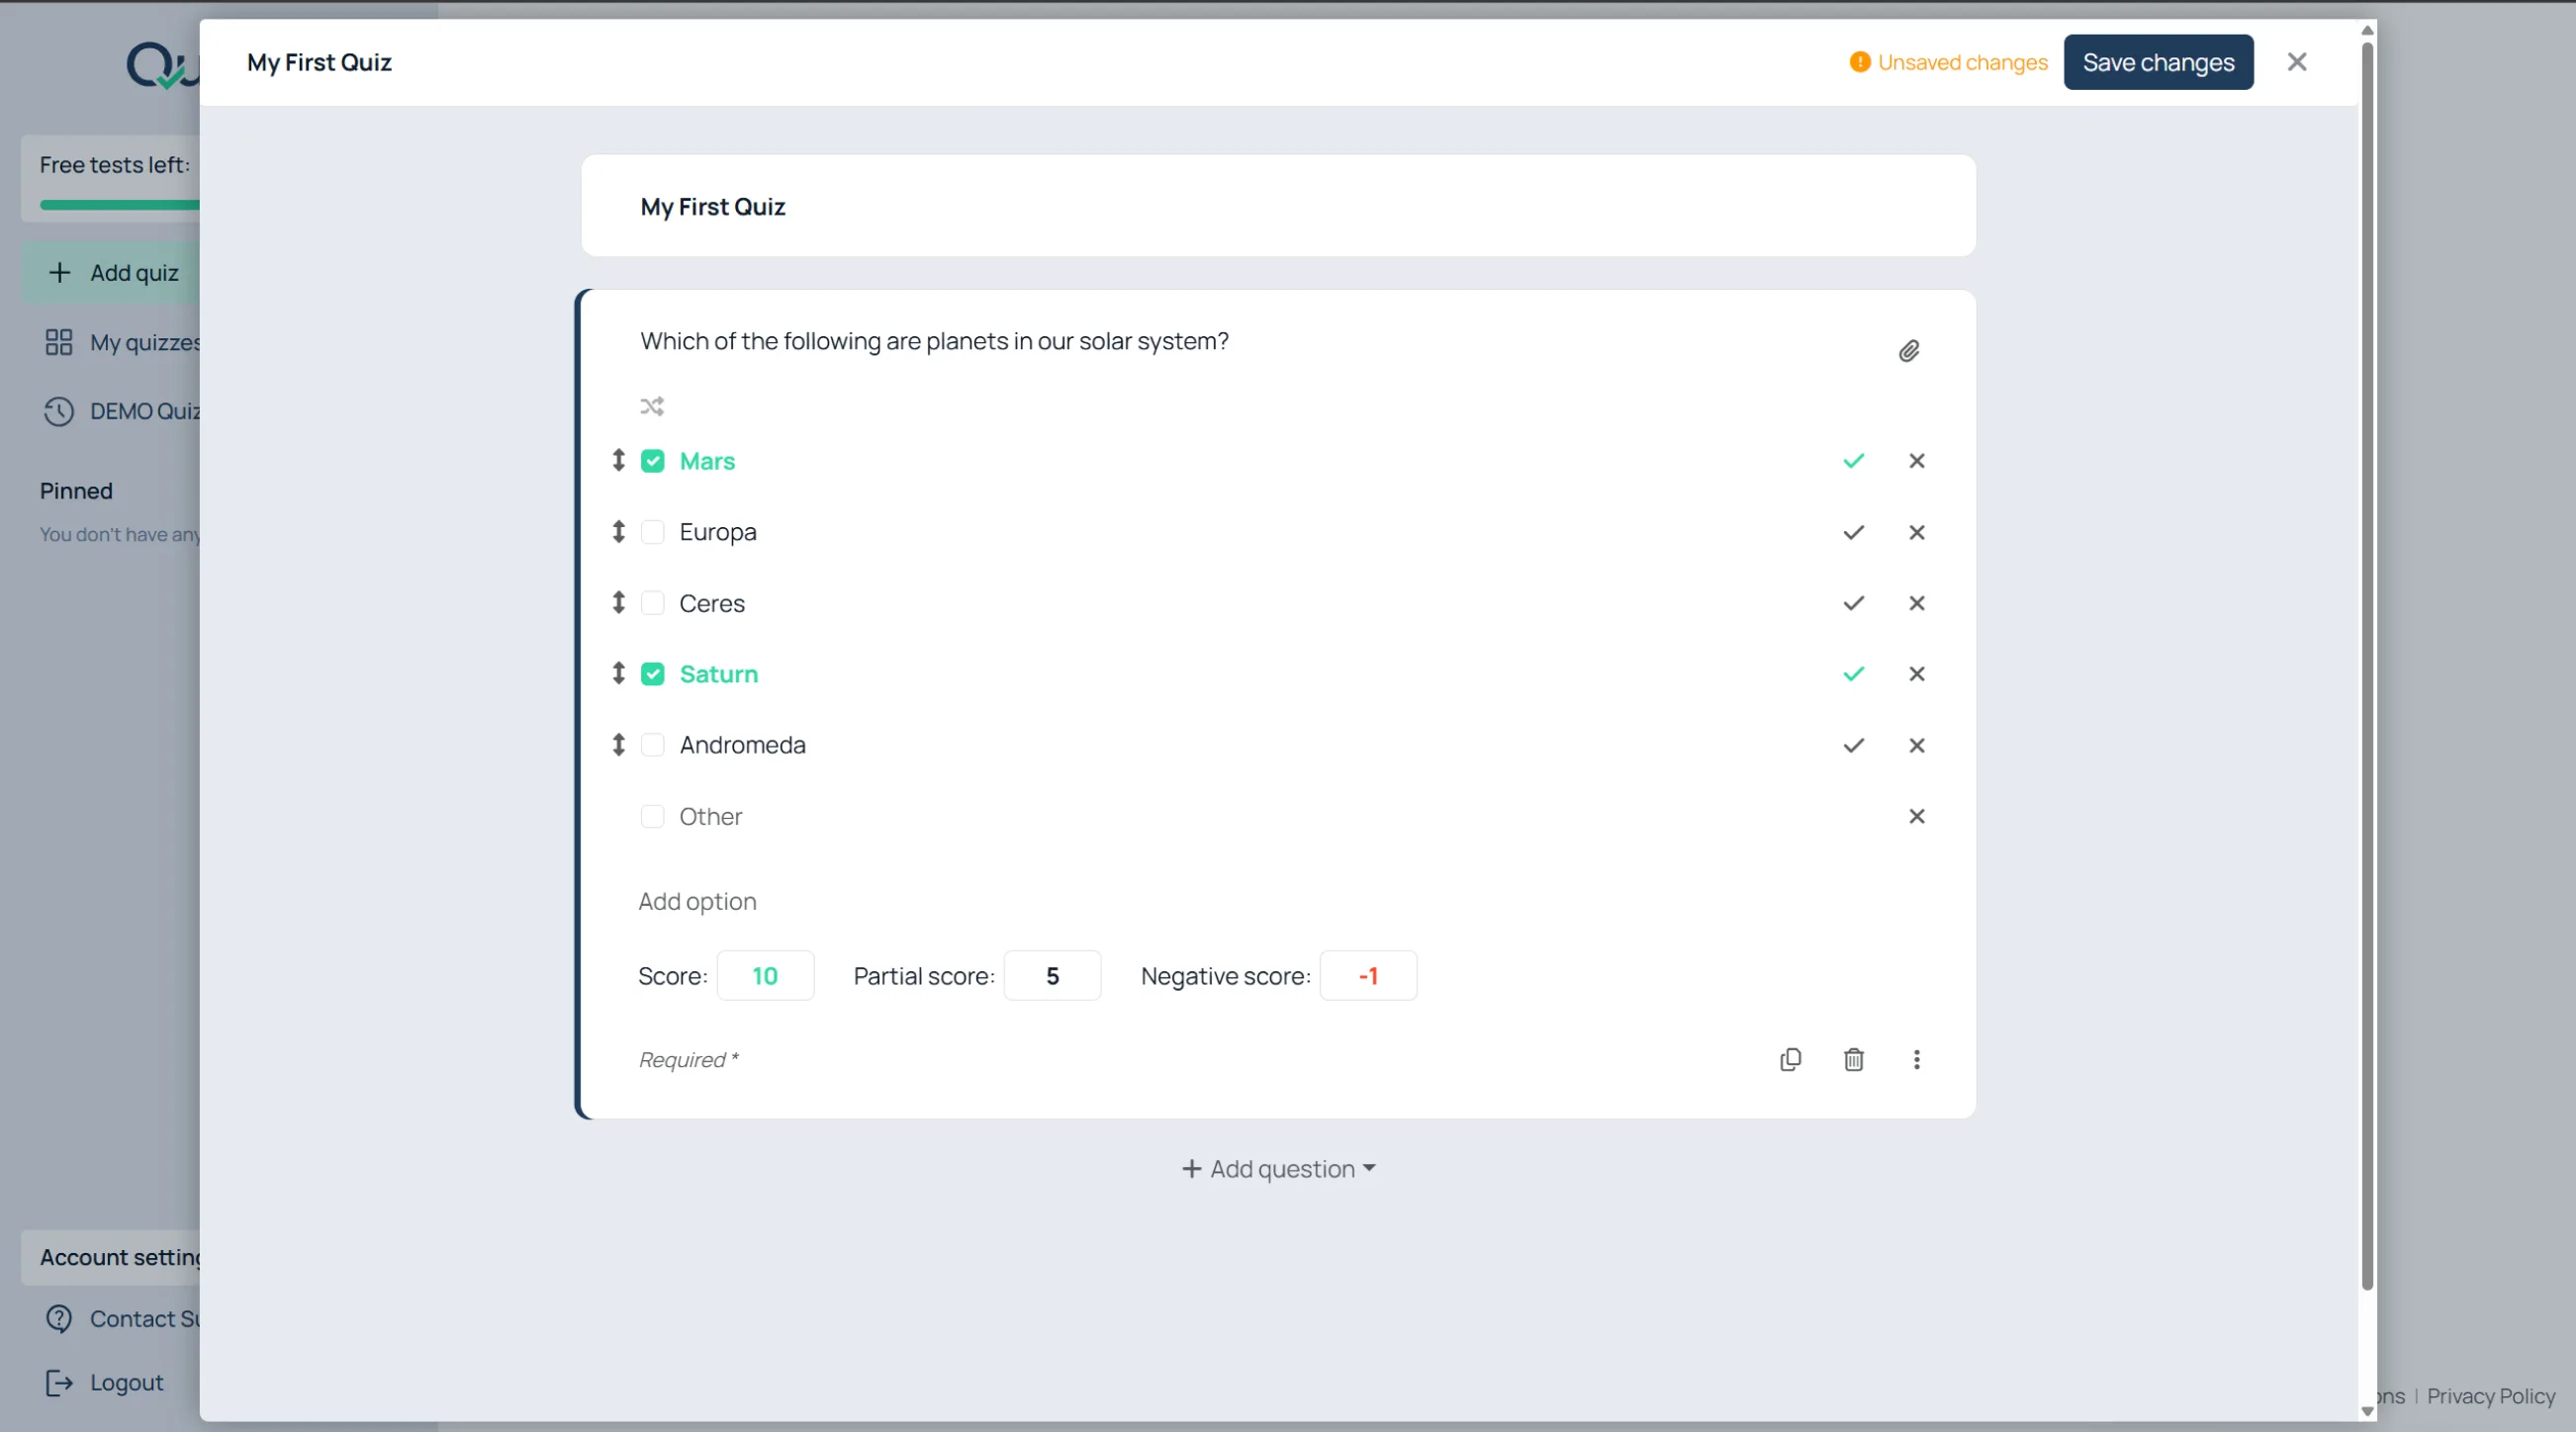
Add the question text
Click inside the “Question” field;
Enter the question.
Add answer options
Click “Add option”;
Enter the option text;
Repeat for additional options.
Mark correct answers
Find the correct option;
Click the checkmark next to it.
→ For “Multiple Choice” and “Dropdown”, select one correct answer.
→ For “Checkboxes”, select multiple correct answers if needed.
Shuffle answer options
Click the shuffle icon inside the question;
Leave it enabled if respondents should see options in a different order.
Add Images or Audio
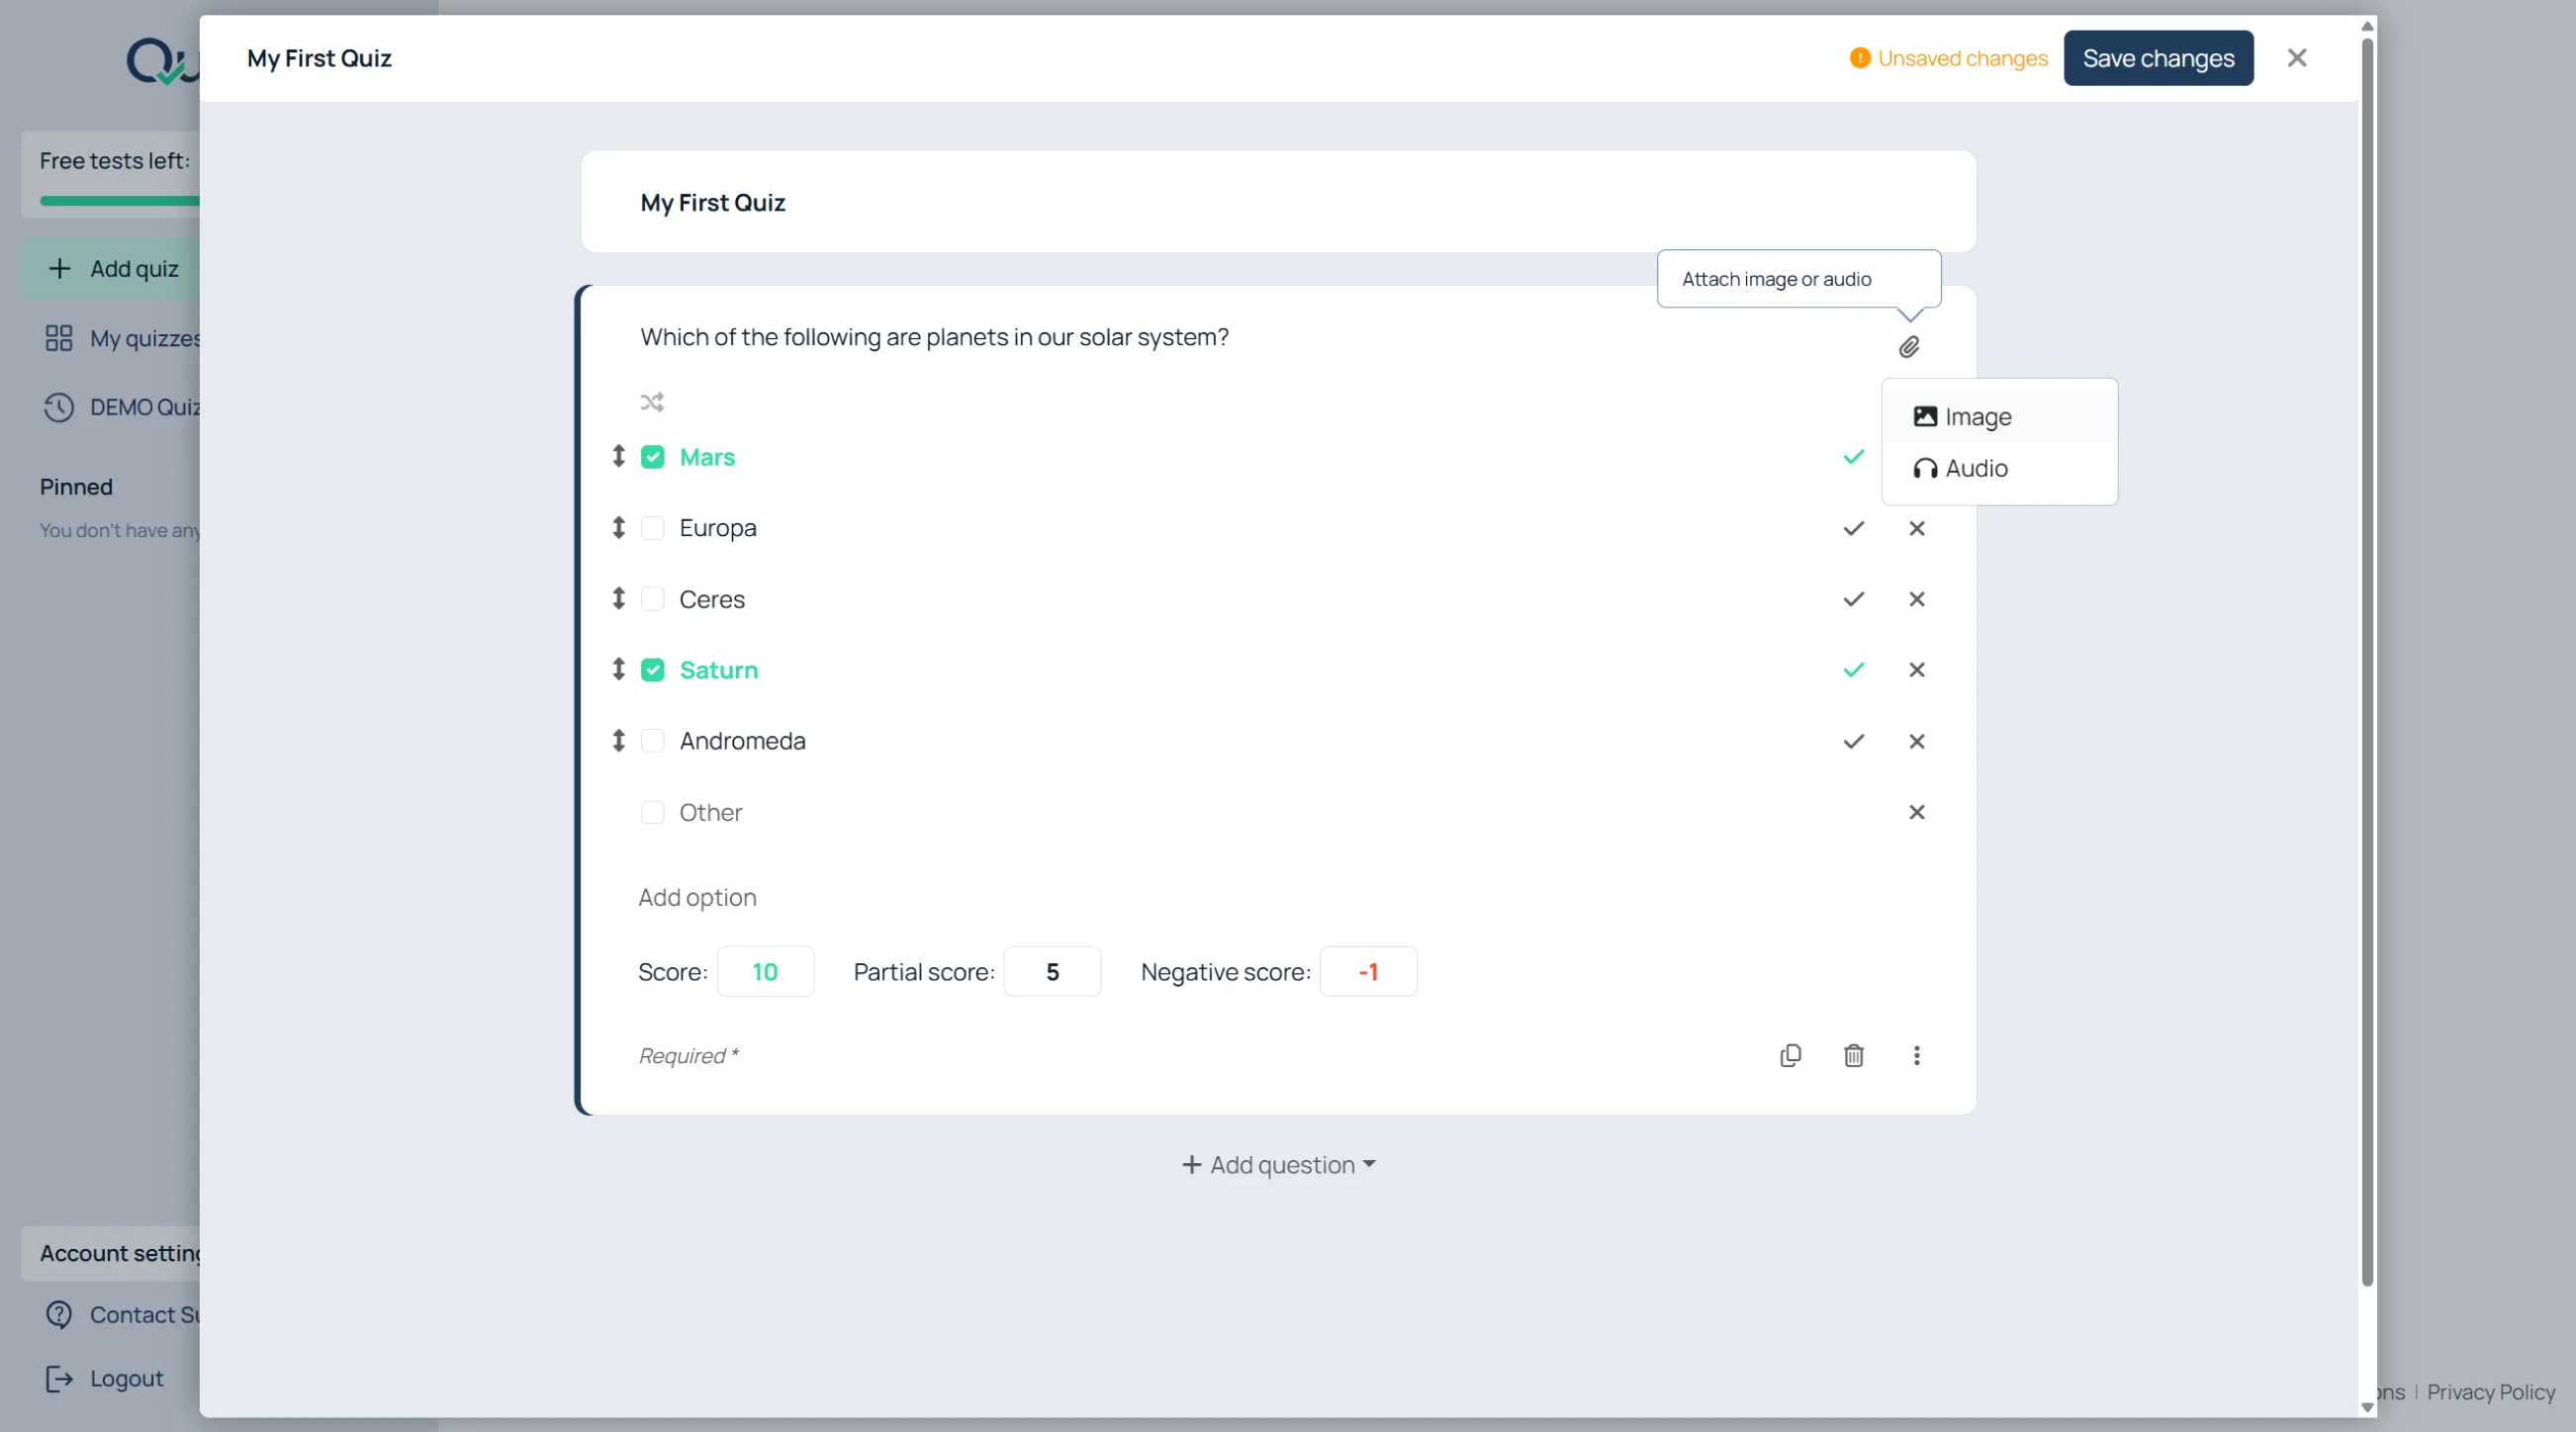
To attach media:
Click the attachment icon inside the question;
Choose “Image” or “Audio”;
Upload the file.
Configure Scoring
Scoring settings help control how respondents are evaluated. Use them to reward correct answers, allow partial credit, or discourage random guessing on exams and certifications.
Question scoring is configured directly inside each question.
Available scoring settings:
“Score”;
“Partial score”;
“Negative score”.
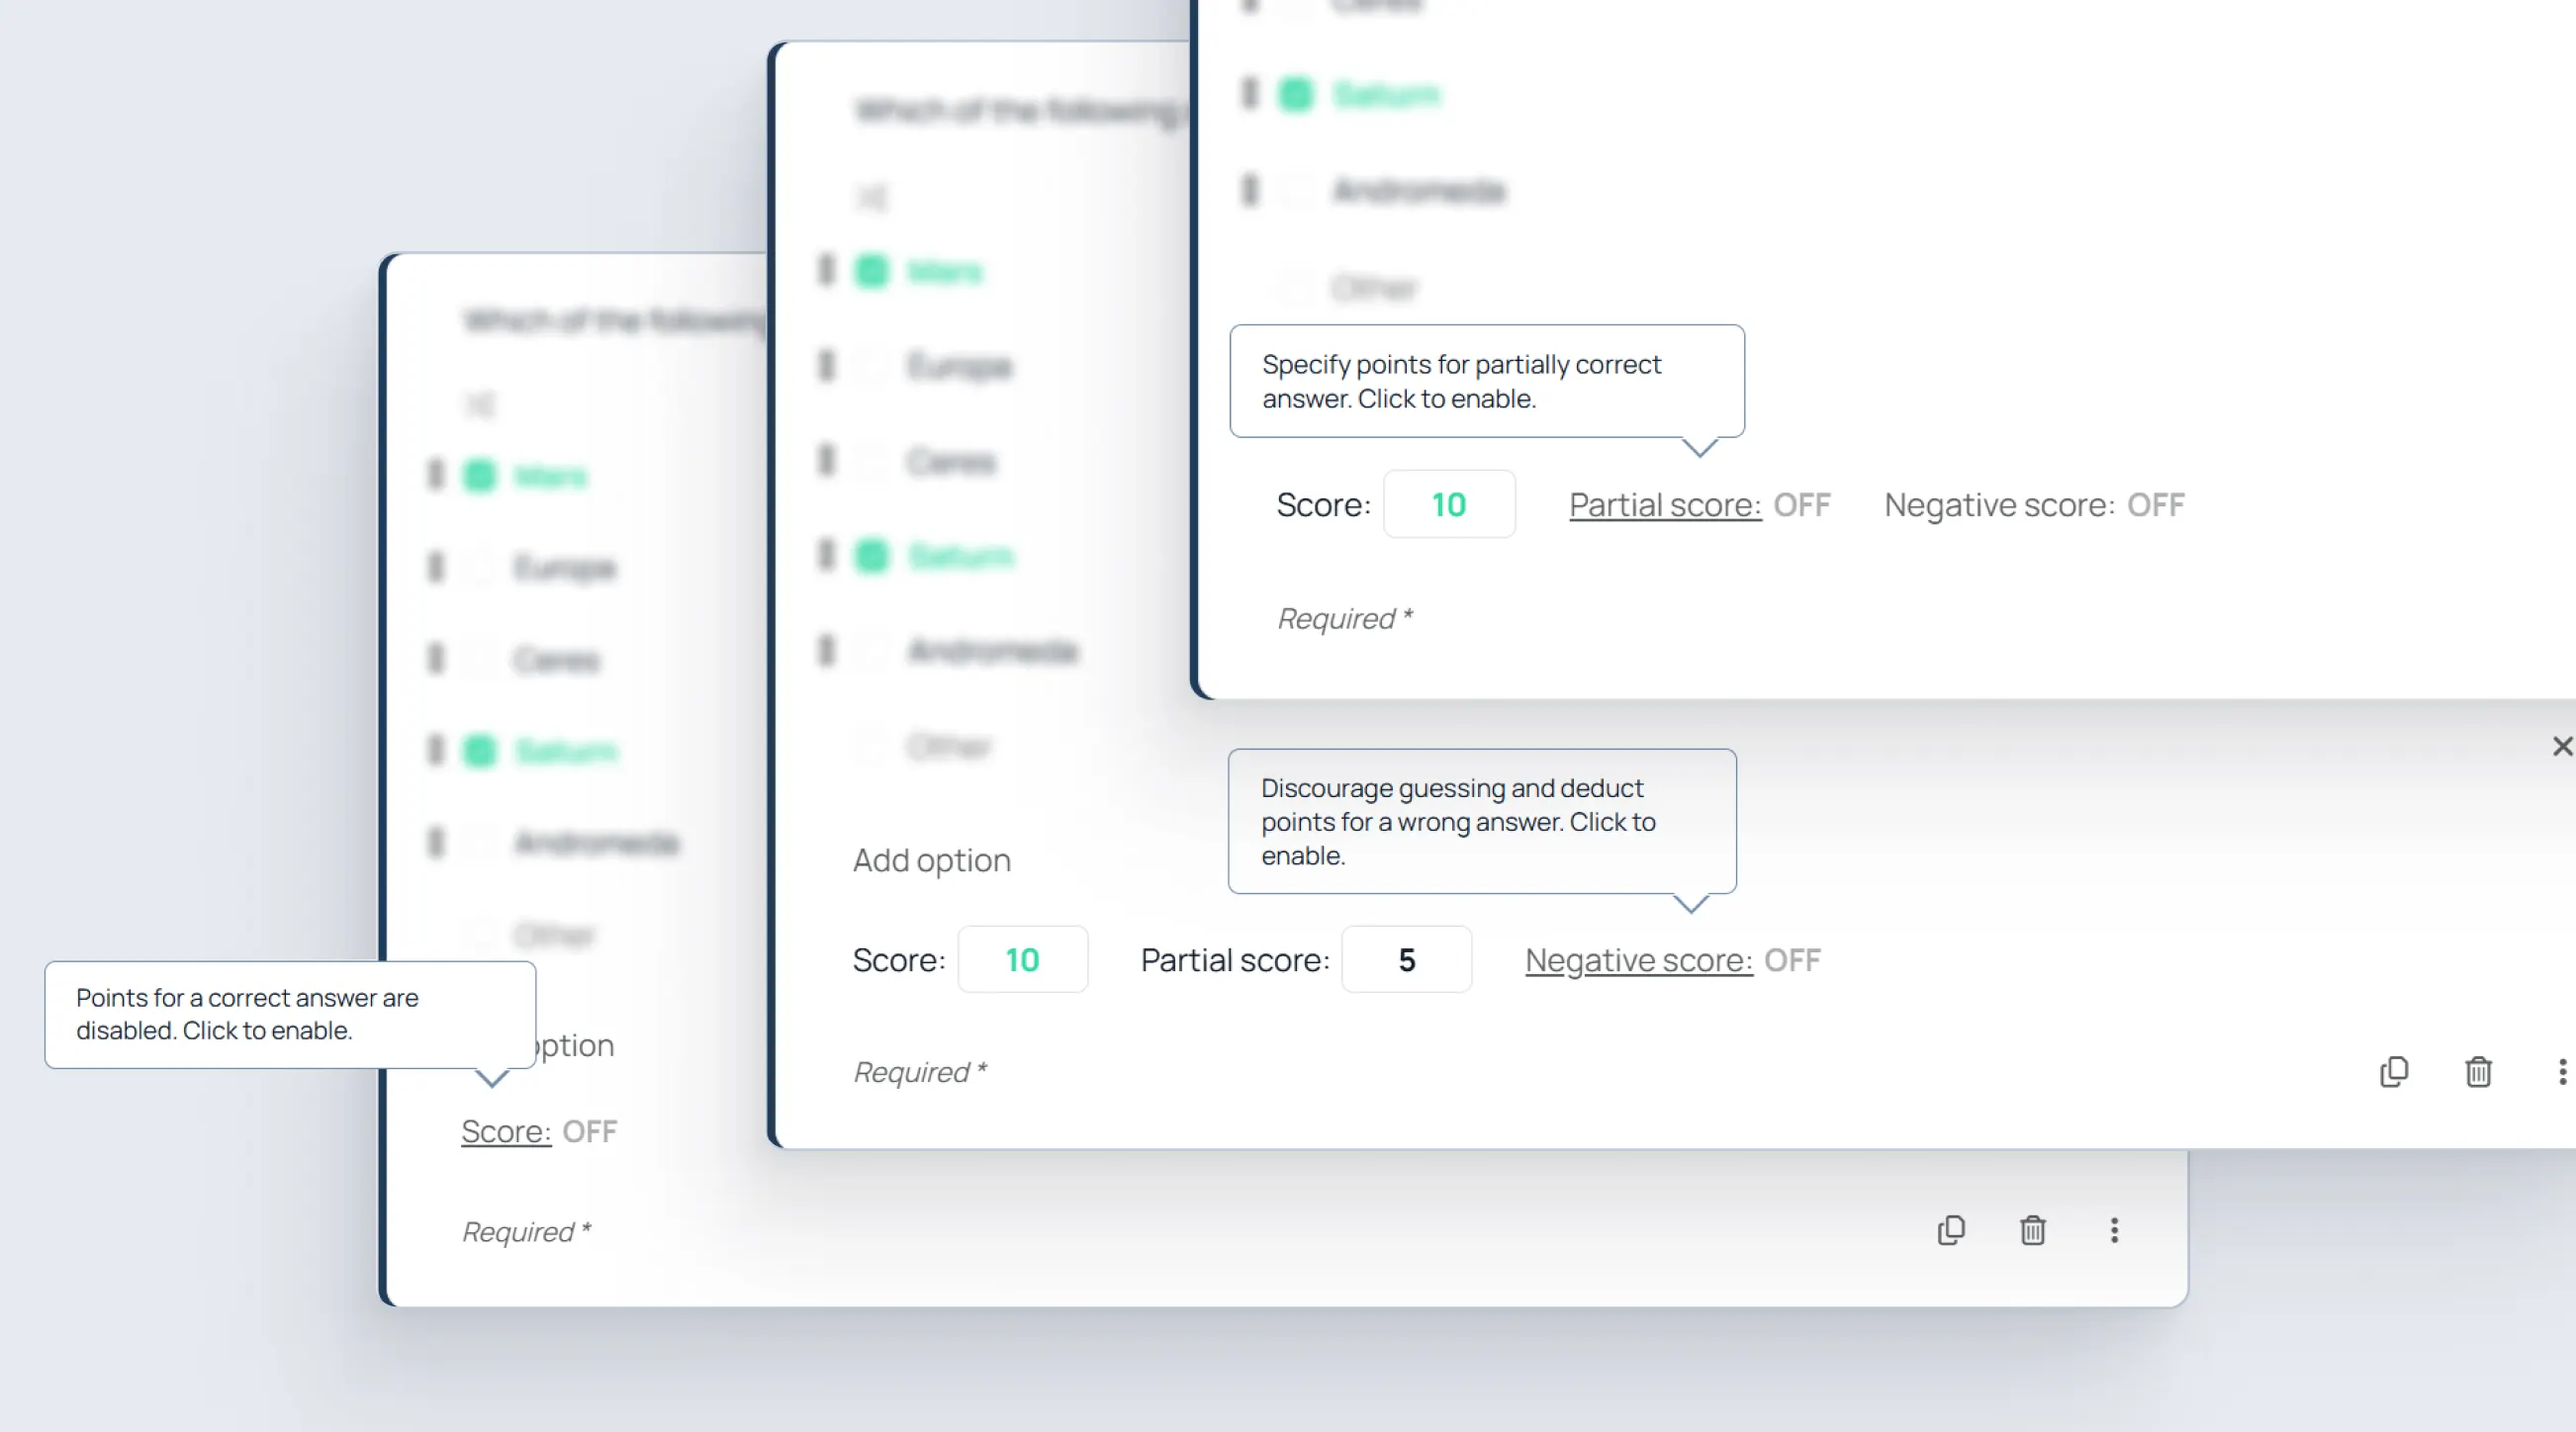
Set the main score
The “Score” input is enabled and expanded by default.
Enter the number of points in the “Score” input.
If you do not want the question to be graded:
Click the “Score” label to collapse or disable scoring for that question.
Enable partial score
Partial scoring is useful when a respondent gives a partially correct answer. This is especially valuable for checkbox questions where respondents may correctly identify some answers but miss others.
Click “Partial score”;
Enter the value.
Enable negative score
“Negative score” is disabled by default.
Click “Negative score” to expand the setting;
Enter the penalty value.
Negative scoring discourages guessing by subtracting points for incorrect answers. This is commonly used in exams and certifications where random guessing should reduce the final score.
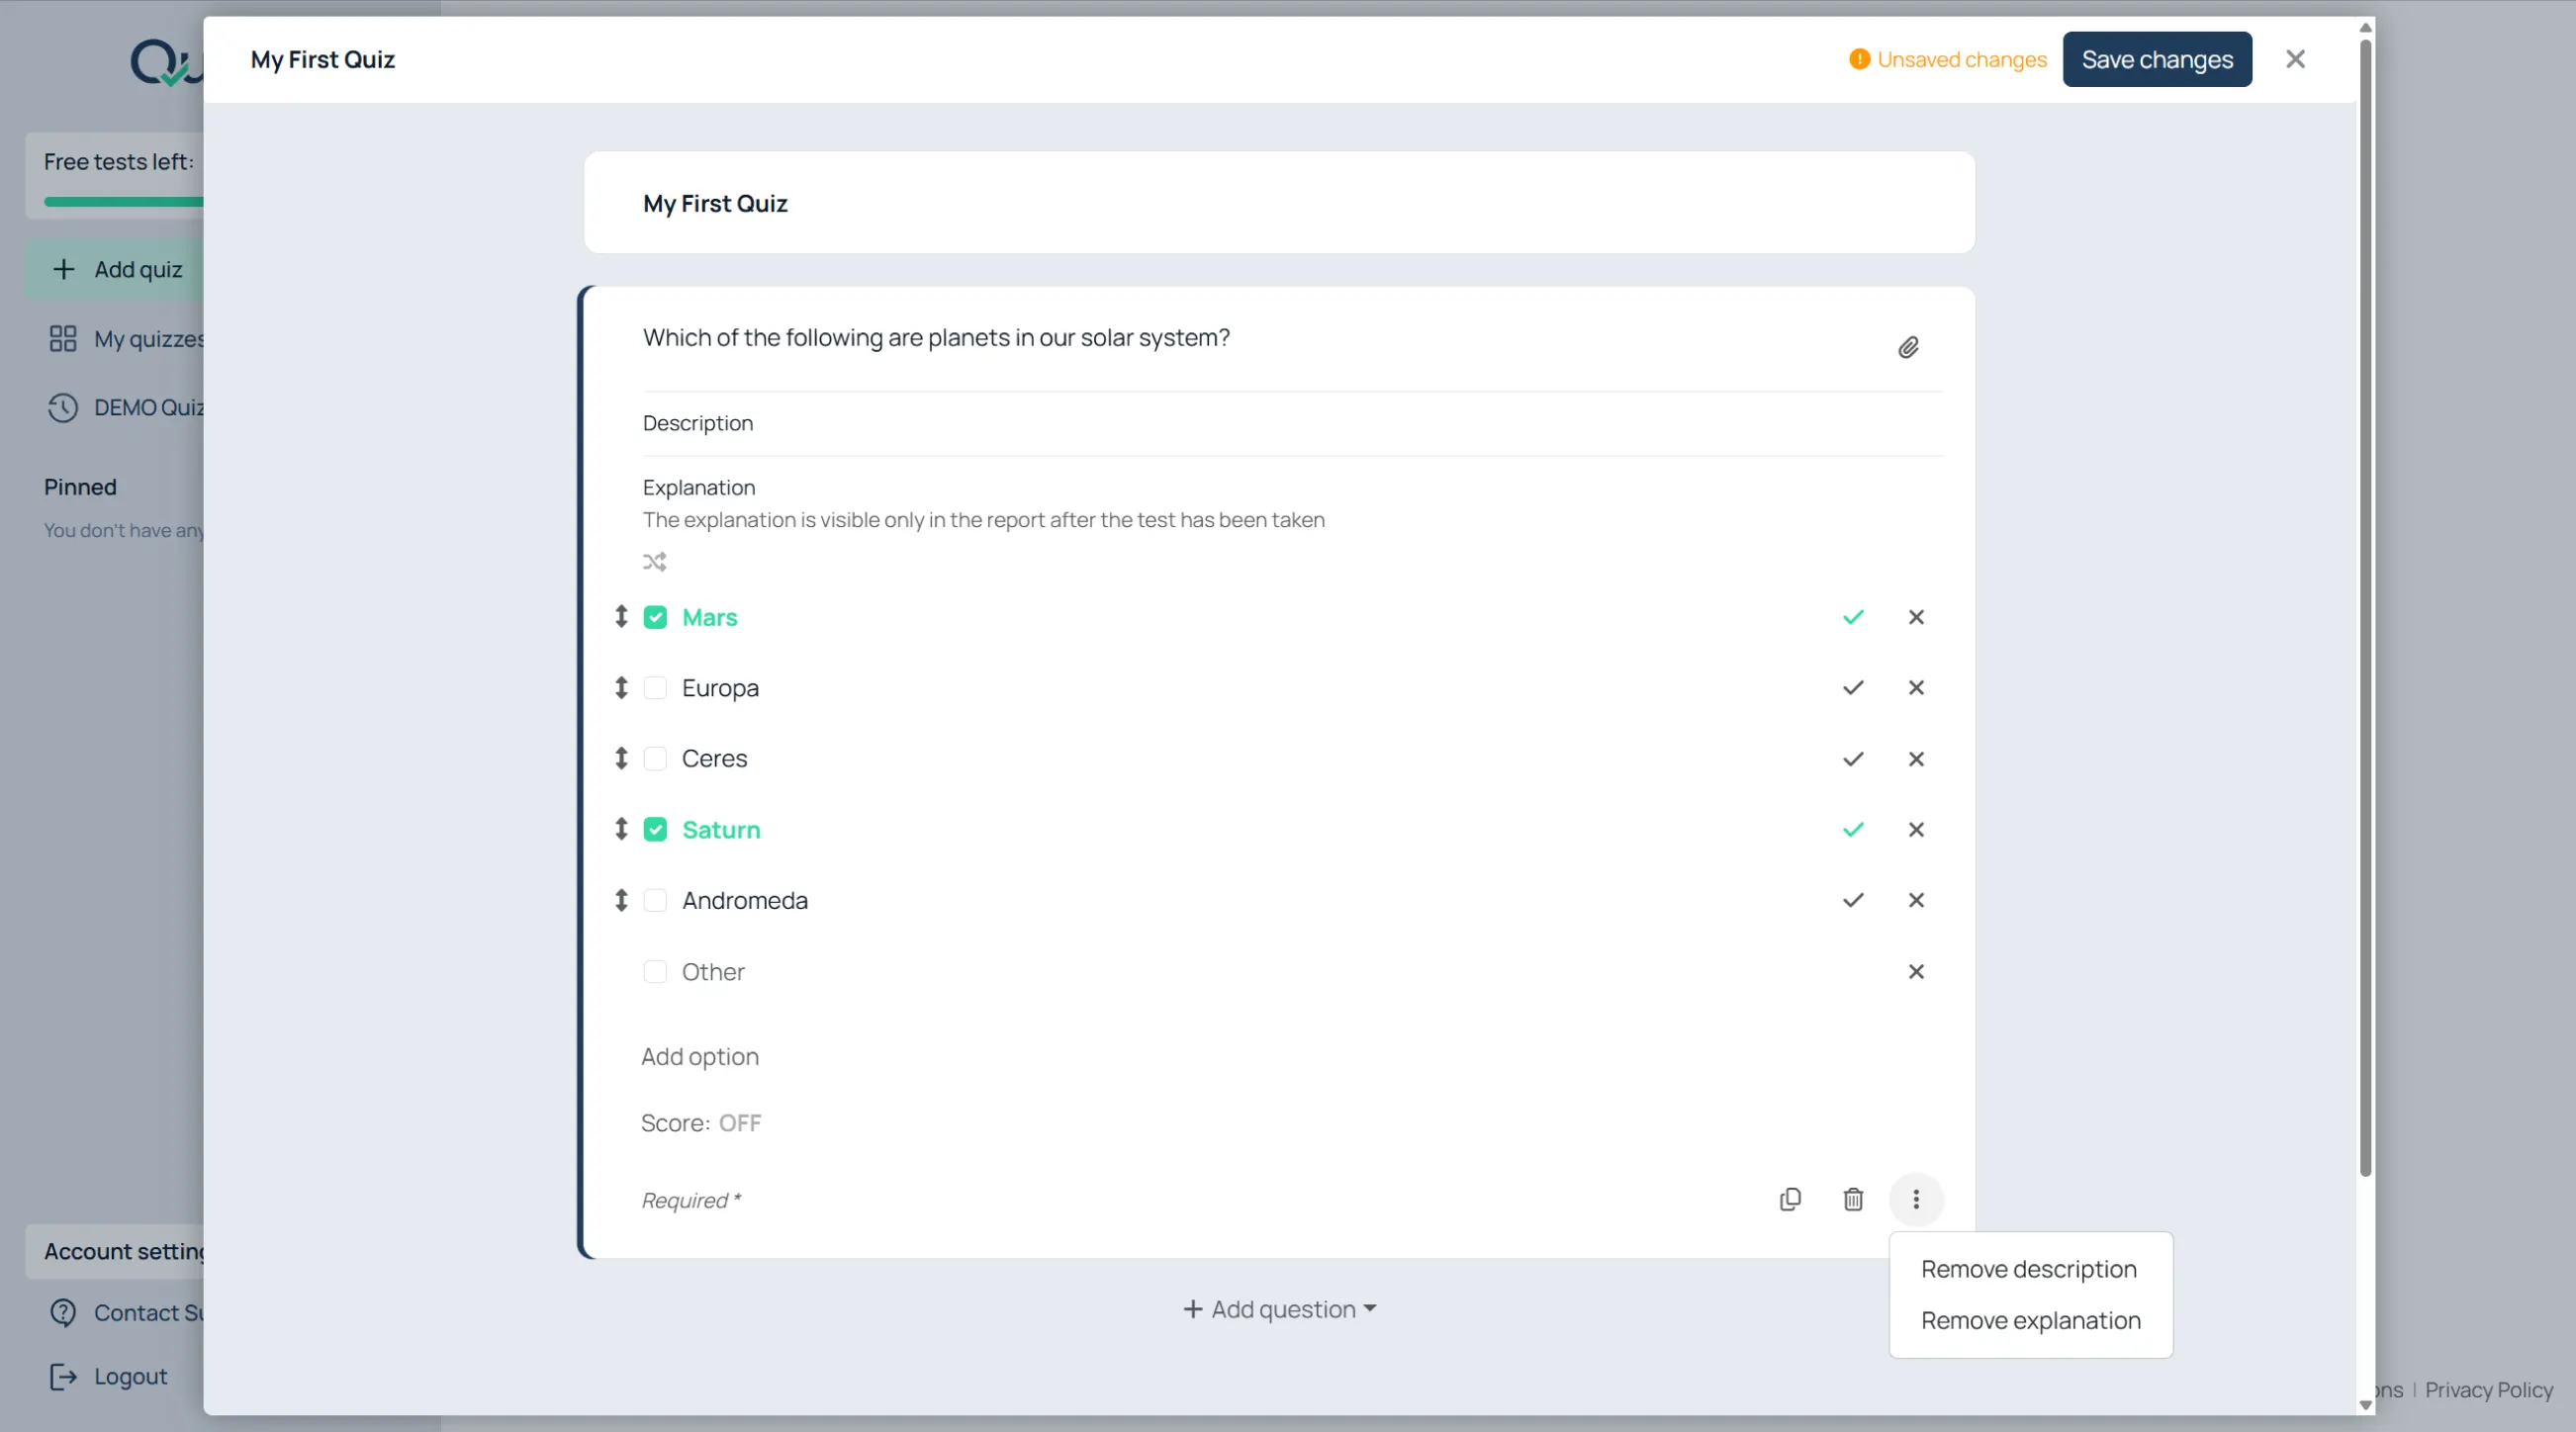
Add Descriptions and Explanations
To add extra instructional text:
Click the three-dot menu on the question;
Click “Add description” or “Add explanation”.
Descriptions appear during the test.
Explanations appear later in reports or results.
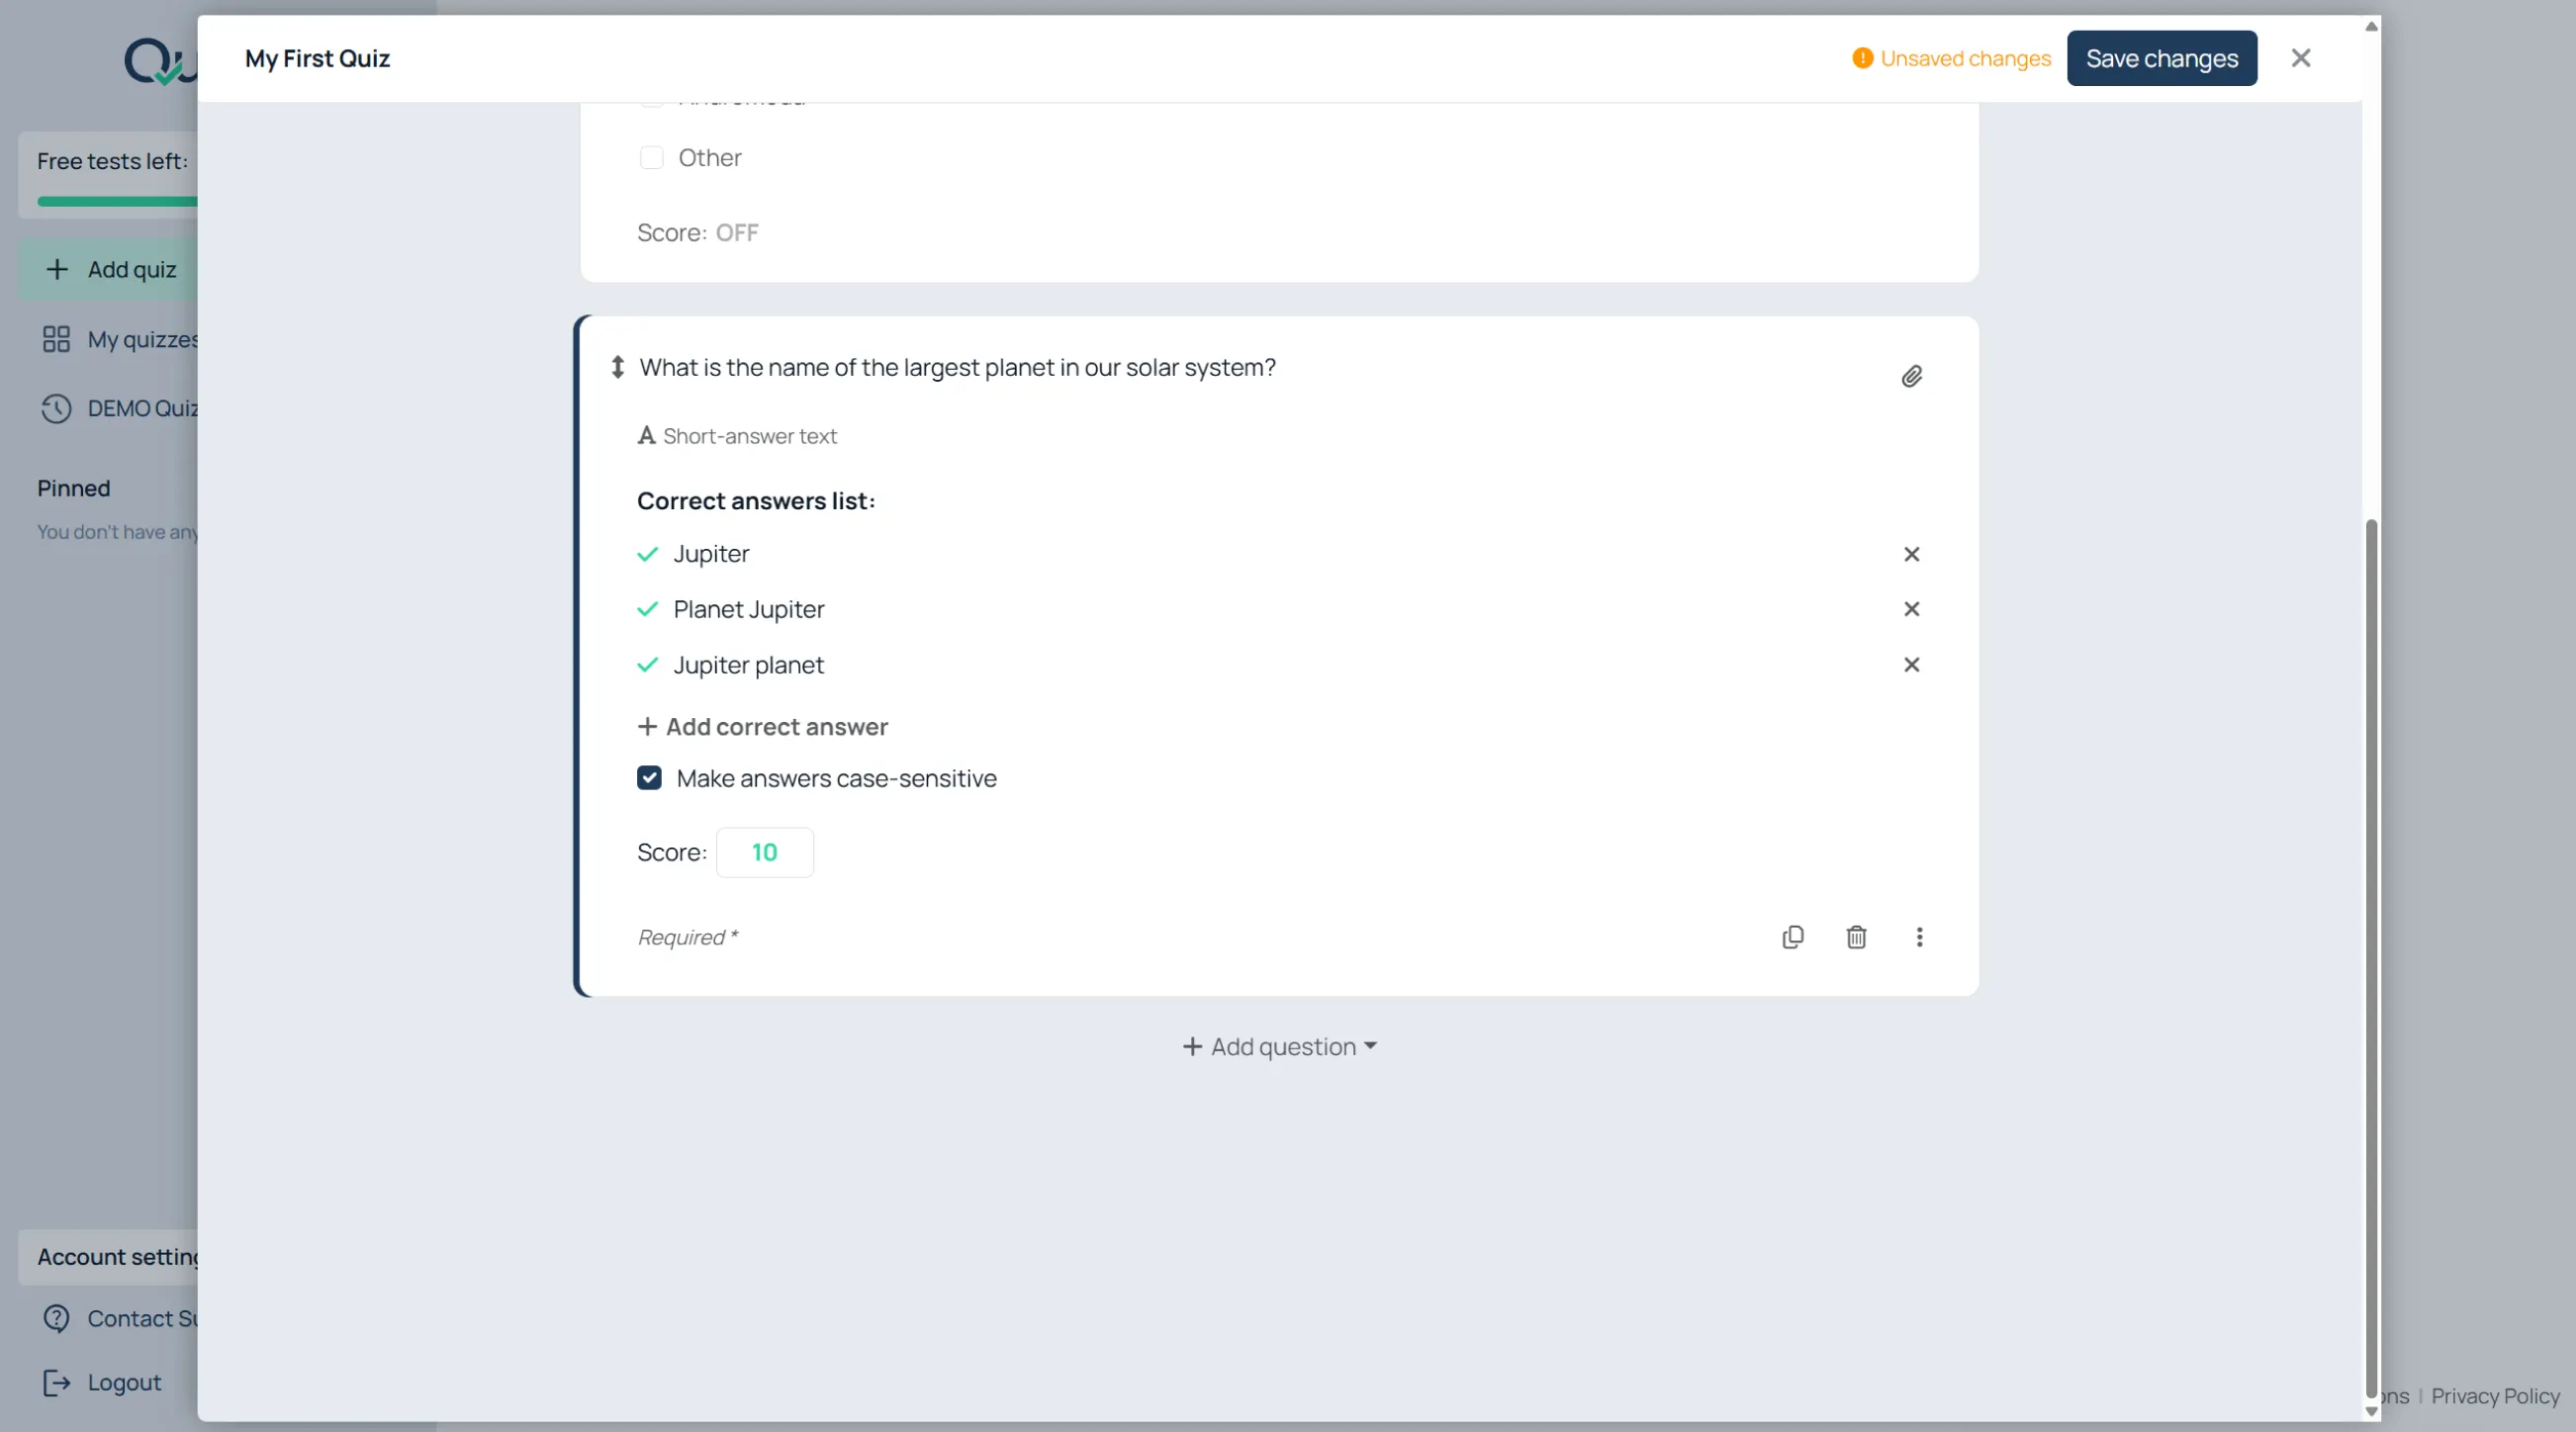
Create Short Answer Questions
To configure accepted answers:
Add a “Short Answer” question;
Click “Add correct answer”;
Enter accepted answers.
Example accepted answers:
dad;
daddy;
father.
Create Paragraph Questions
Use “Paragraph” for essays, written explanations, and manually graded answers.
Organize Large Quizzes
Use Sections
To add a section:
Click “+ Add question”;
Choose “Section break”;
Enter the section title.
Use sections for:
chapters;
topics;
theory blocks;
practical tasks;
reading passages.
Add Section Content
Sections can contain:
descriptions;
images;
audio.
To add them:
Click the section menu or attachment icon;
Choose the content type;
Upload or enter the content.
Shuffle Questions Inside a Section
To randomize question order:
Click the shuffle icon on the section;
Leave it enabled.
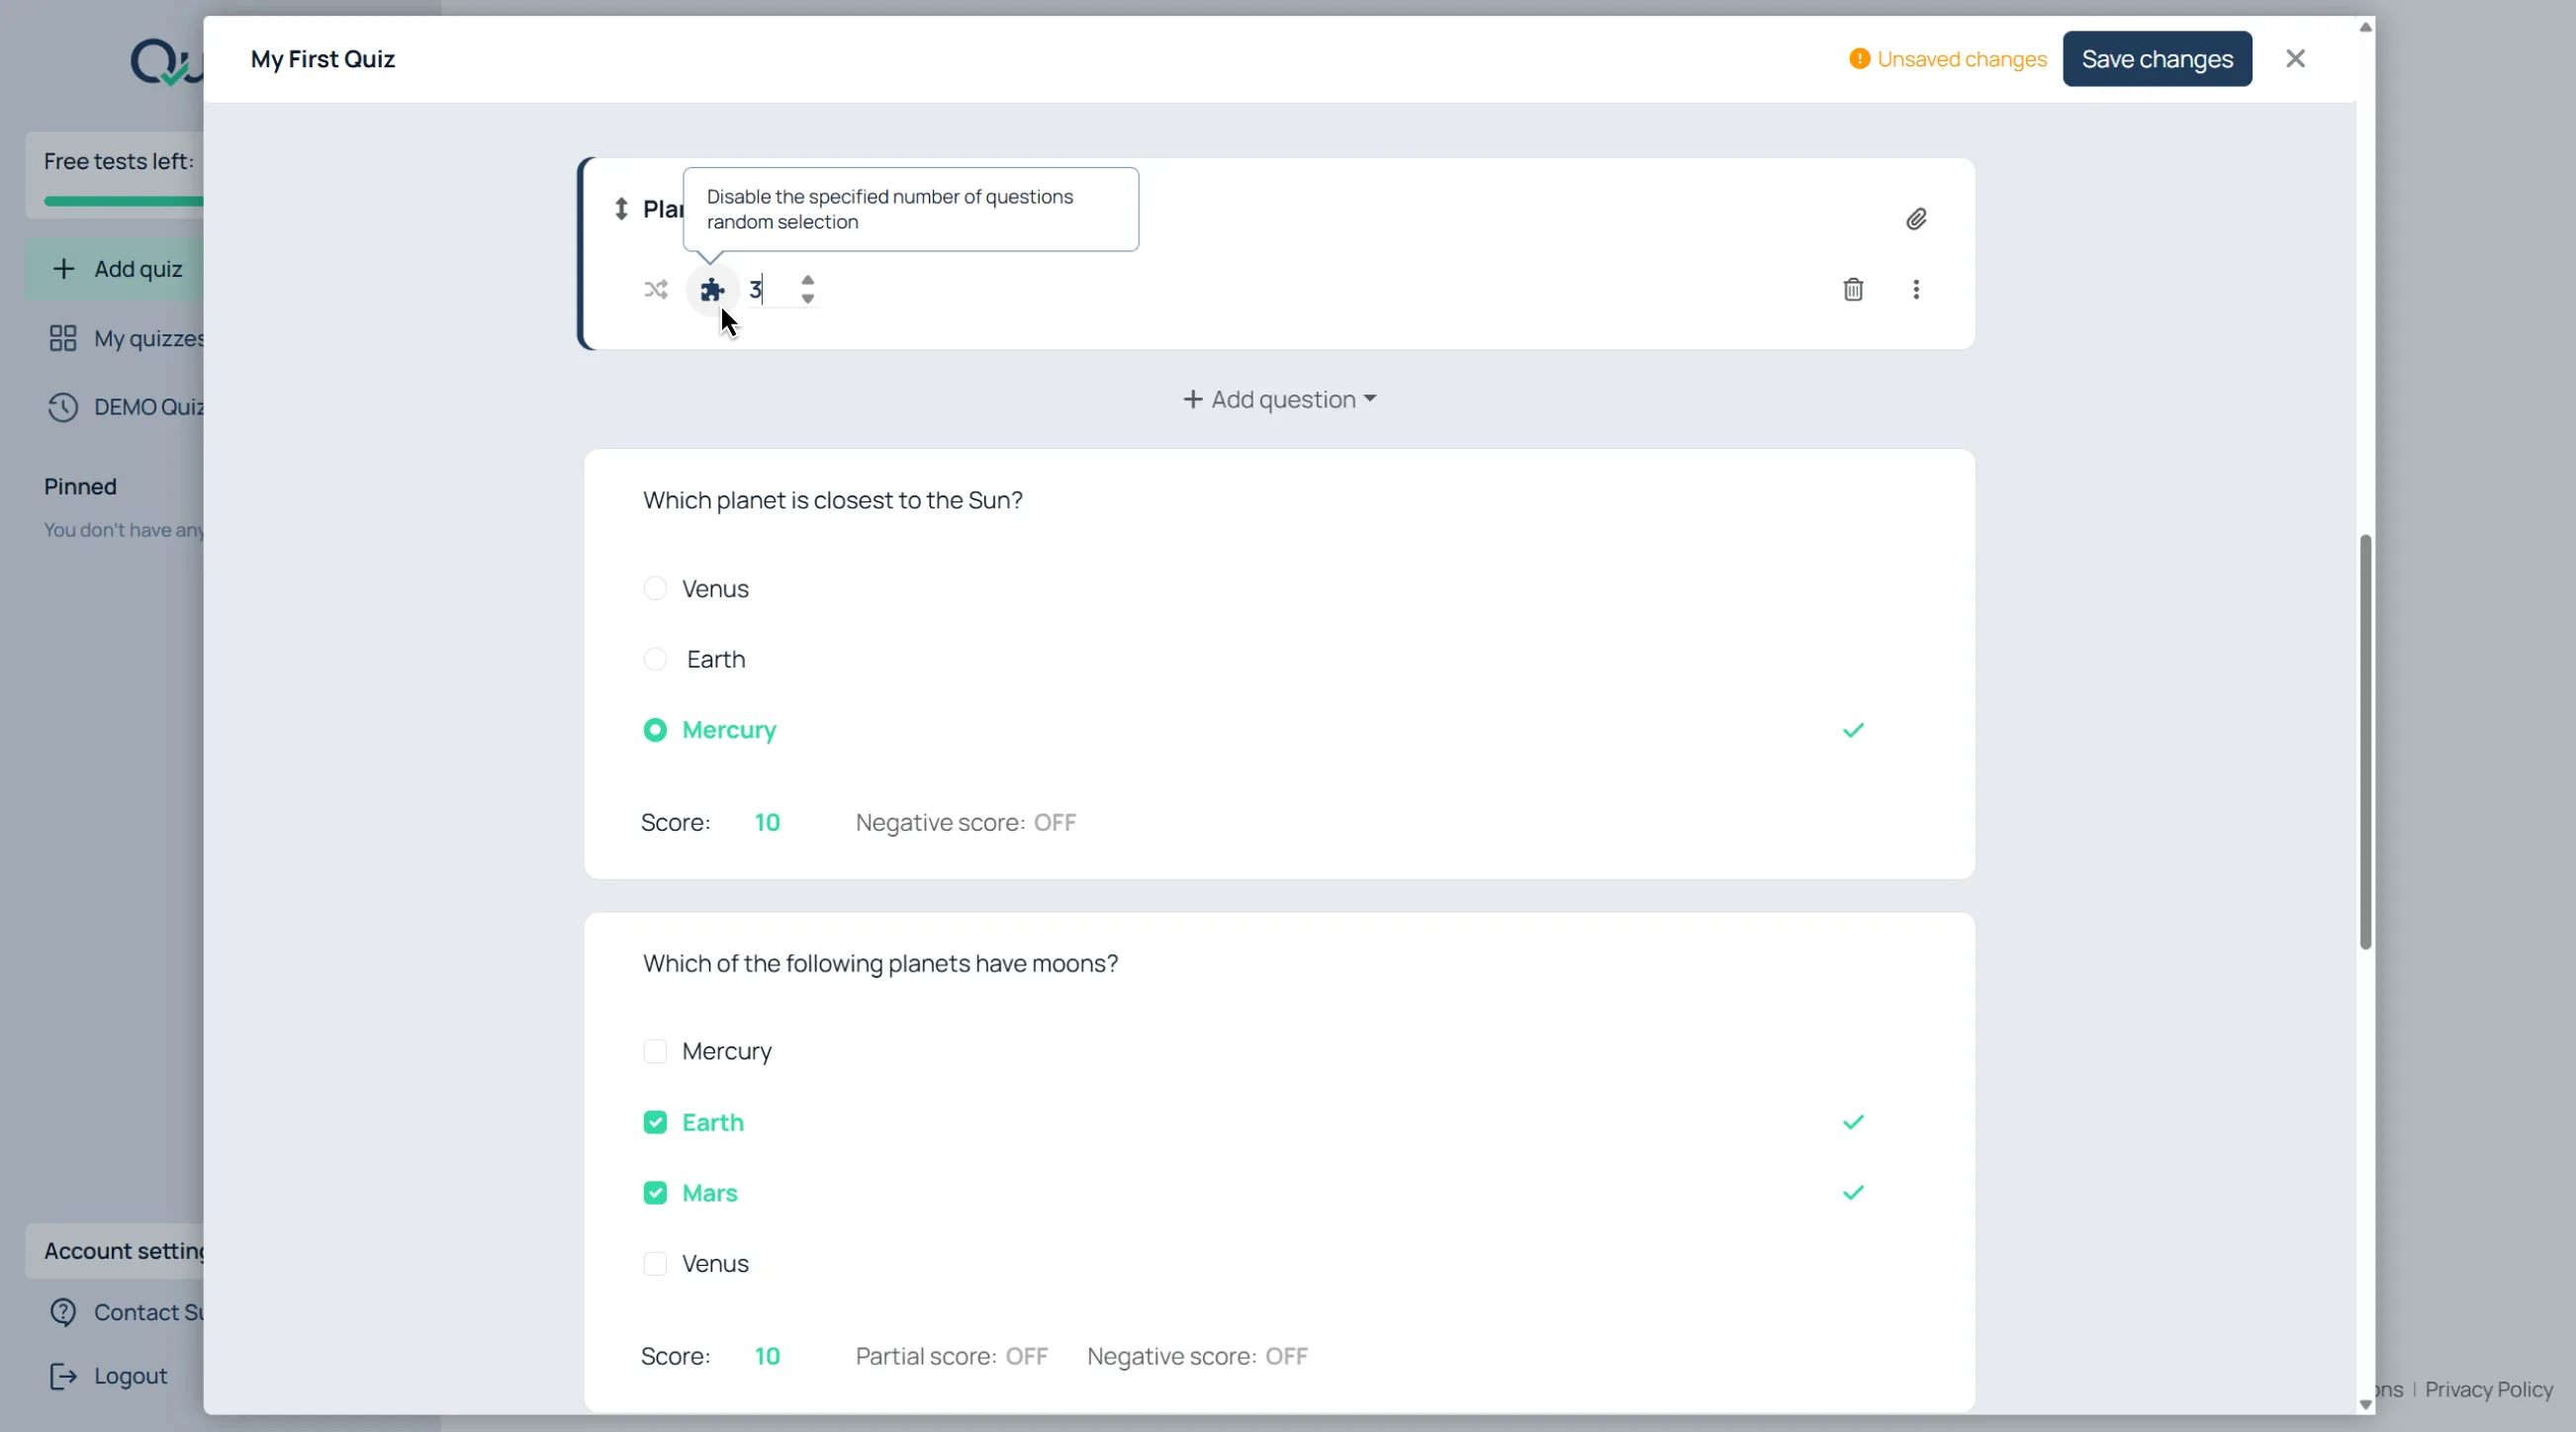
Use Question Pools
Question pools help generate different versions of the same assessment automatically. This reduces answer sharing and makes repeated testing more secure.
To randomly select questions from a section:
Add many questions to the section;
Open the random selection setting;
Enter how many questions should be selected.
Example:
Add 100 questions;
Randomly select 10.
Each respondent receives a different subset.
Save and Configure the Quiz
Save the Quiz
Saving the quiz creates the initial delivery link and stores all question settings; scoring rules; and quiz structure.
When the quiz is ready:
Click “Save changes”.
Quilgo automatically creates a ready-to-use quiz link.
Configure Test Delivery
Open Quiz Settings
To configure test behavior:
Click “Settings” from the dashboard;
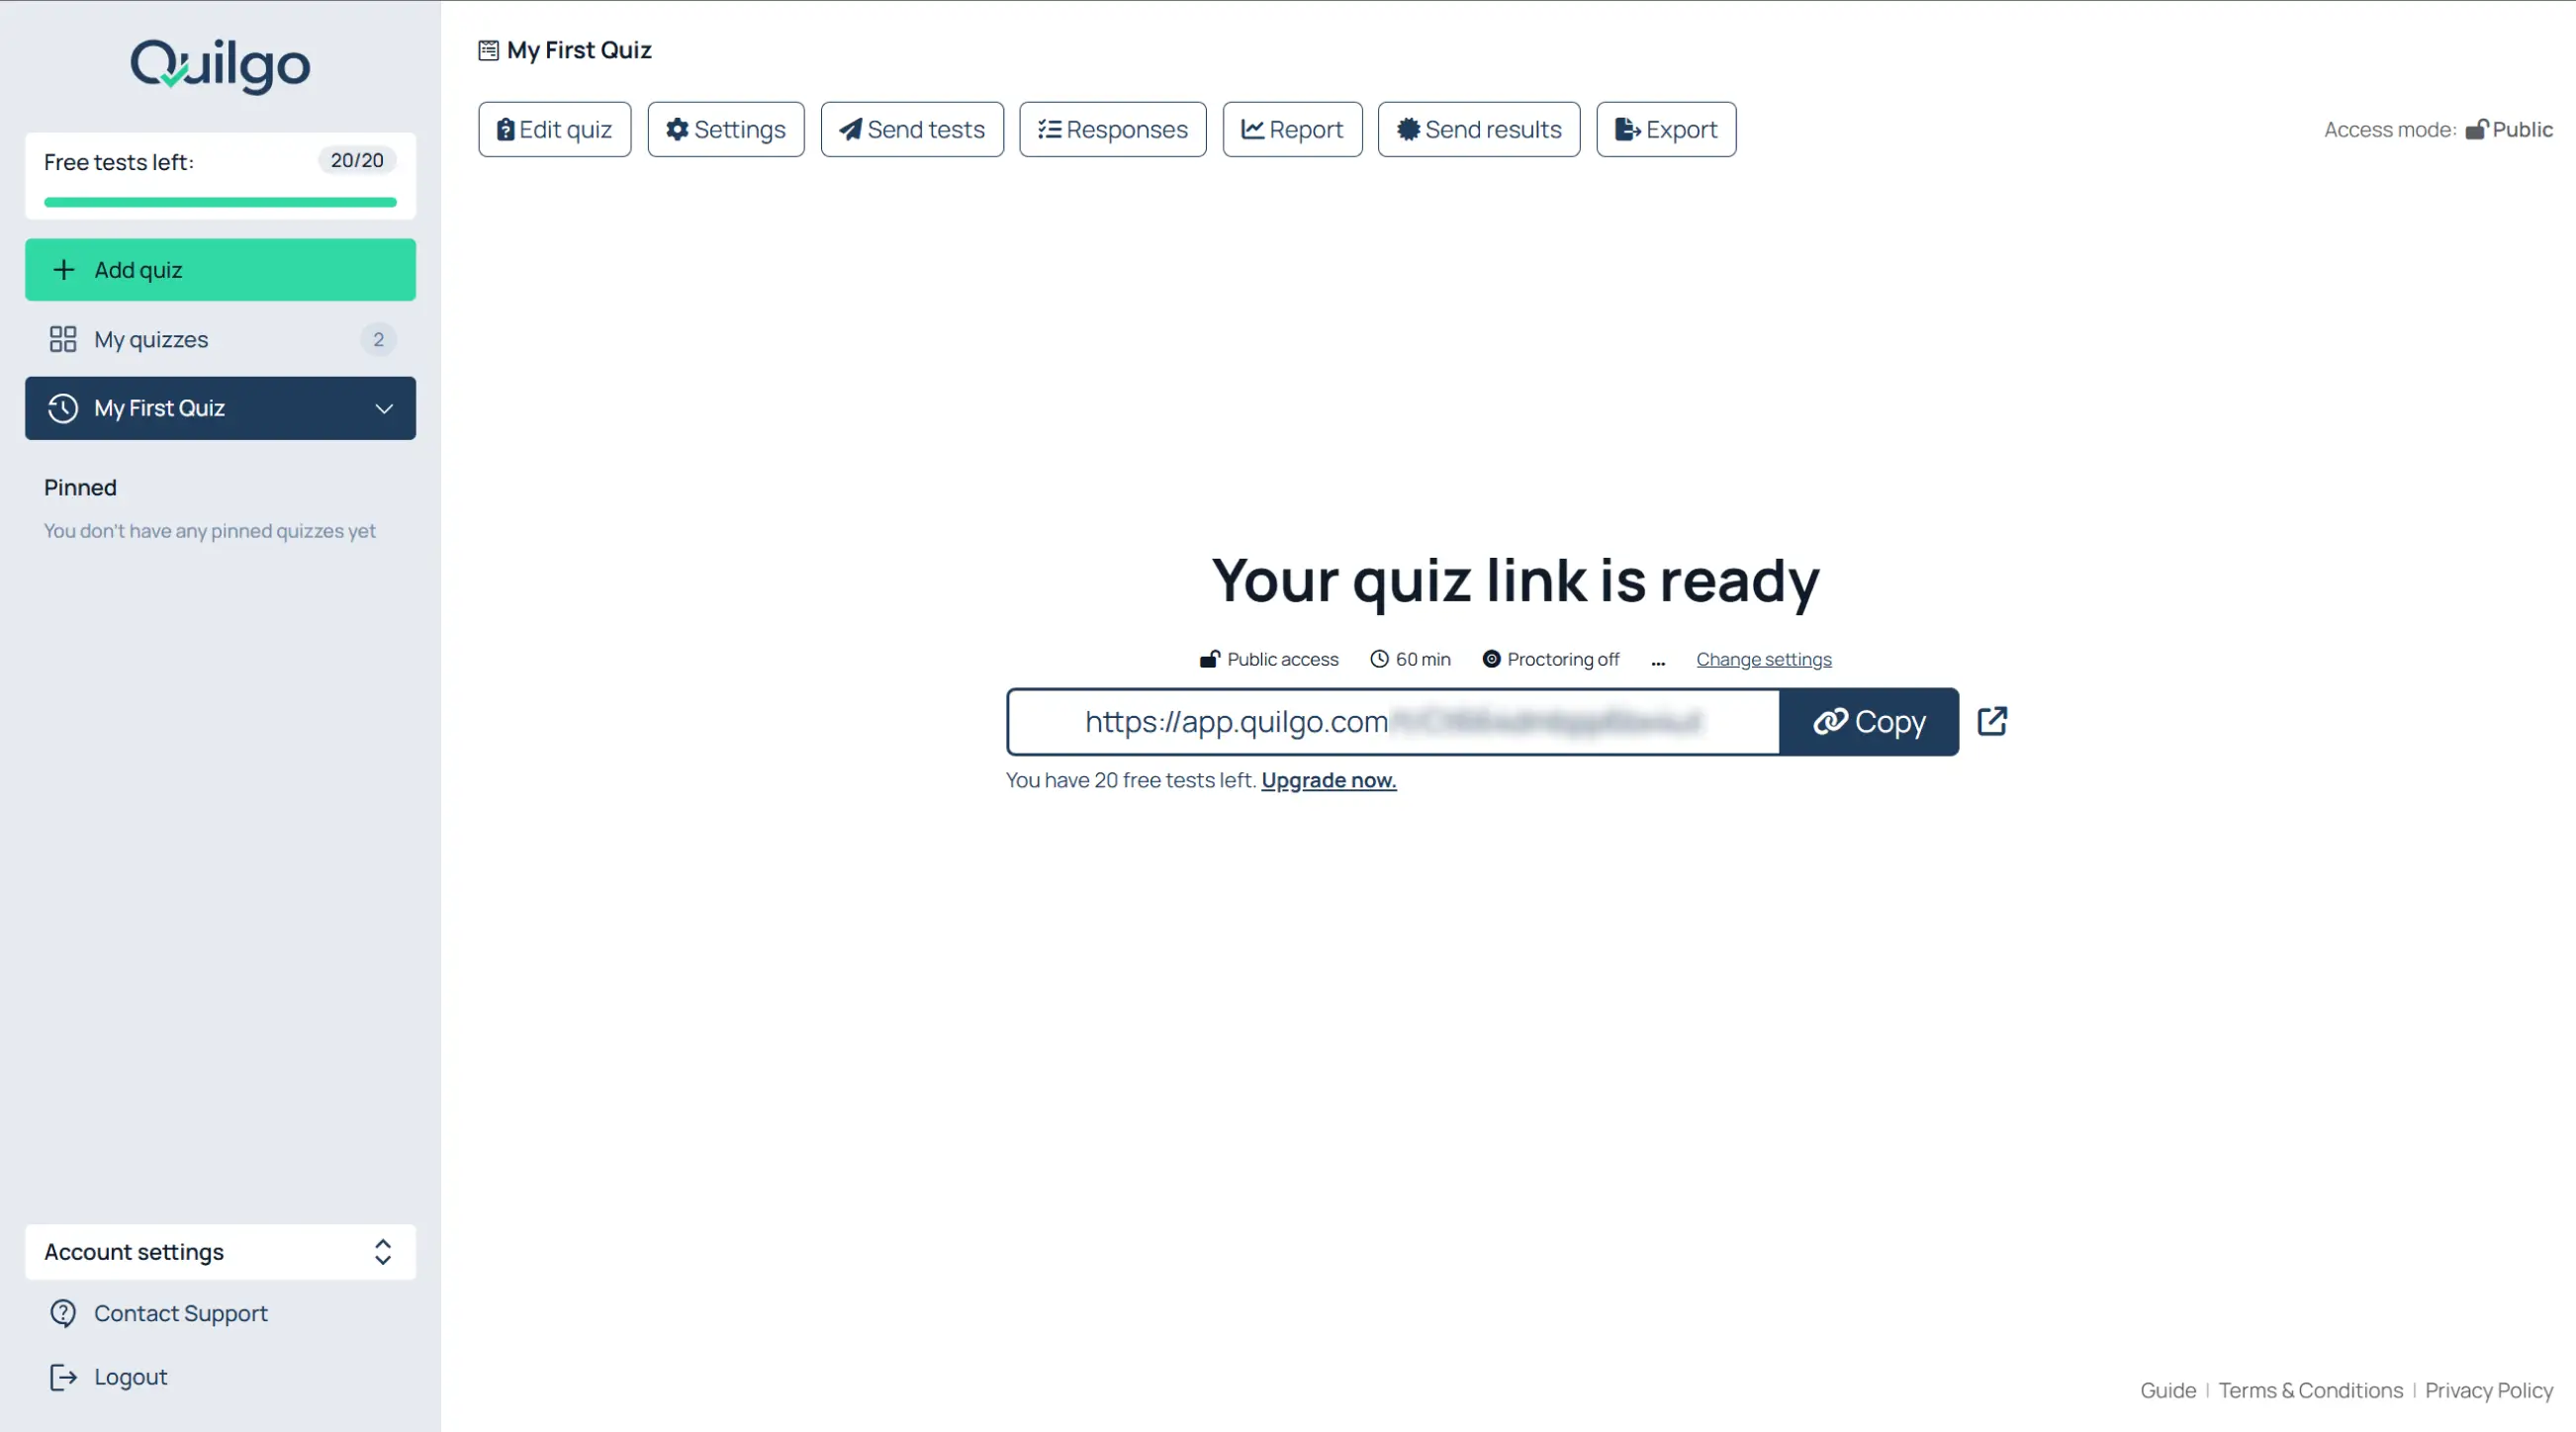
Or click “Change settings” from the link screen.
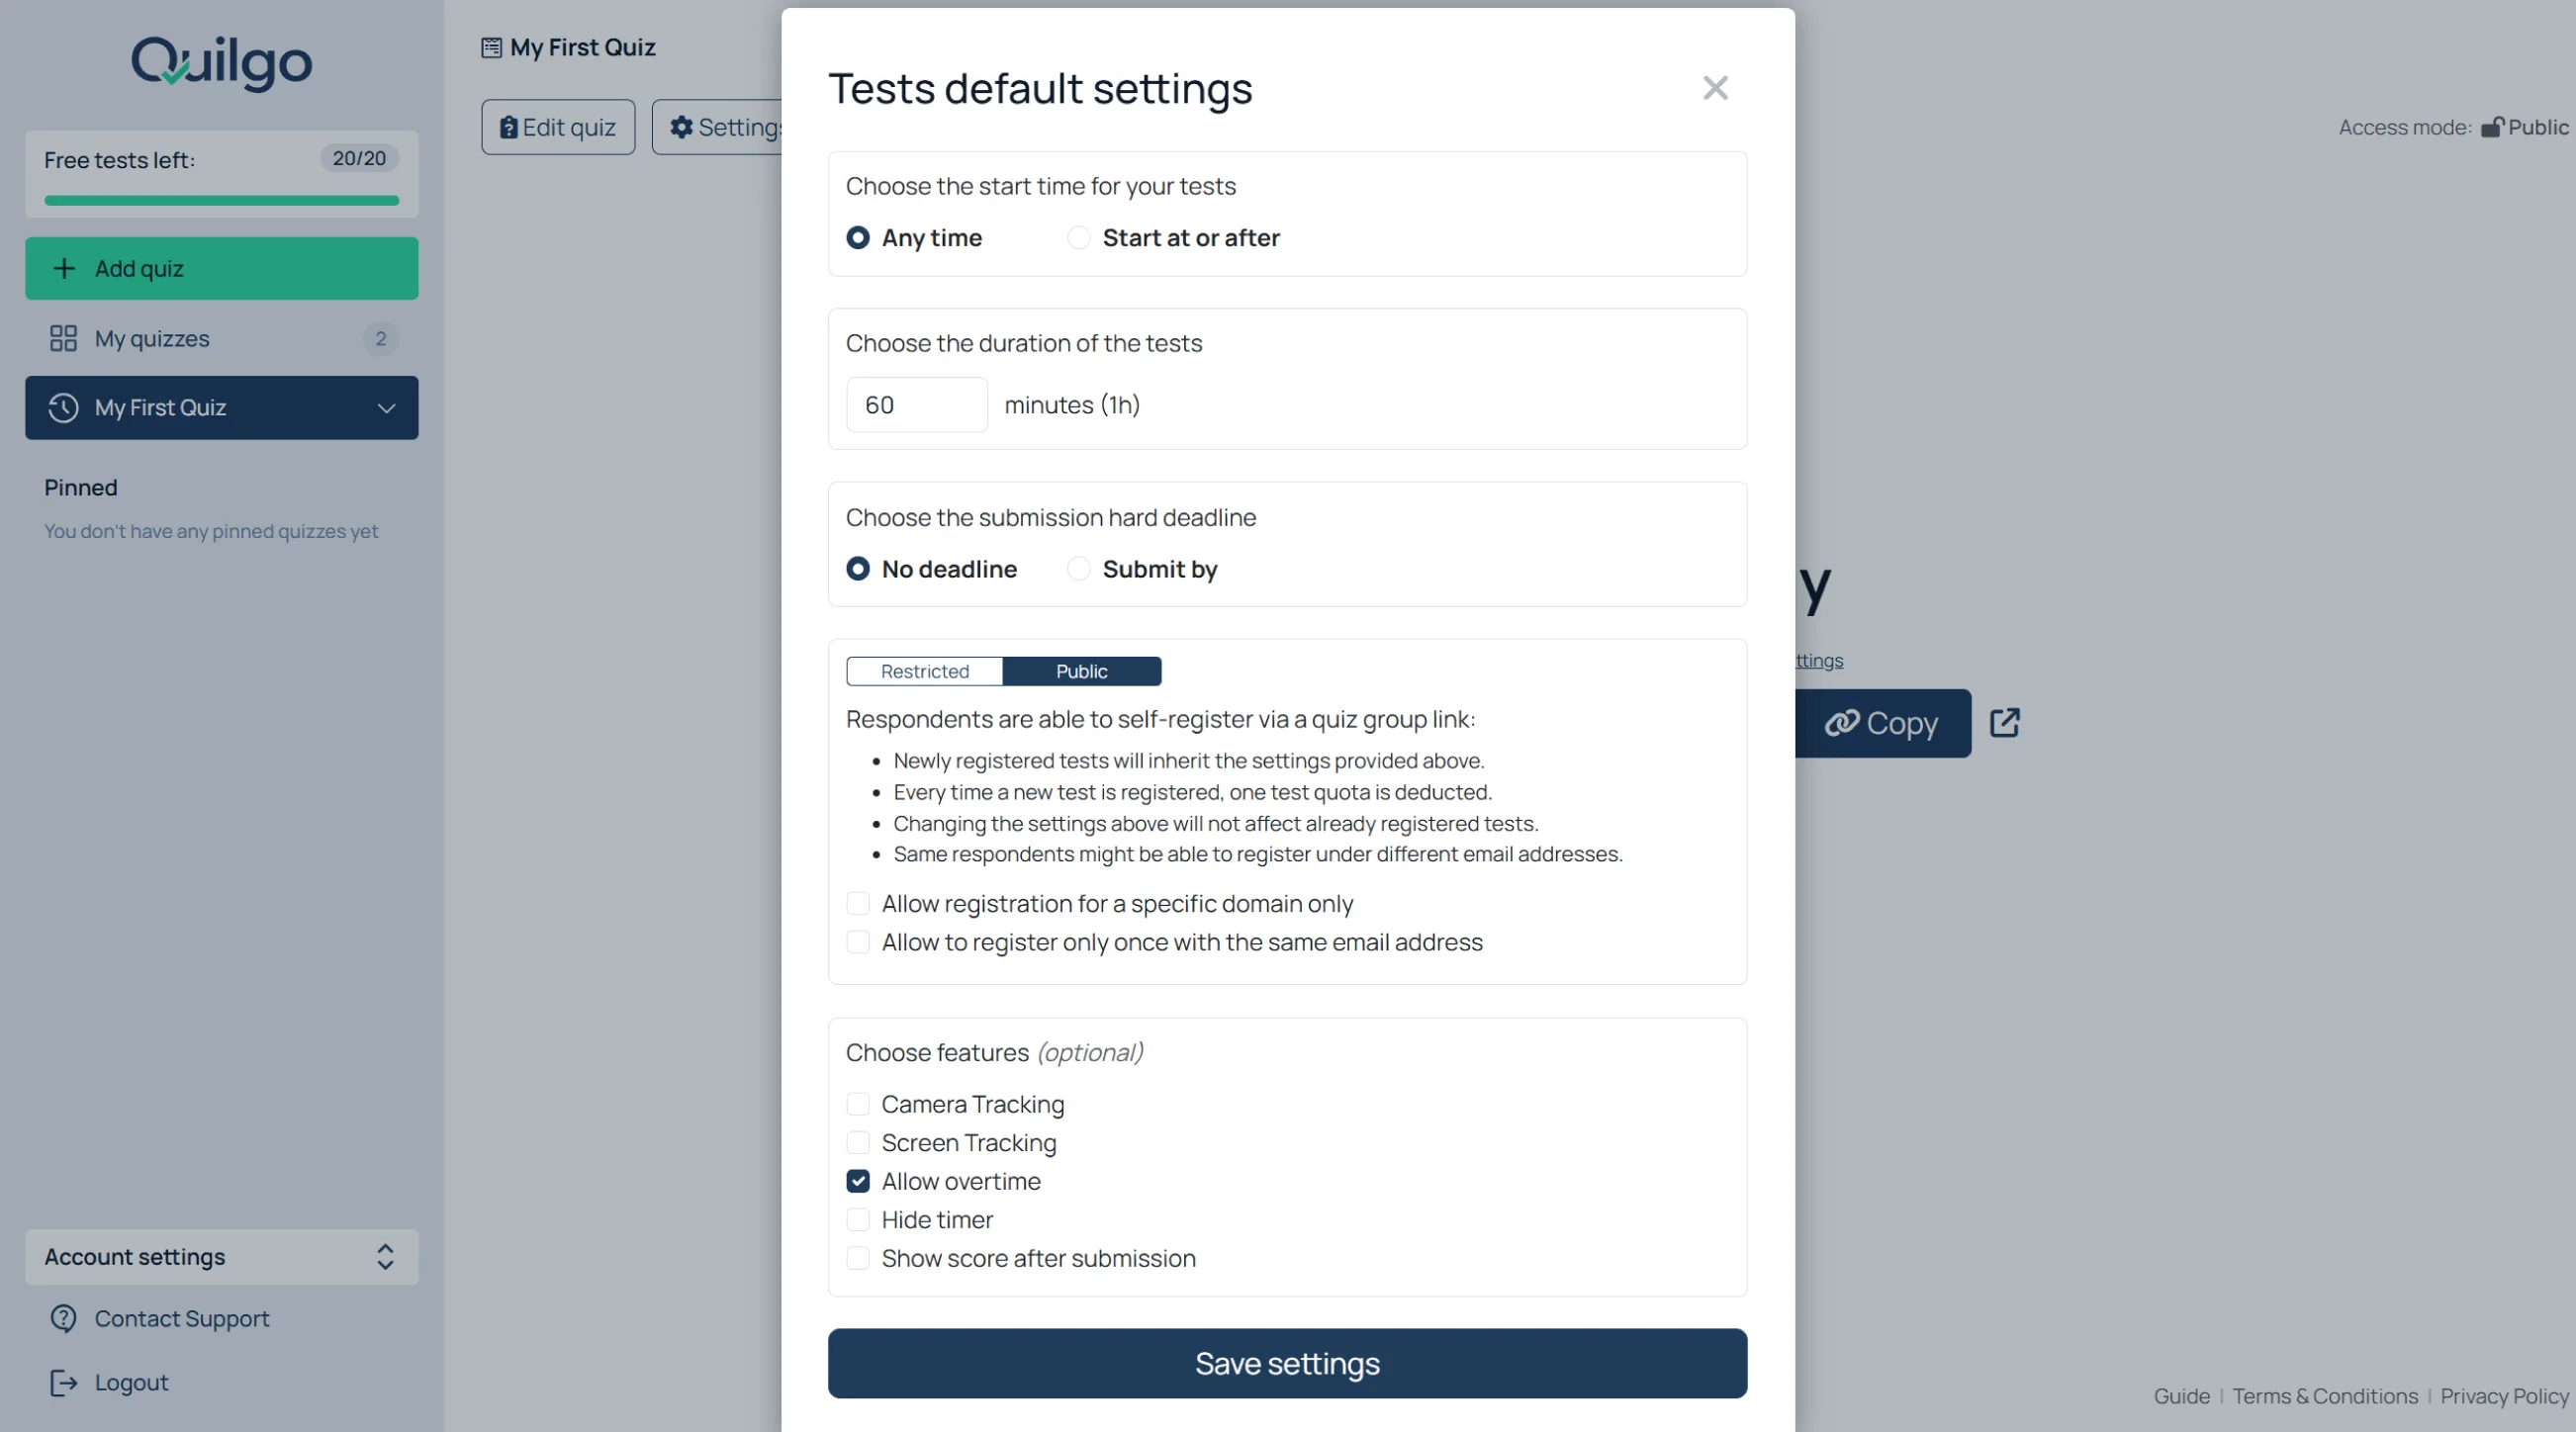
This opens “Tests default settings”.
Configure Timing
Set the start time
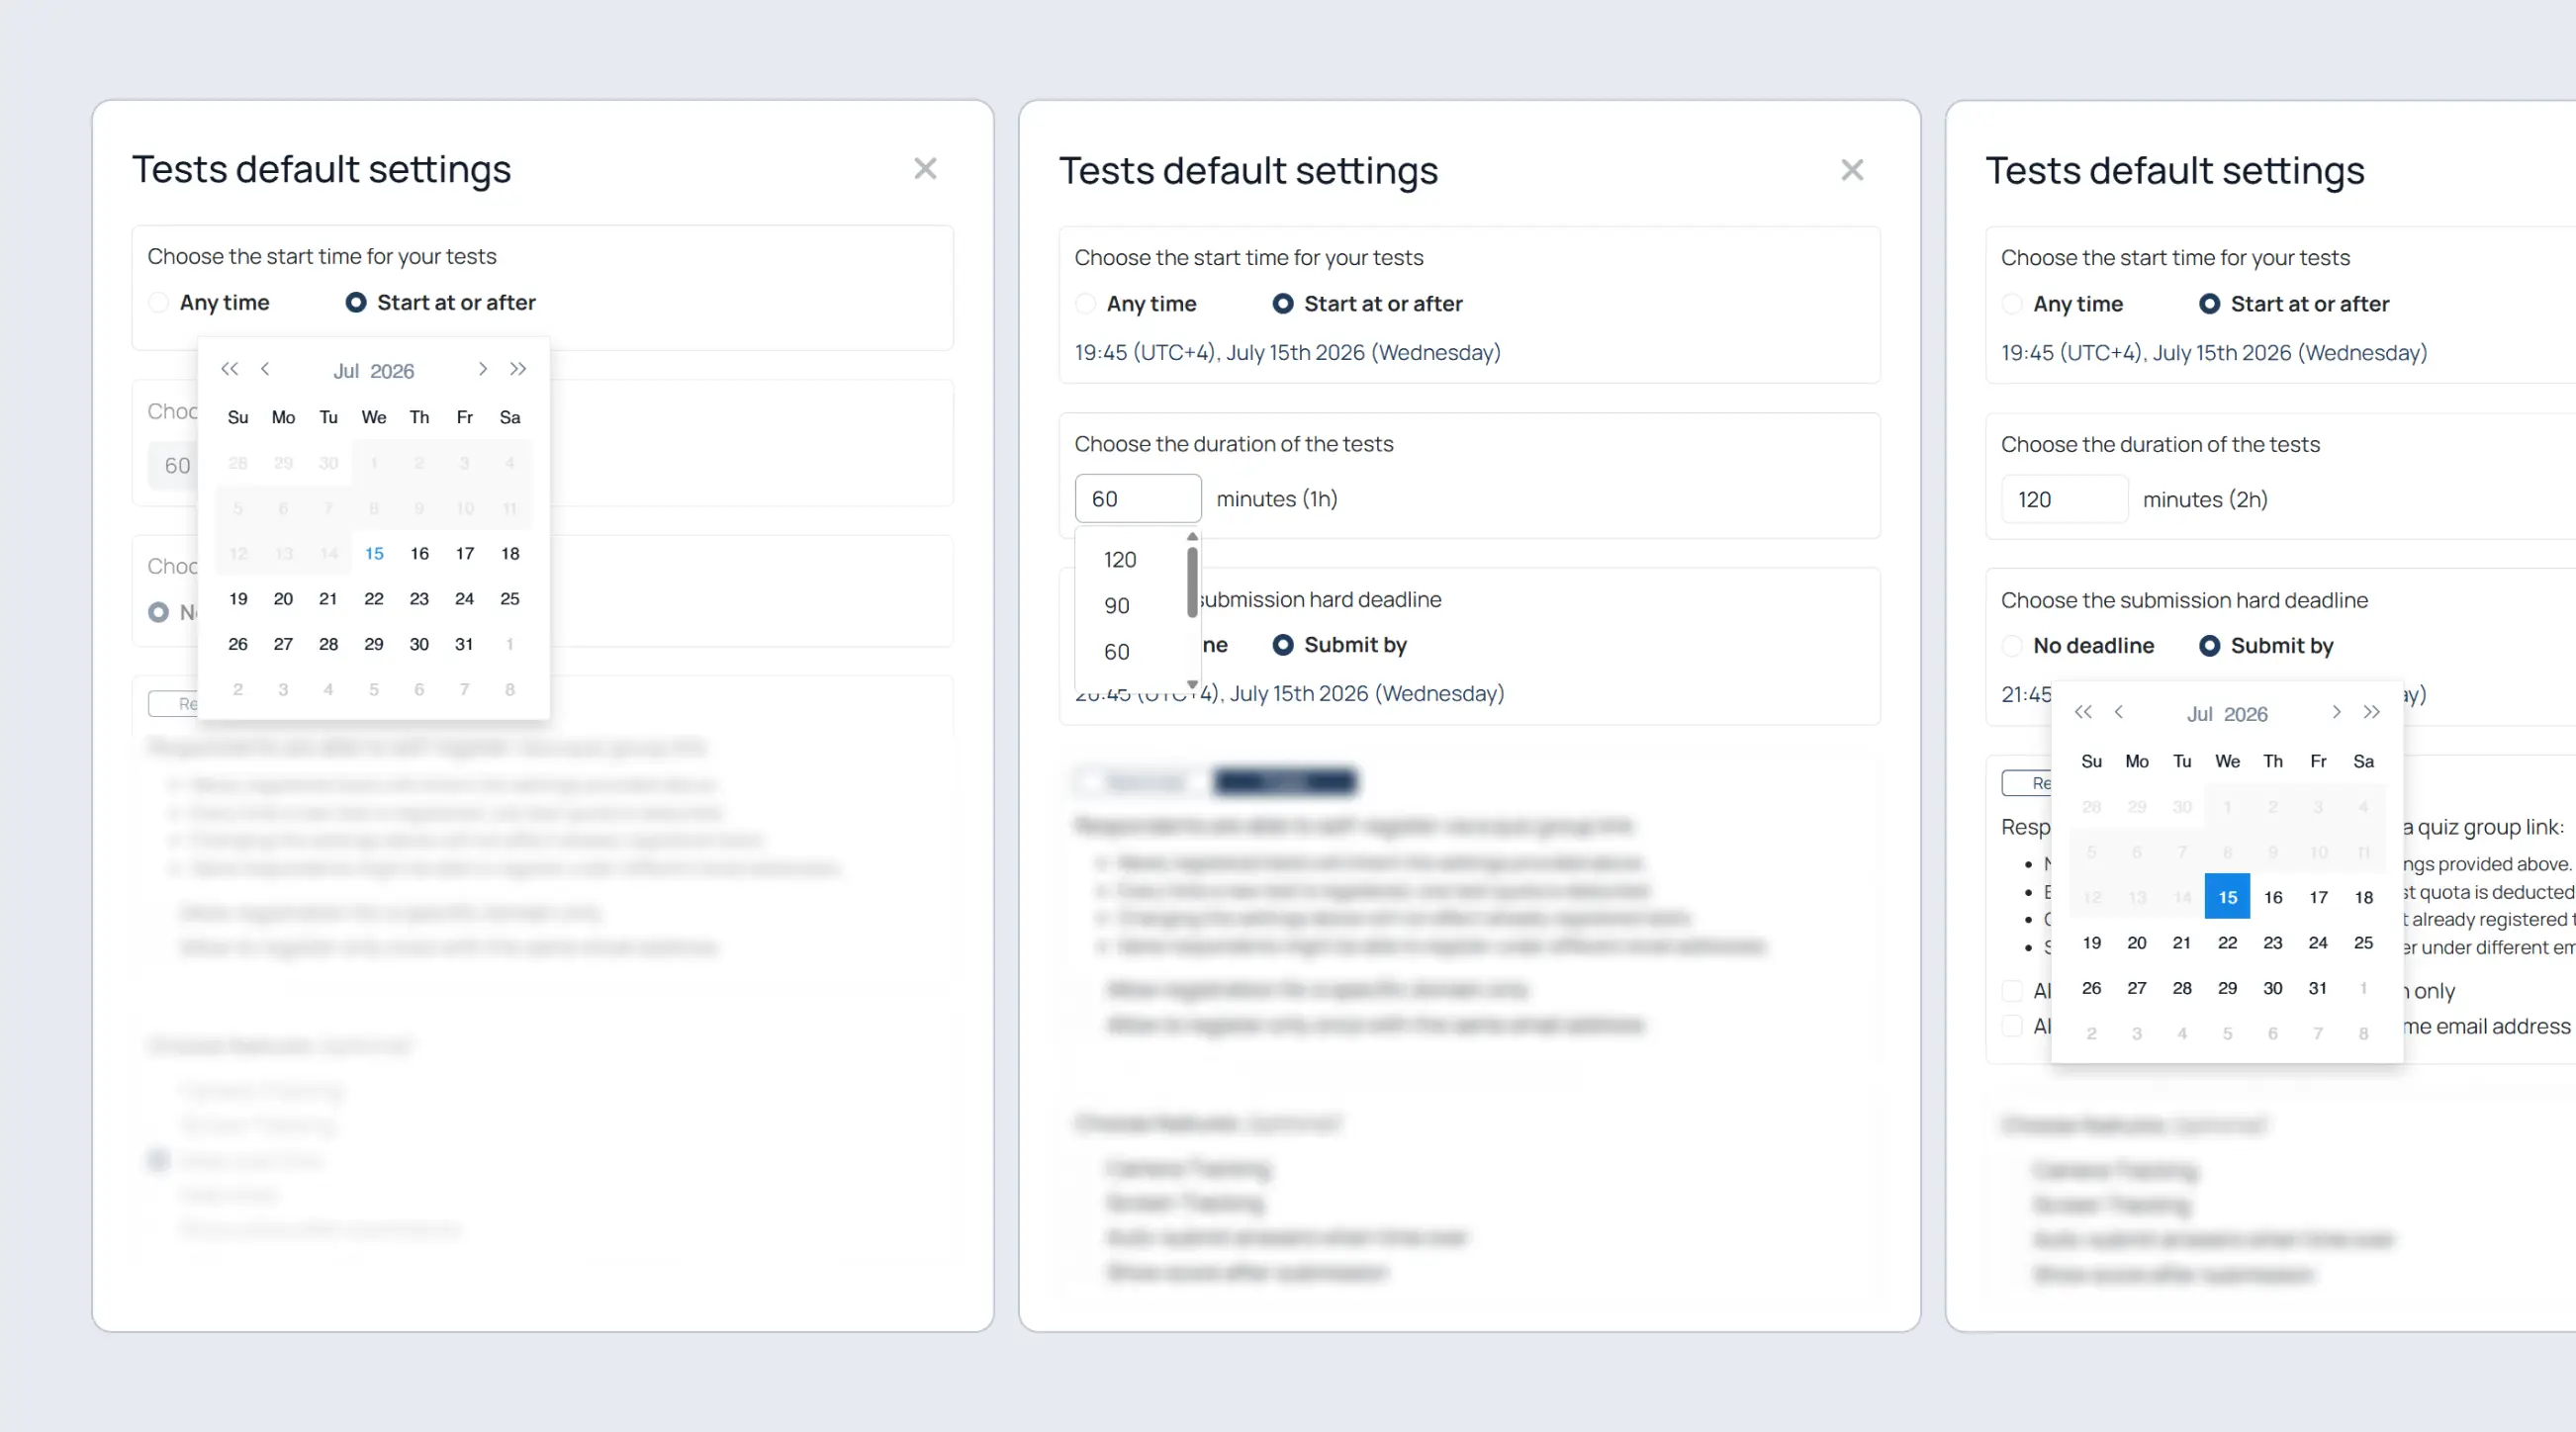
Find “Choose the start time for your tests”;
Select “Any time” or “Start at or after”;
Choose the date and time if scheduling is enabled.
Set the duration
Find “Choose the duration of the tests”;
Enter the number of minutes.
Set the hard deadline
Find “Choose the submission hard deadline”;
Select “No deadline” or “Submit by”;
Choose the date and time.
Configure Access Modes
Use Public Mode
Public mode is designed for self-registration workflows. Instead of manually creating respondents one by one, you can distribute one shared link and let respondents register themselves.
Public mode allows respondents to self-register using a shared link.
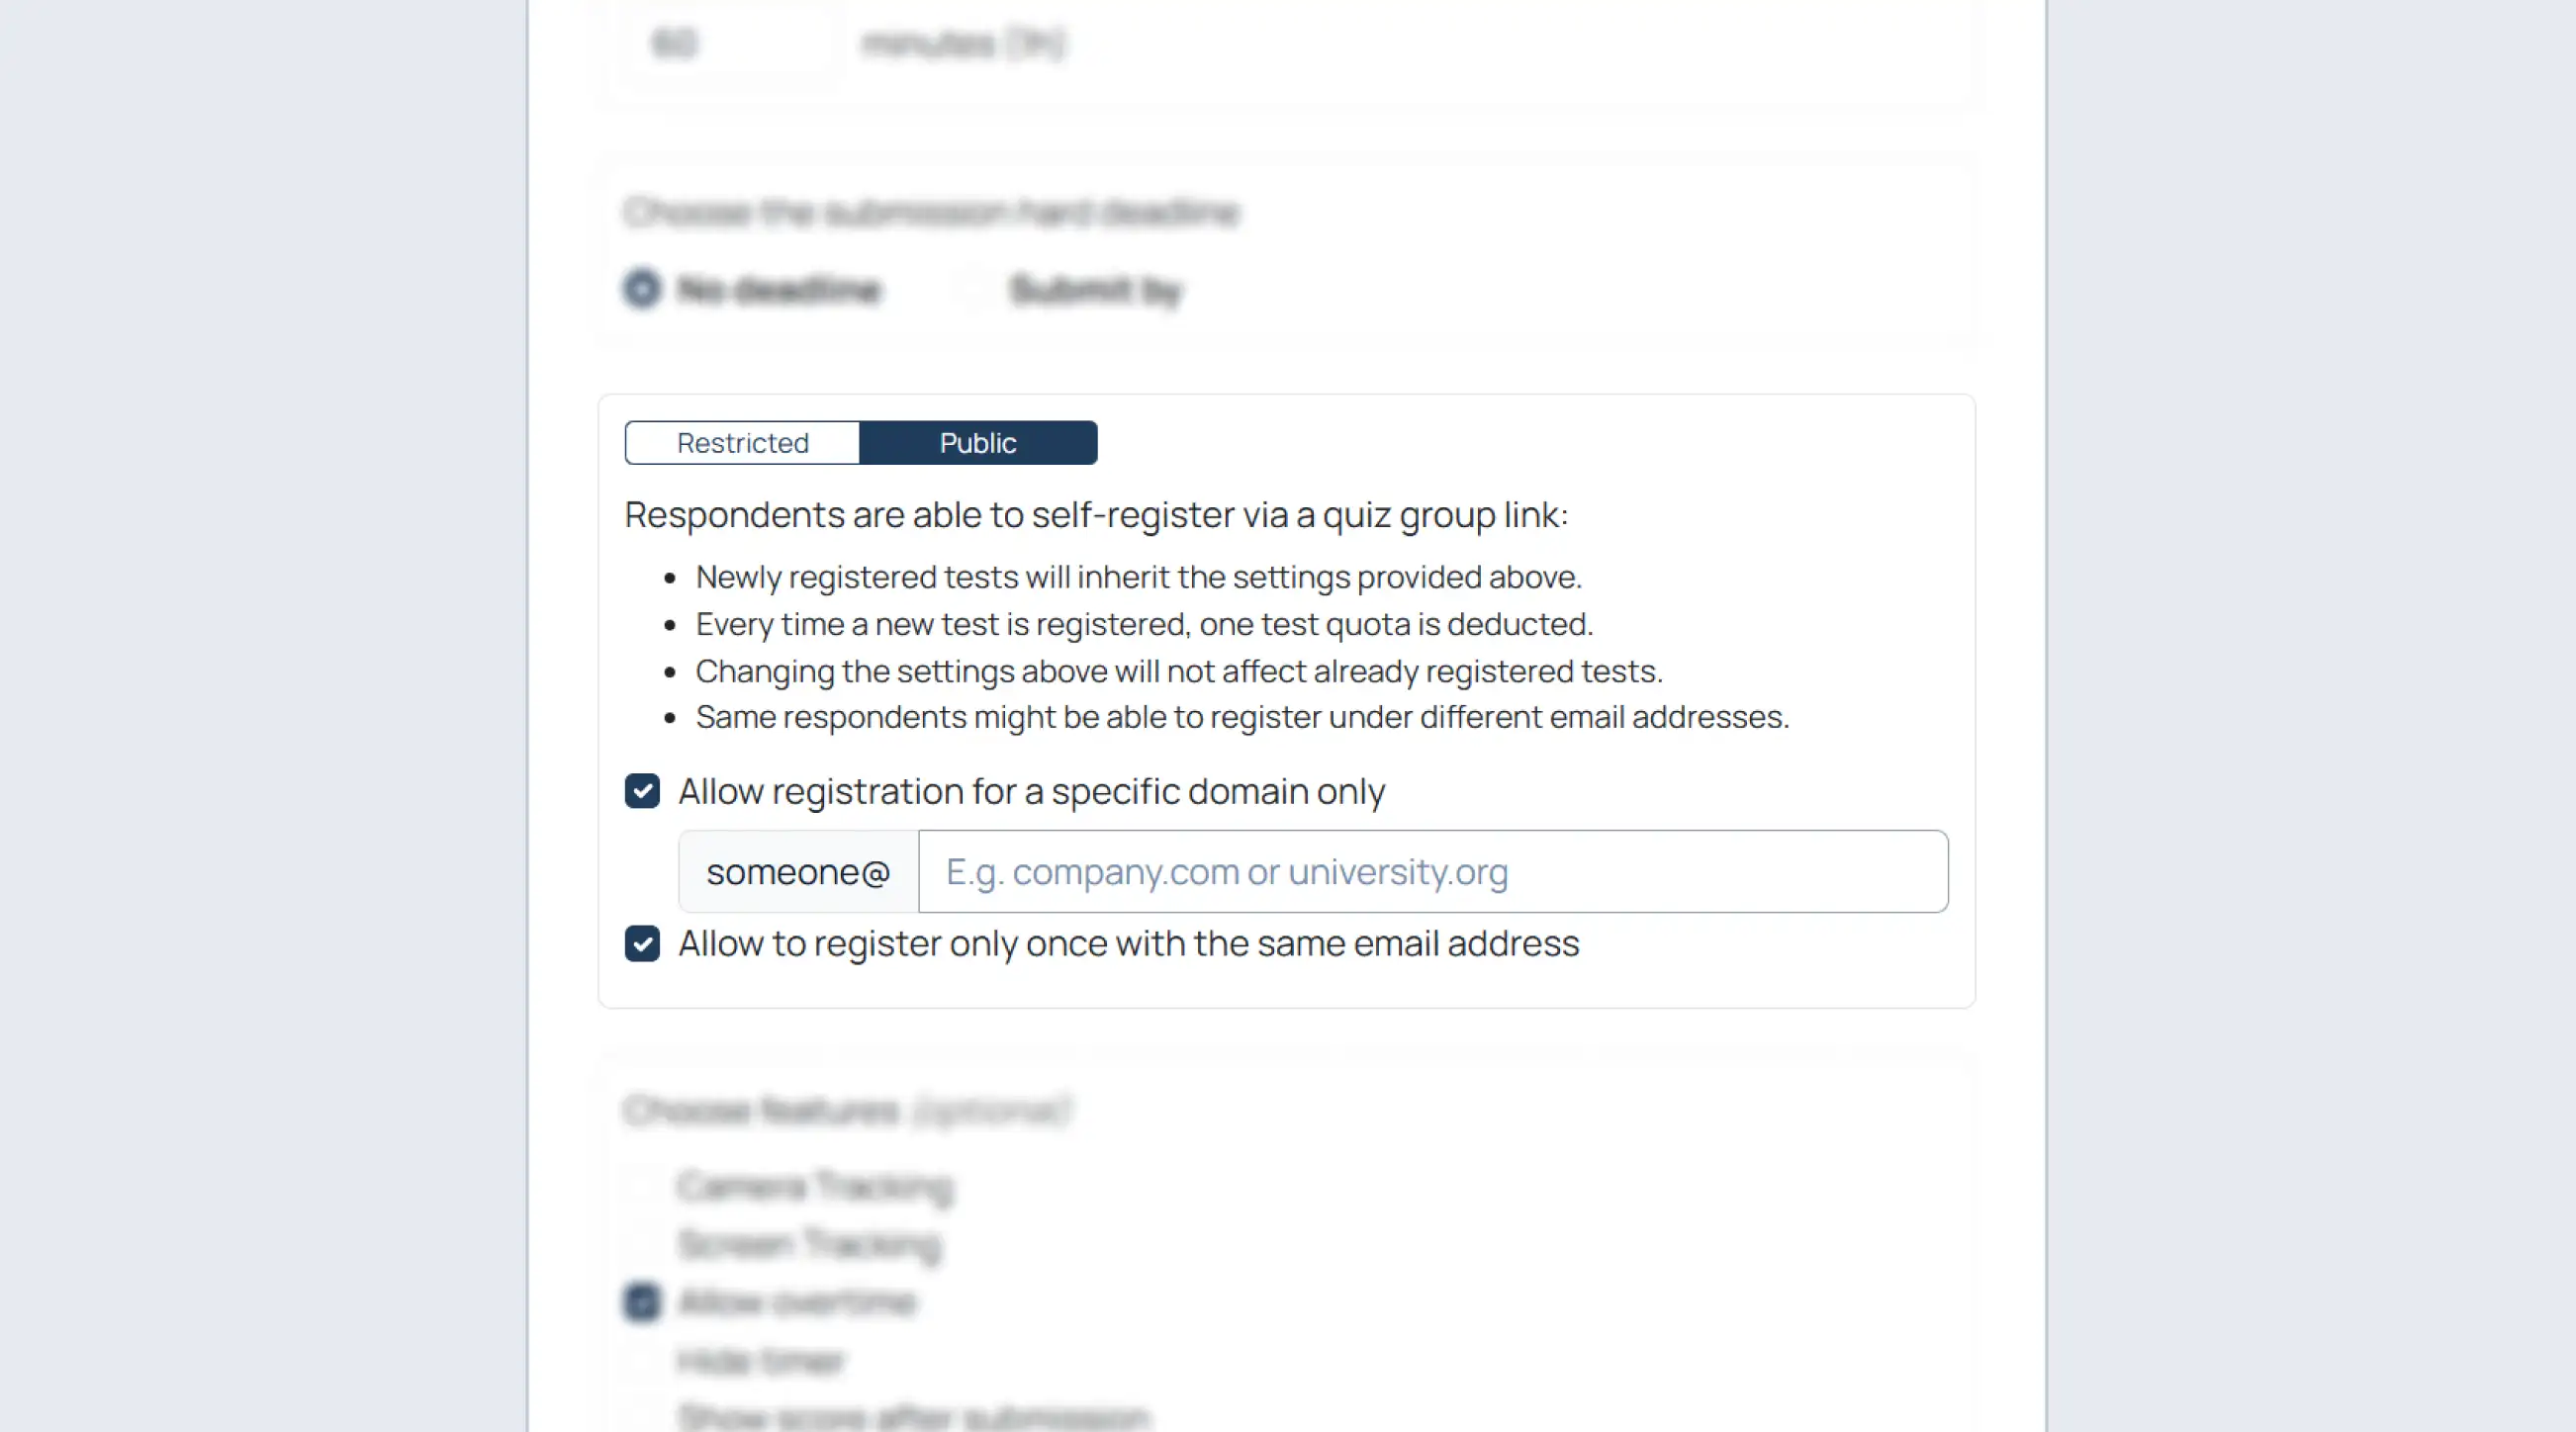
Restrict registrations to one domain
Domain restriction limits registrations to specific email domains, such as those of schools, universities, or companies. This helps prevent external users from registering for private assessments.
Enable “Allow registration for a specific domain only”;
Enter the allowed domain.
Allow one registration per email
This setting prevents respondents from repeatedly registering with the same email address. It is especially useful for graded quizzes, certifications, and controlled assessments.
Enable “Allow to register only once with the same email address”.
Use both restrictions together
Use both settings for stricter classroom or university workflows.
Use Restricted Mode
Restricted mode is designed for controlled assessments where you already know exactly who should take the test. Instead of self-registration, respondents receive individually assigned tests.
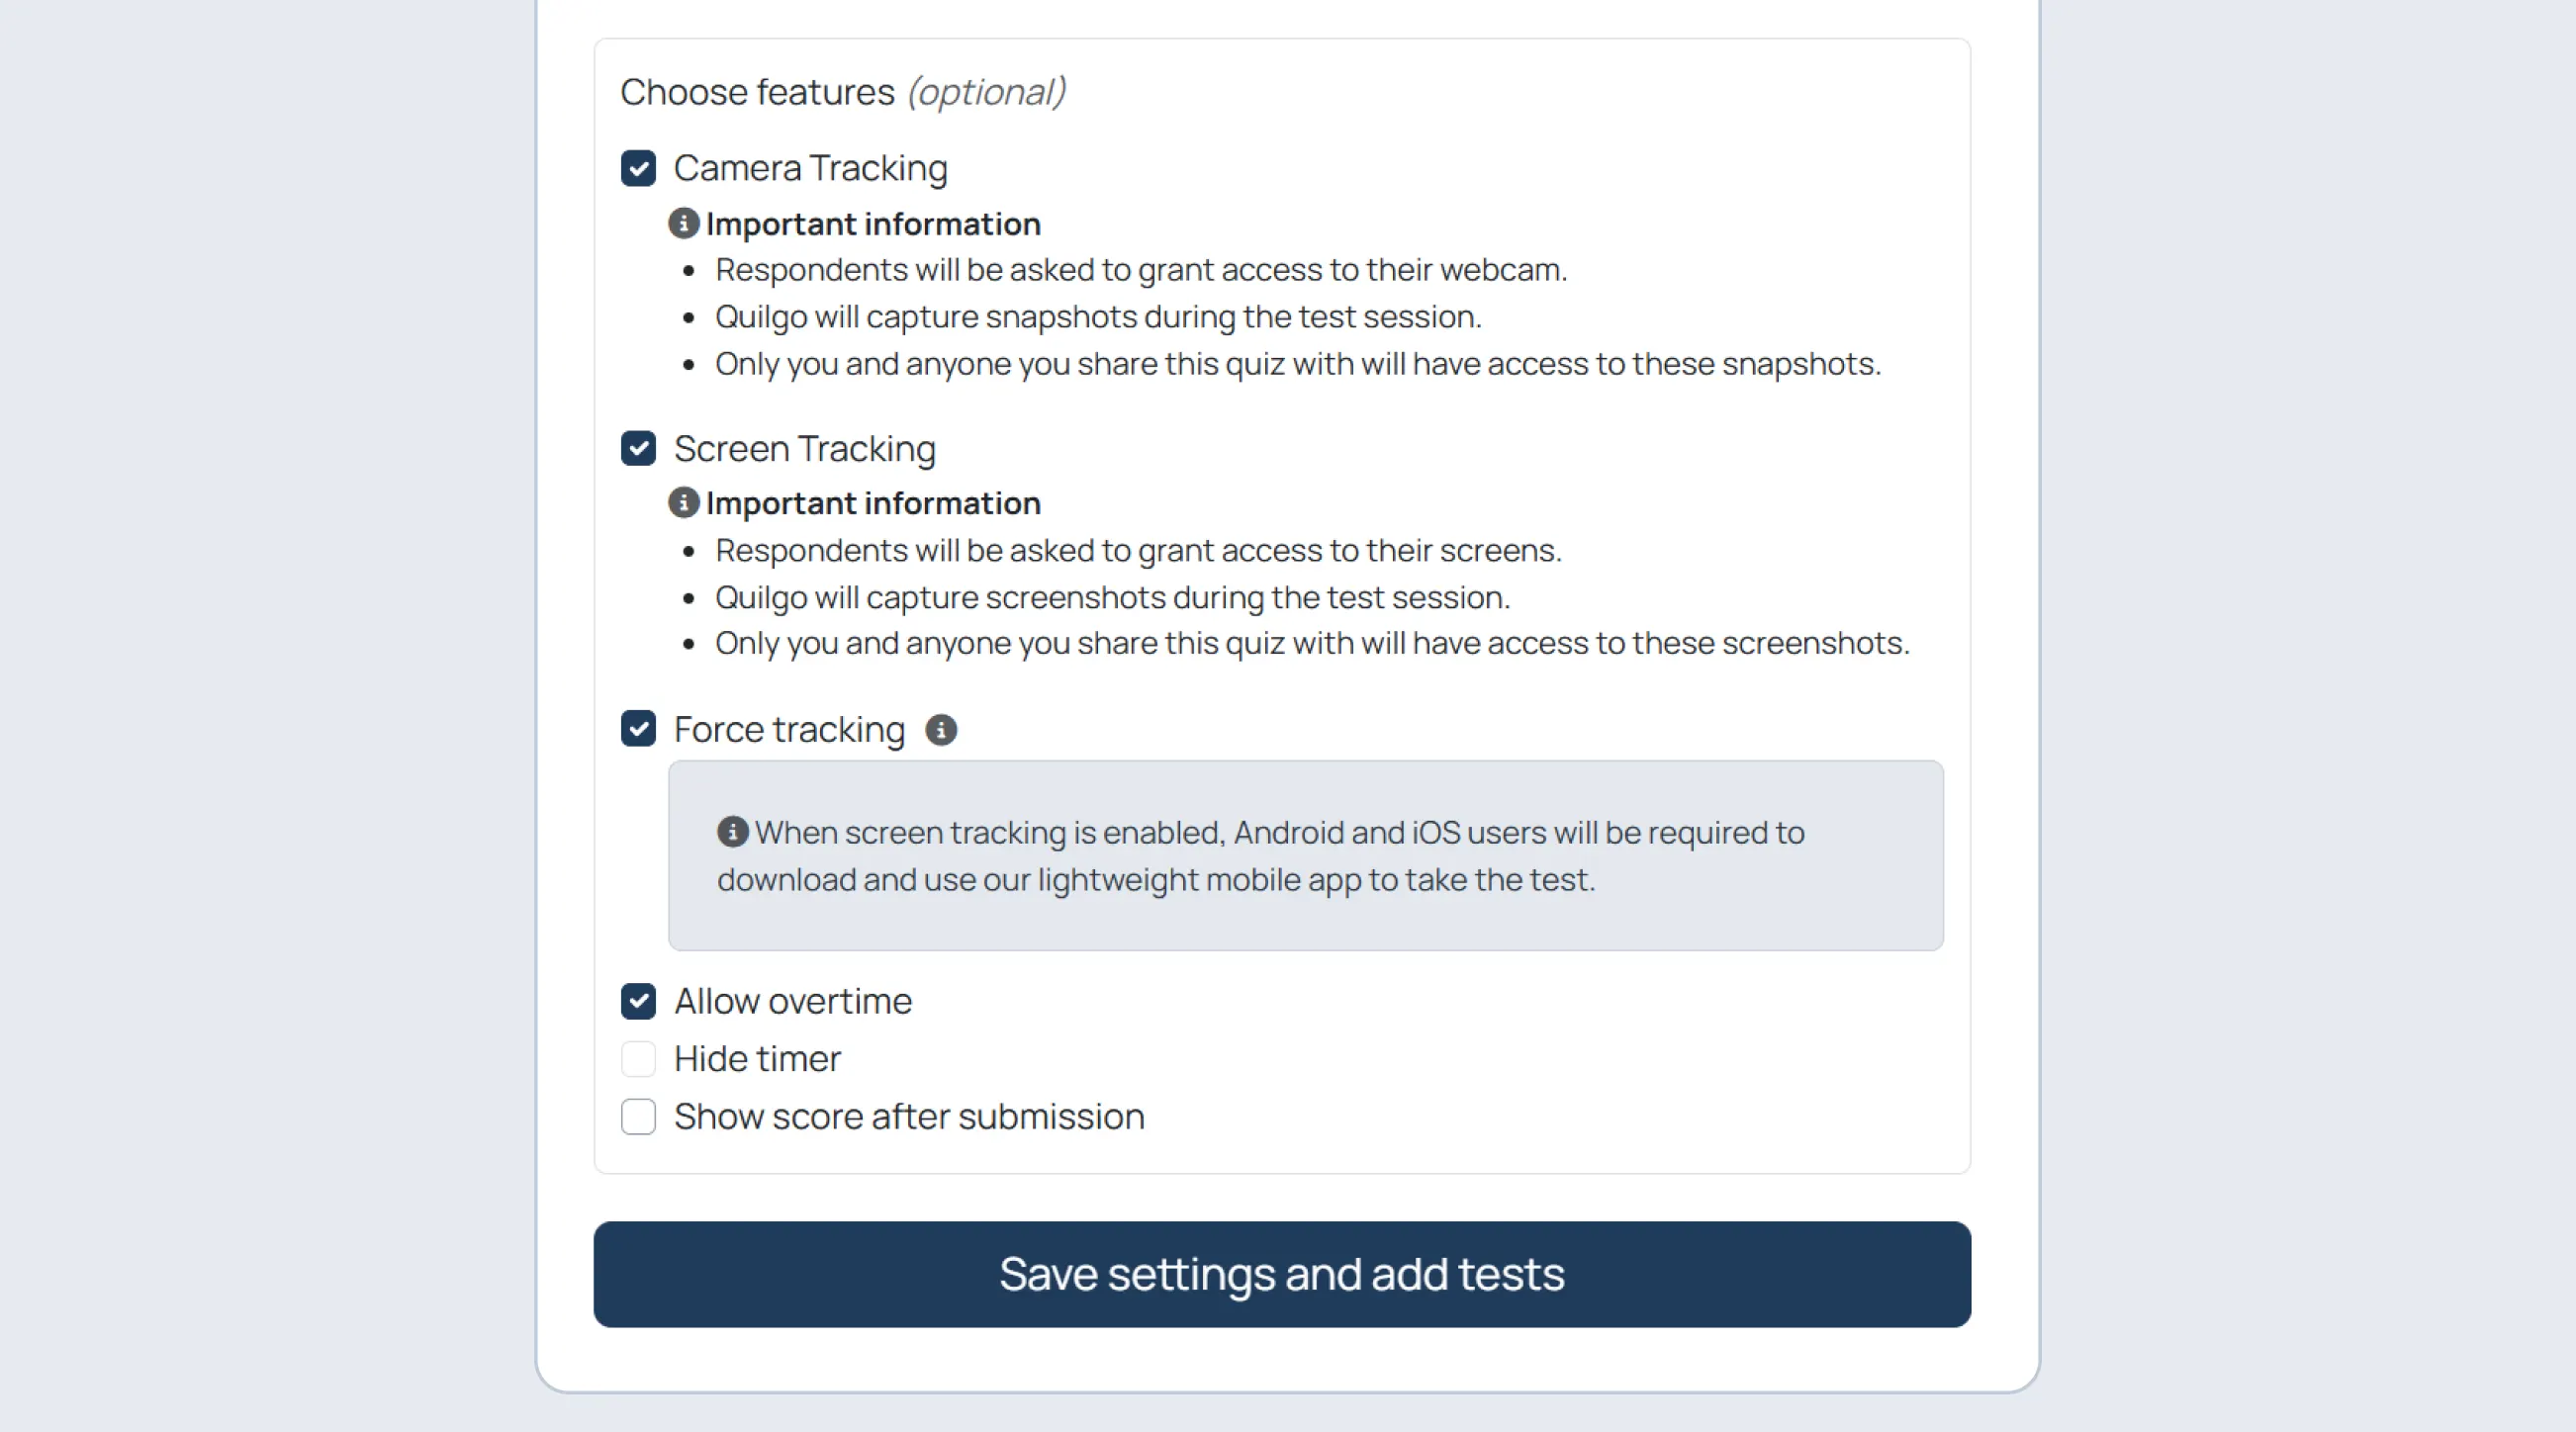
Camera Tracking adds webcam monitoring to the assessment workflow. Quilgo captures snapshots during the session and includes them in reports for later review.
Enable “Camera Tracking”.
Enable Screen Tracking
Screen Tracking captures snapshots of the respondent’s shared screen during the assessment. Use it when you need stronger evidence of integrity or want to review on-screen activity during the test.
Enable “Screen Tracking”.
Enable Force Tracking
Force Tracking ensures that tracking remains active throughout the test session. This is useful for high-control exams and certification-style assessments.
Enable “Force tracking”.
Configure Overtime and Auto-Submit
Allow overtime
Enable “Allow overtime” if respondents may continue after the timer ends.
Auto-submit answers when time is over
Enable “Auto-submit answers when time over” if Quilgo should submit the test automatically.
Show score after submission
Enable “Show score after submission” if respondents should see their score immediately after submission.
Save settings
Click “Save settings”.
Send and Deliver Tests
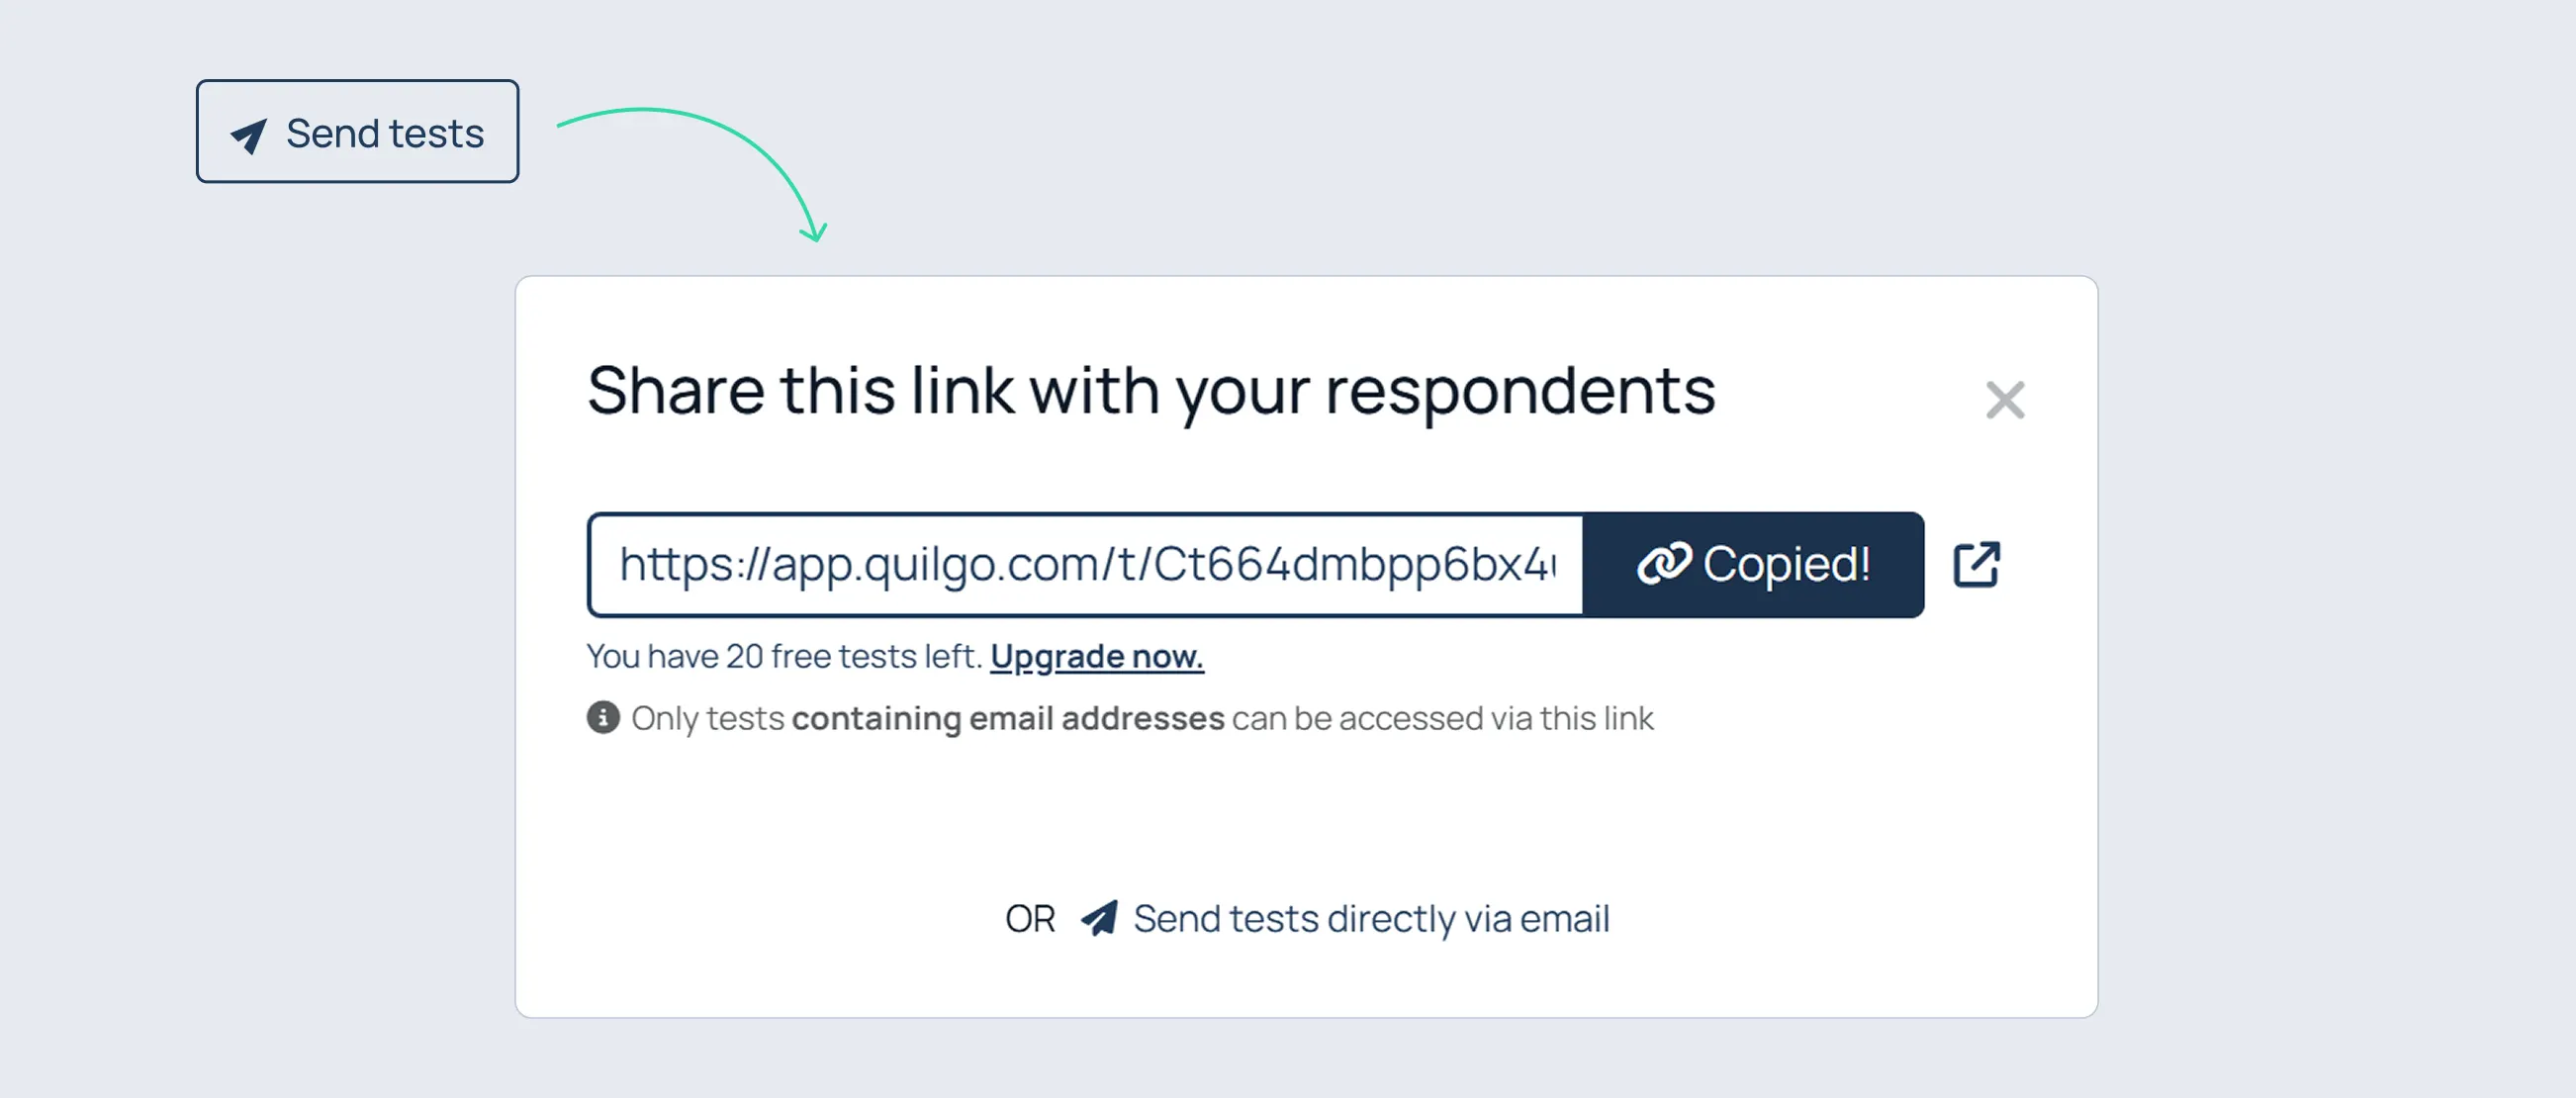
Share the Group Link
The group link is the main entry point respondents use to access the assessment. Its behavior changes depending on whether the quiz uses Public or Restricted mode.
To open the delivery window:
Click “Send tests”.
Public mode behavior
In Public mode, the group link is used for self-registration.
Restricted mode behavior
In Restricted mode, the group link is used for authentication.
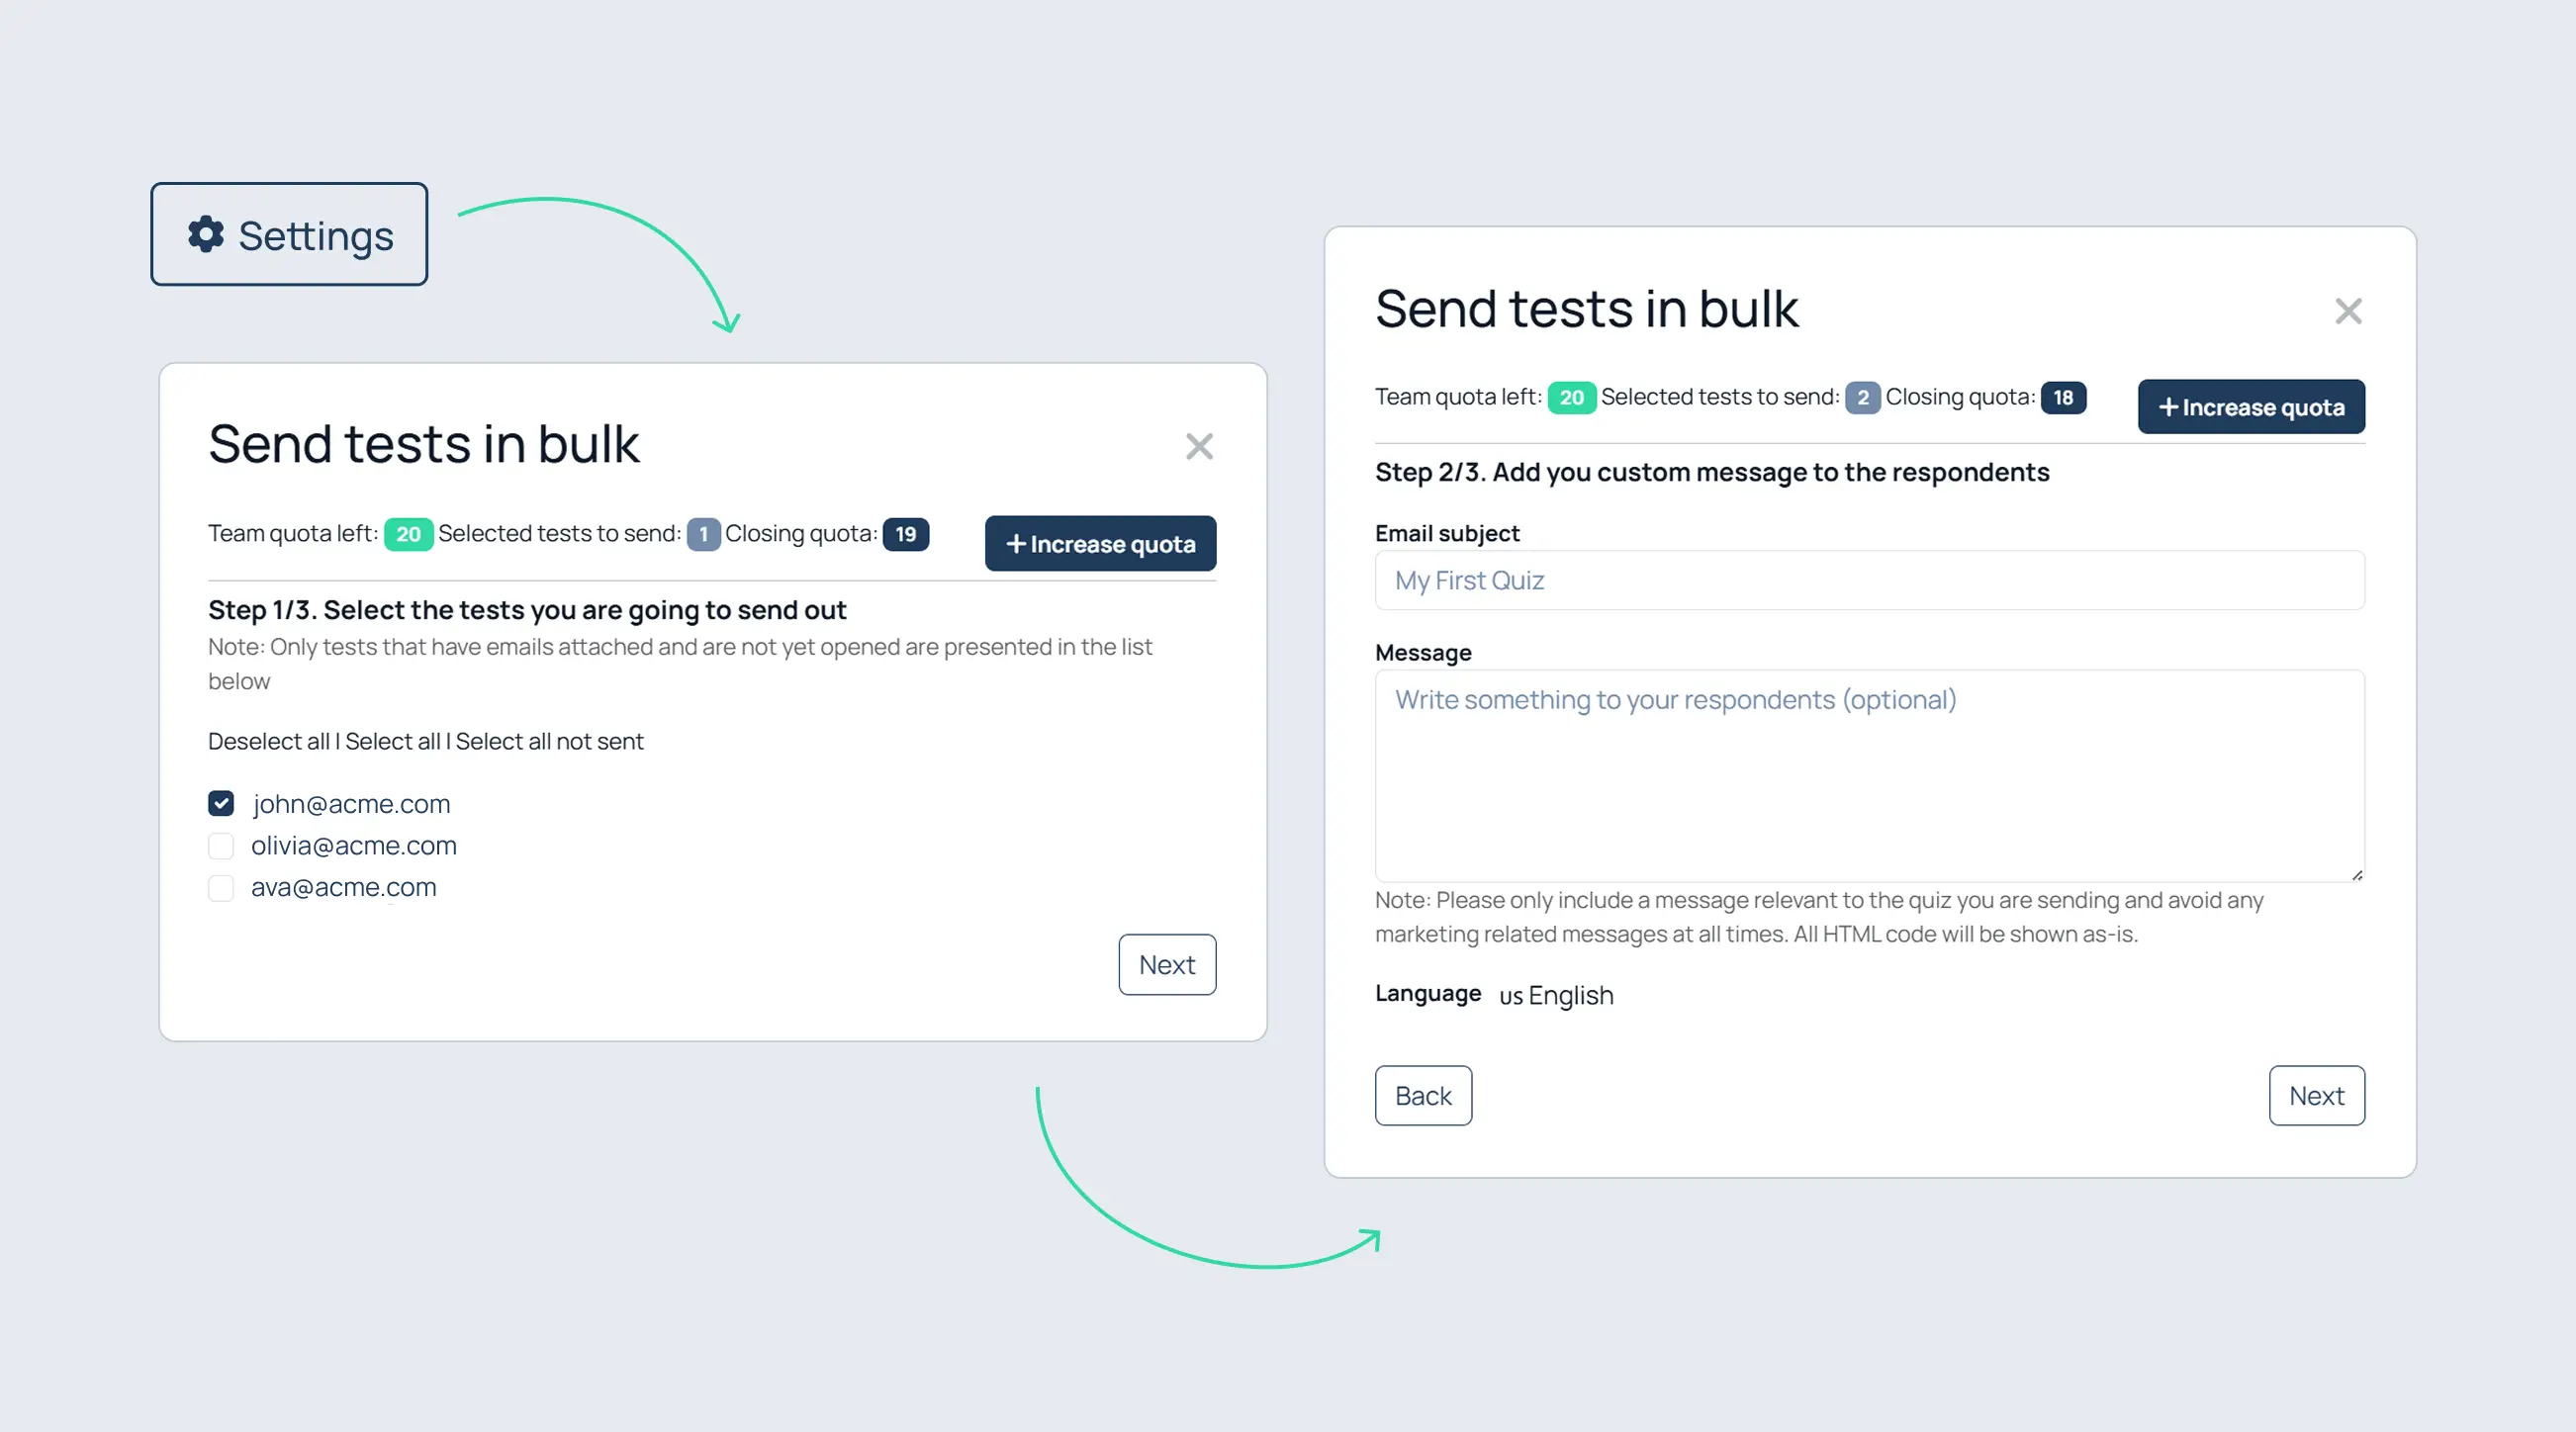
Send Tests by Email
To send invitations:
Click “Send tests”;
Click “Send tests directly via email”.
Select respondents
Select the respondents;
Click “Next”.
Configure the email
Enter the subject;
Optionally enter a message;
Choose the language;
Click “Next”.
Review and send
Review the settings;
Optionally click “Send a test email”;
Click “Send tests”.
Respondent Experience
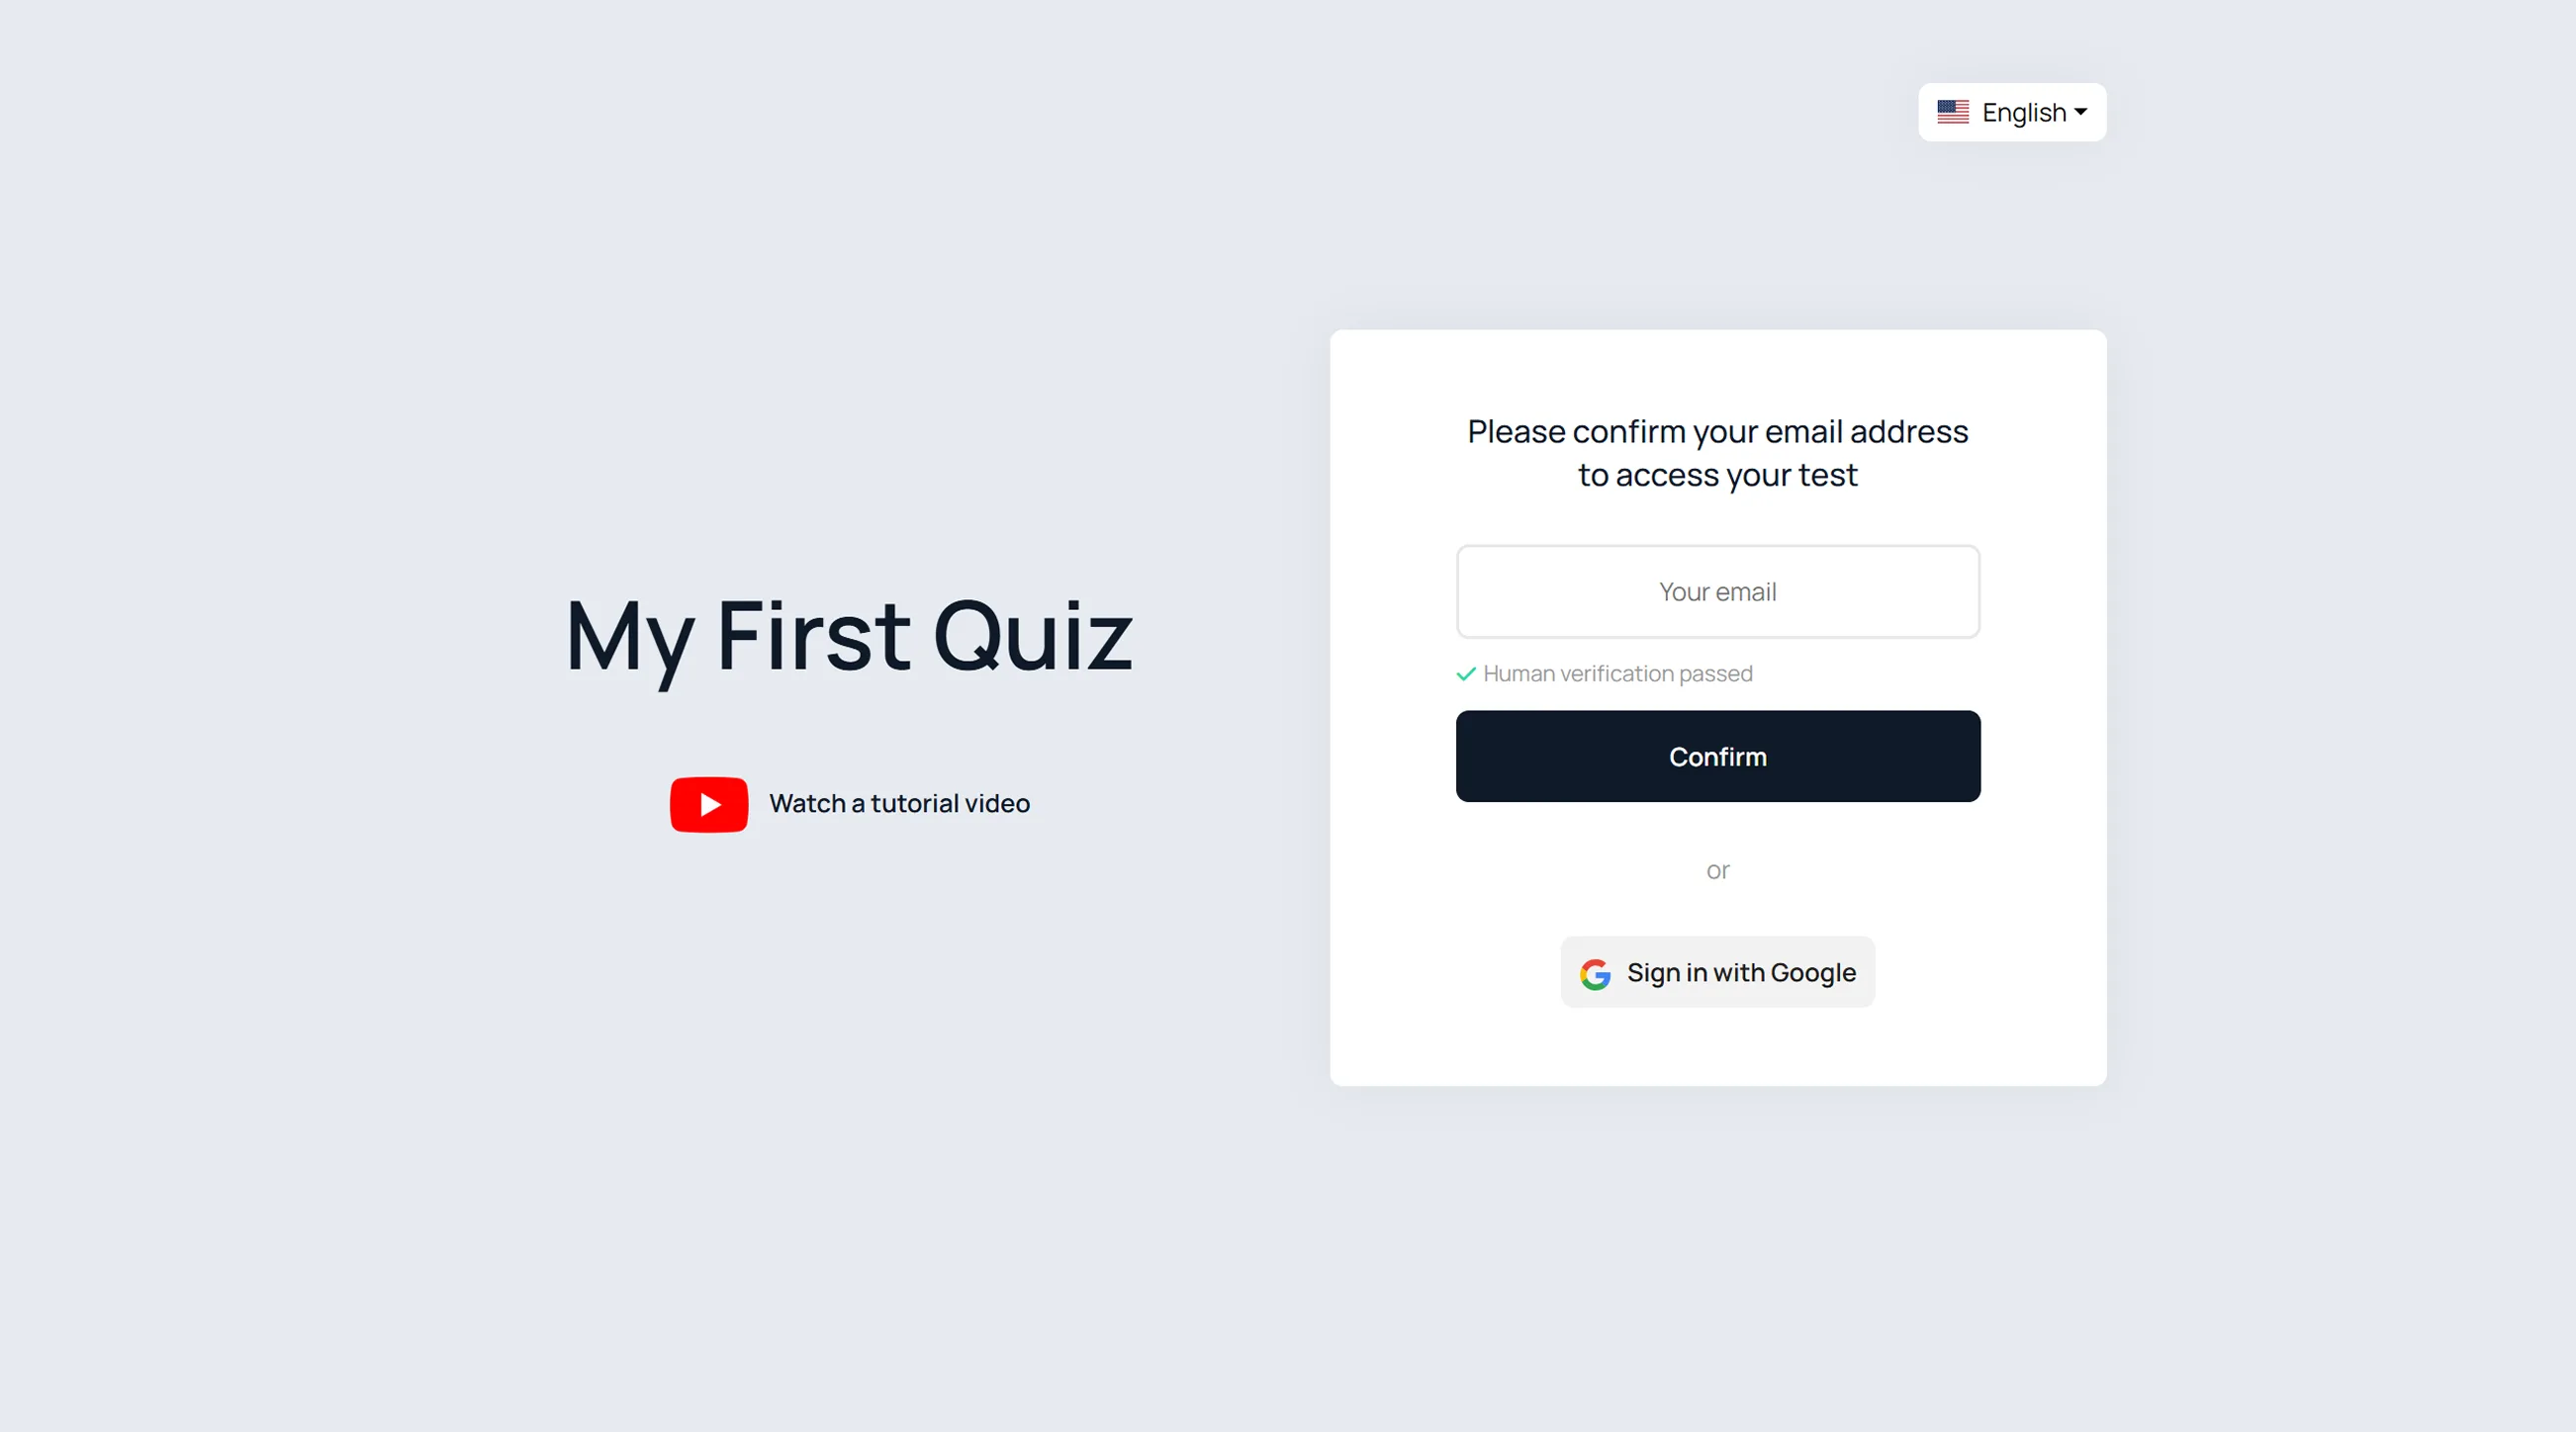
Open the Group Link
Respondents may:
Enter their email;
Click “Confirm”;
Or click “Sign in with Google”.
Start the Test
After authentication:
Review the timing and instructions;
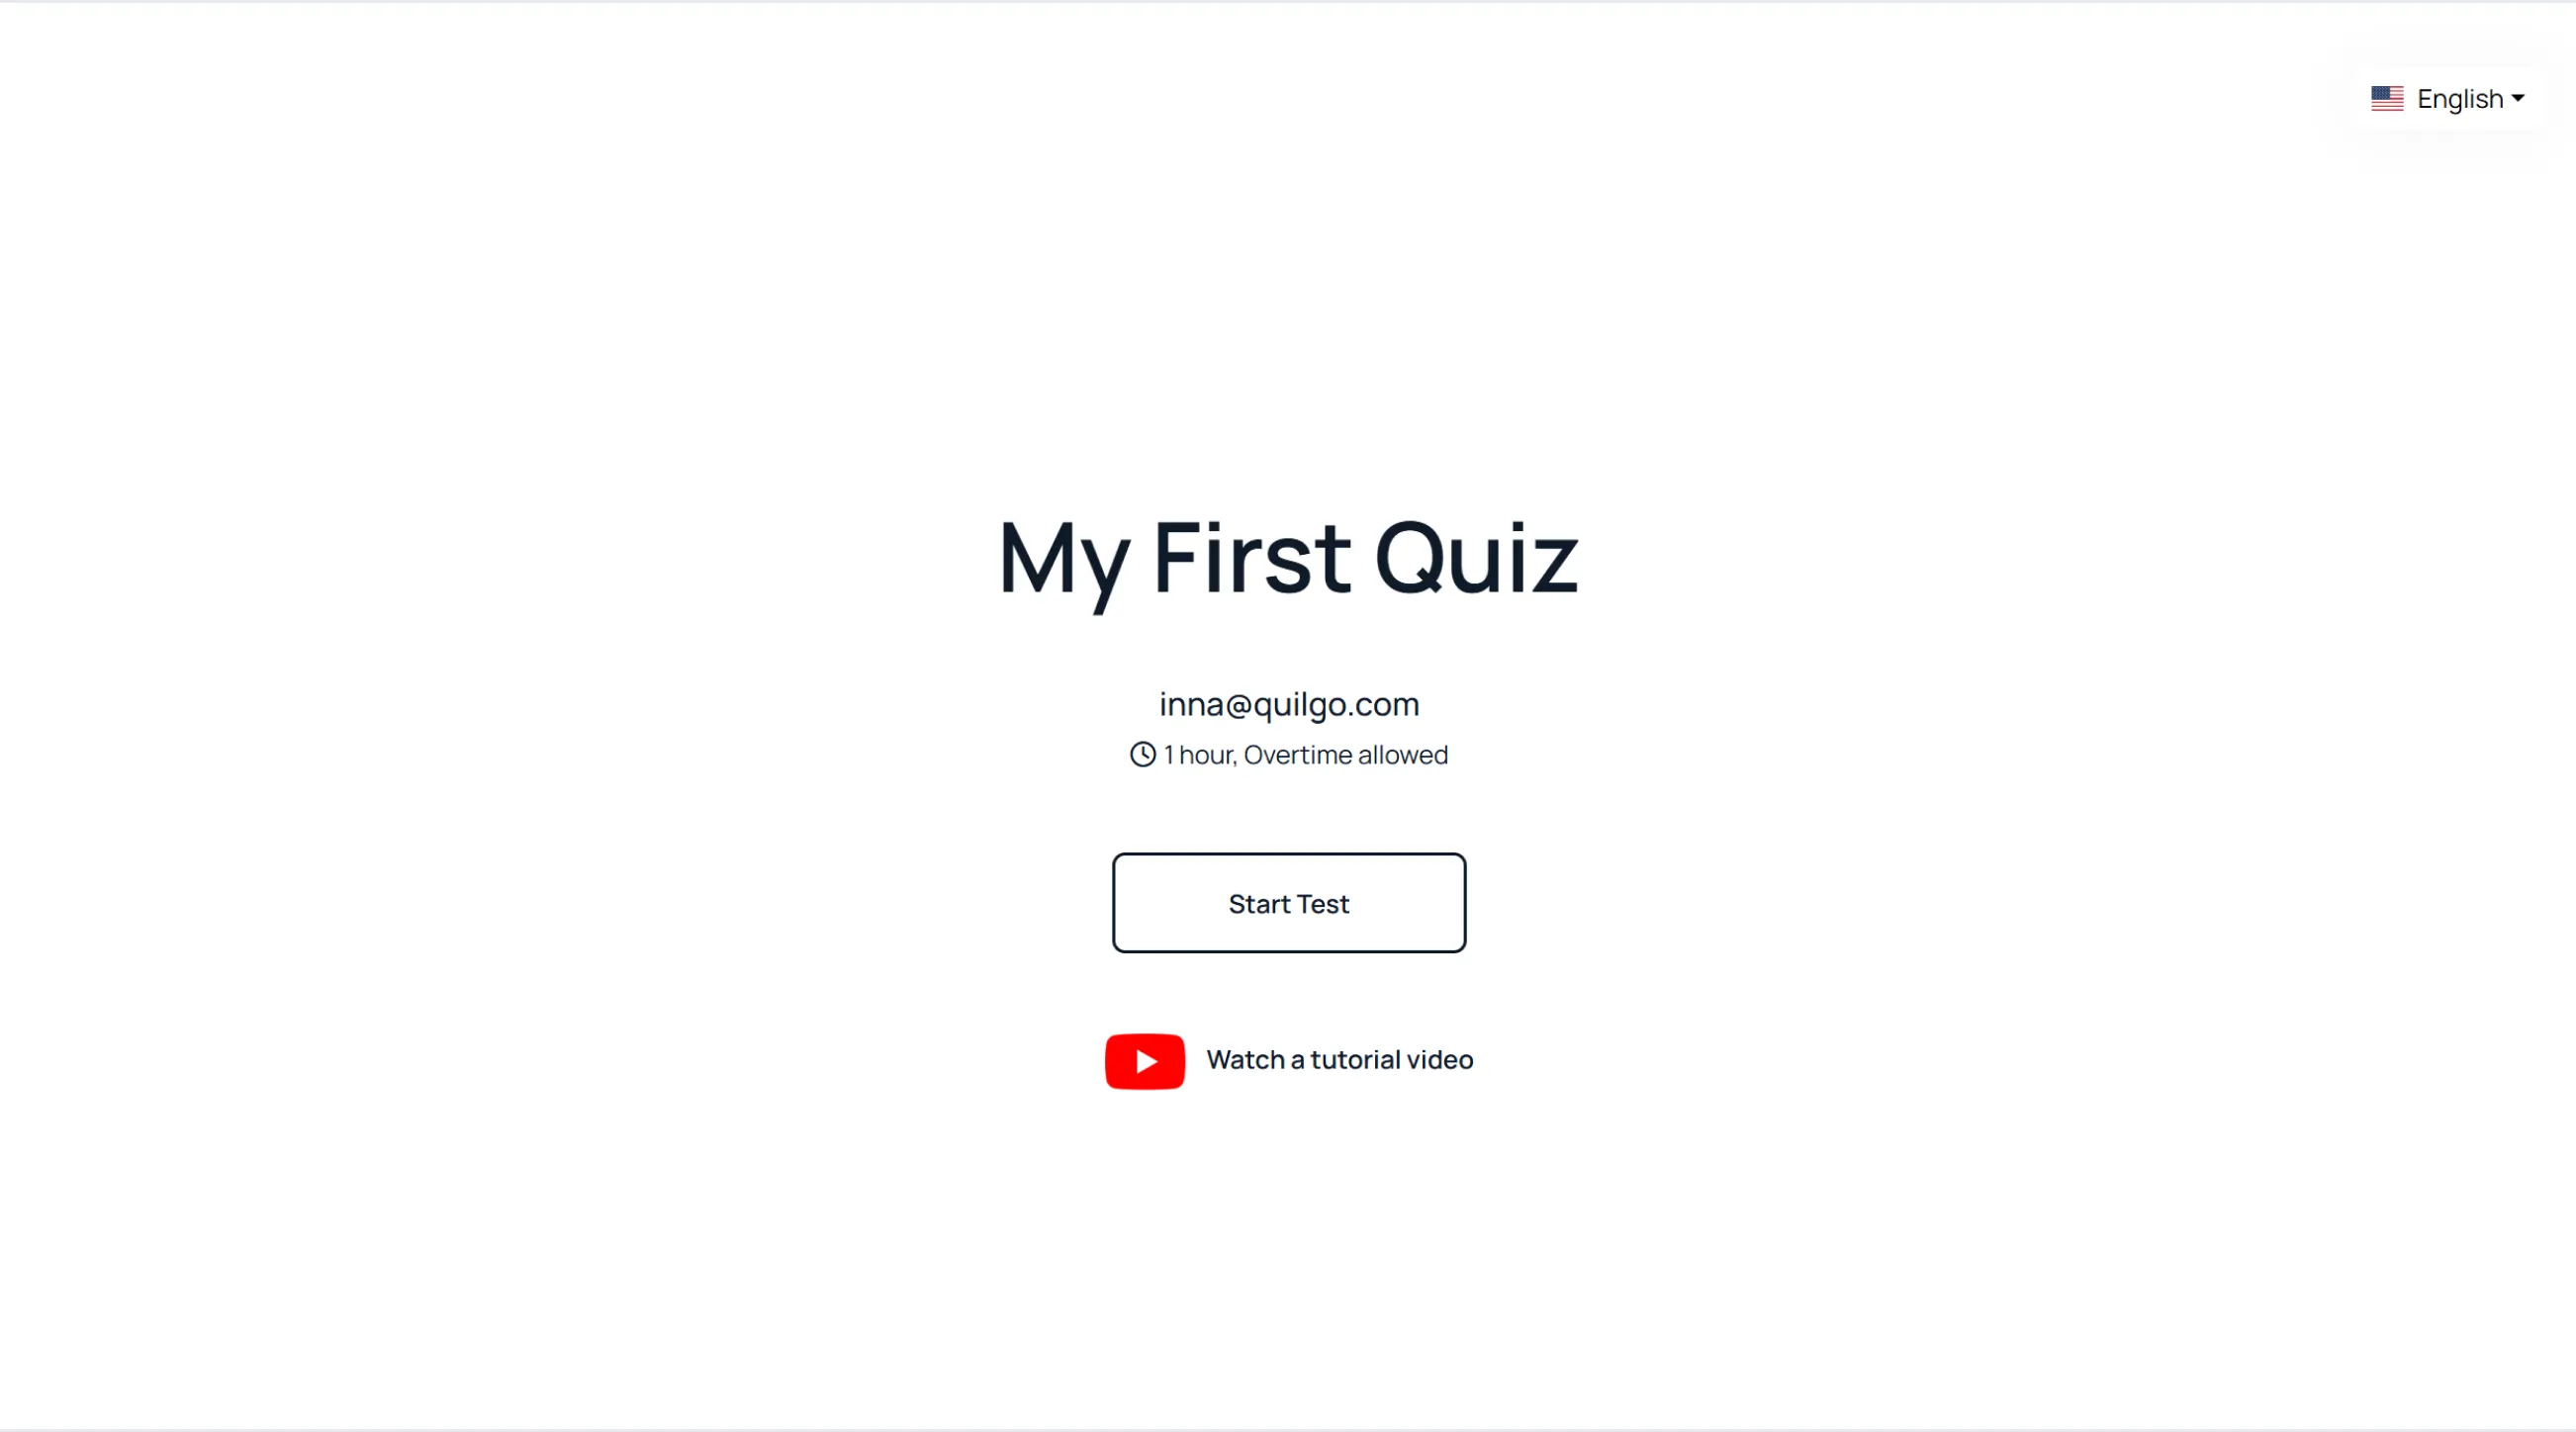
Click “Start Test”.
Grant Camera Access
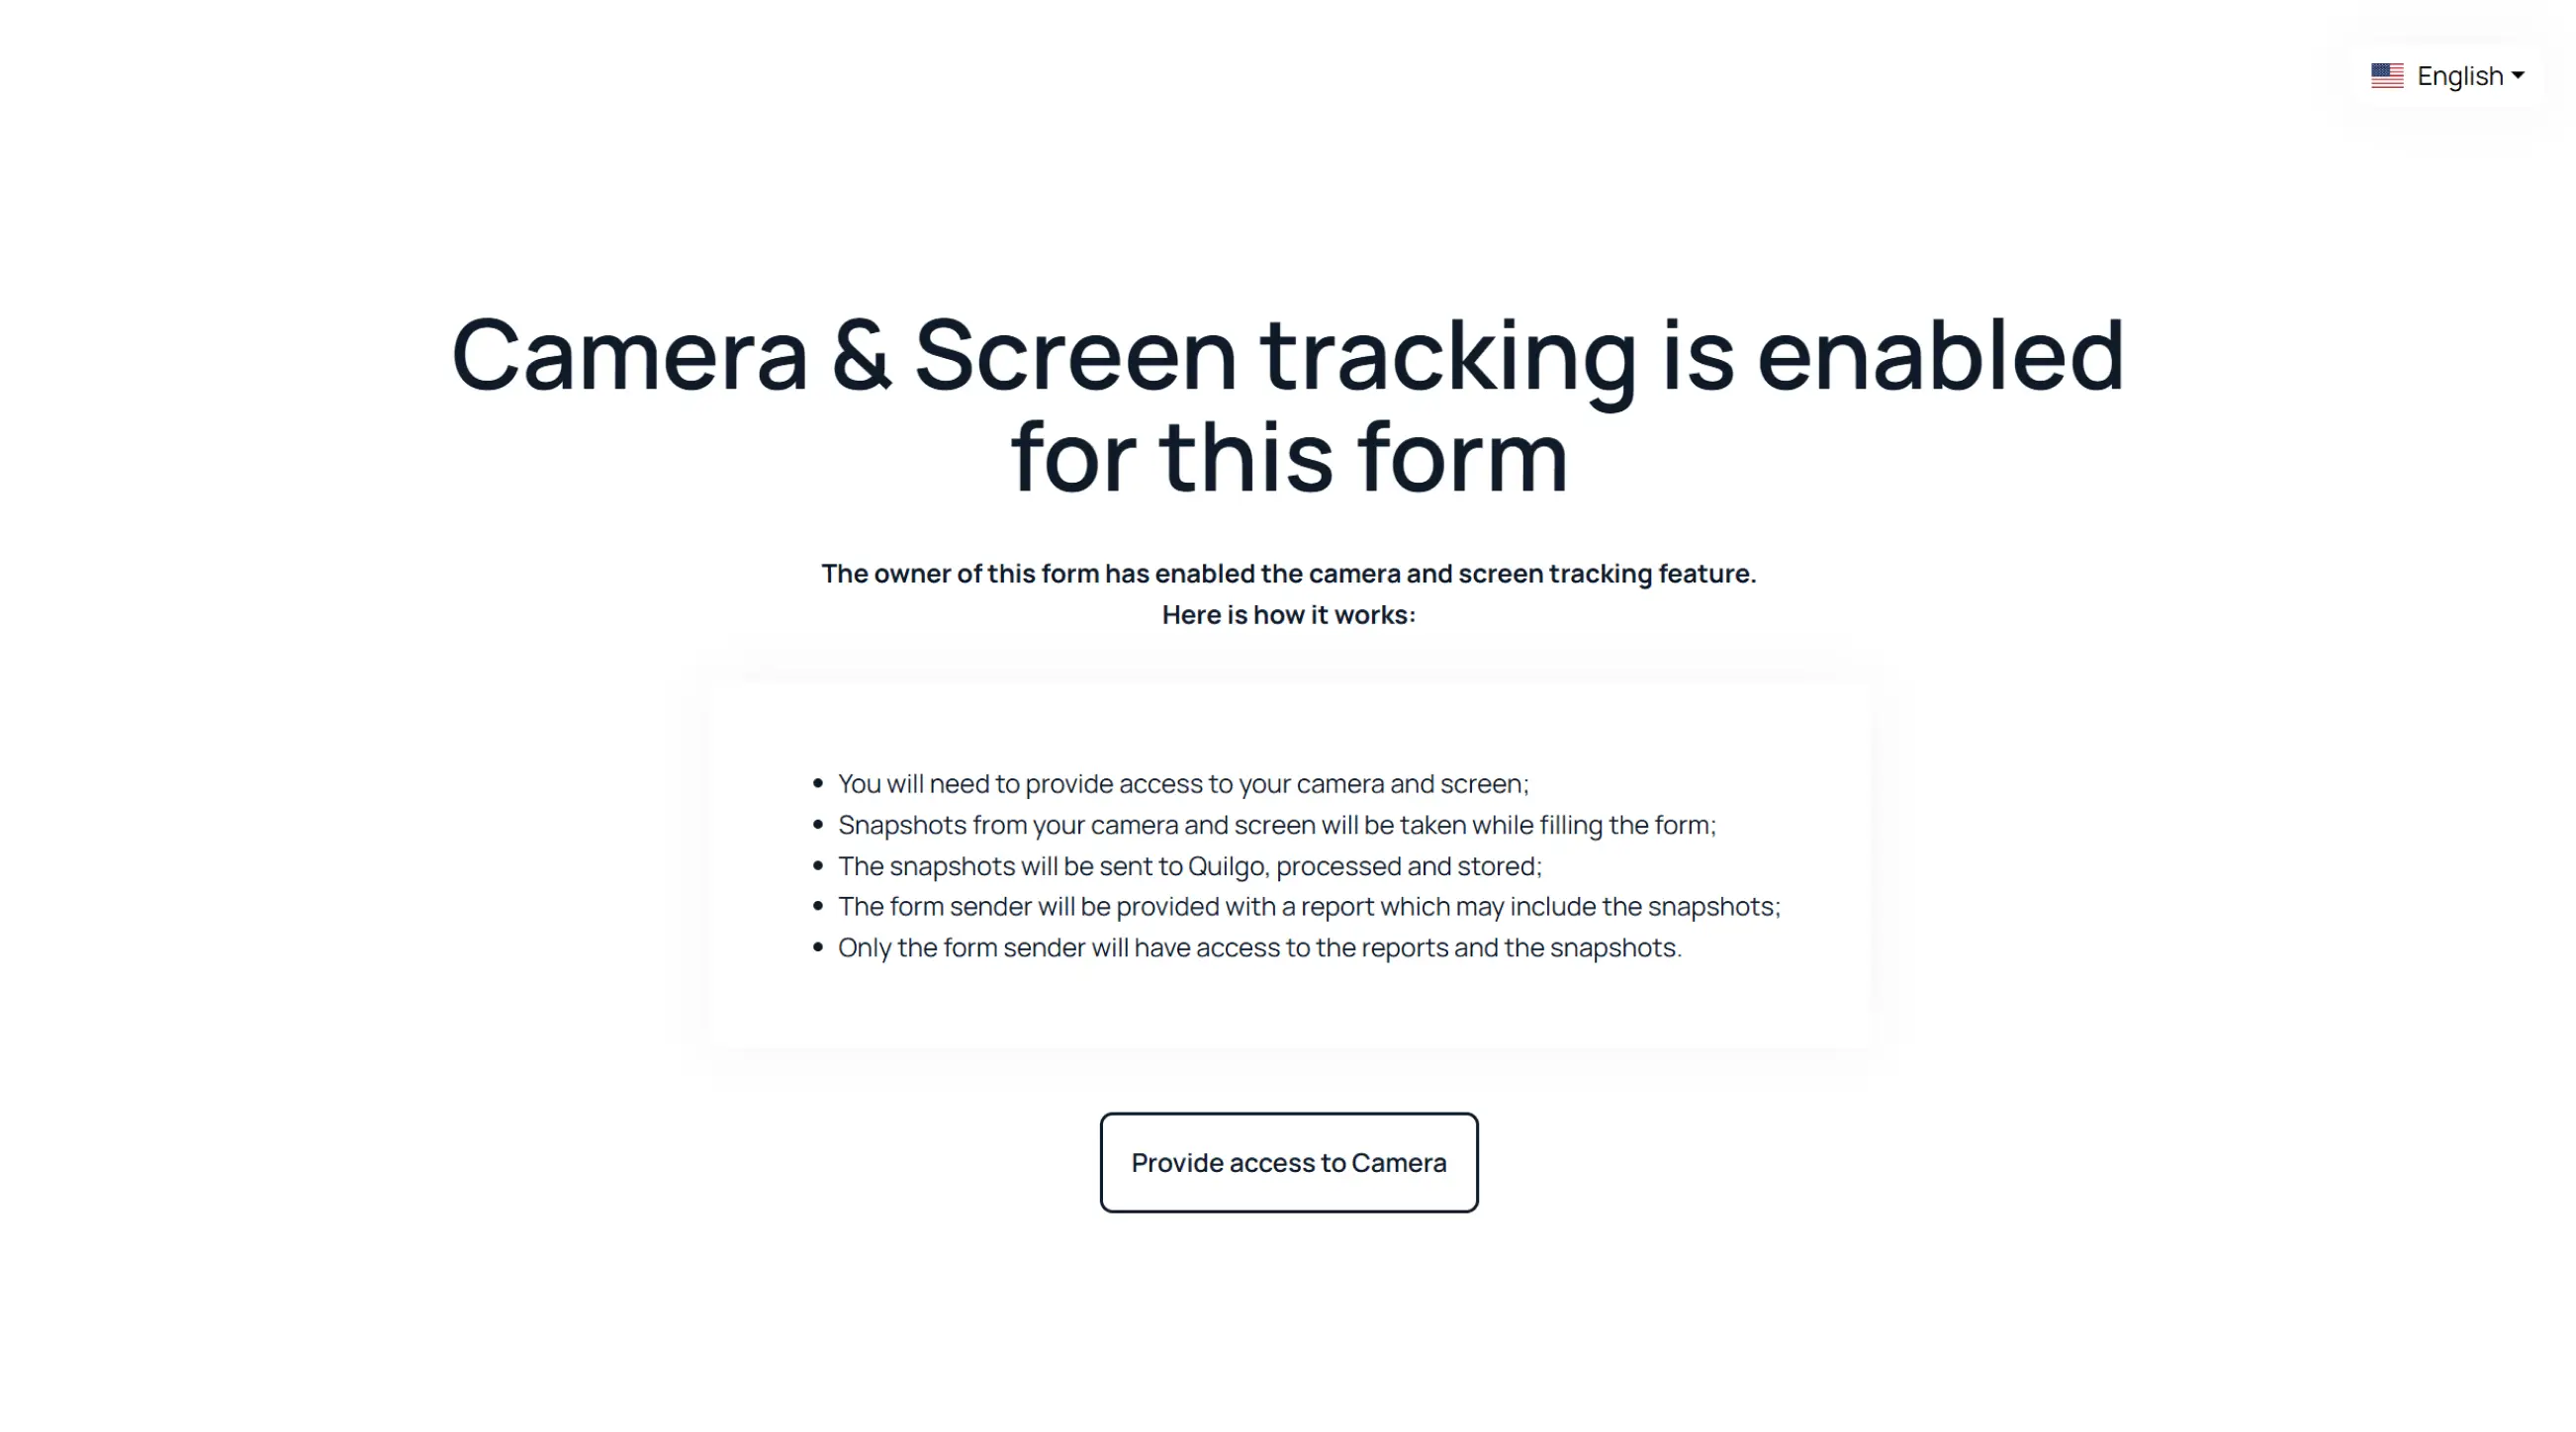
Click “Provide access to Camera”;
Allow camera access in the browser.
Grant Screen Access
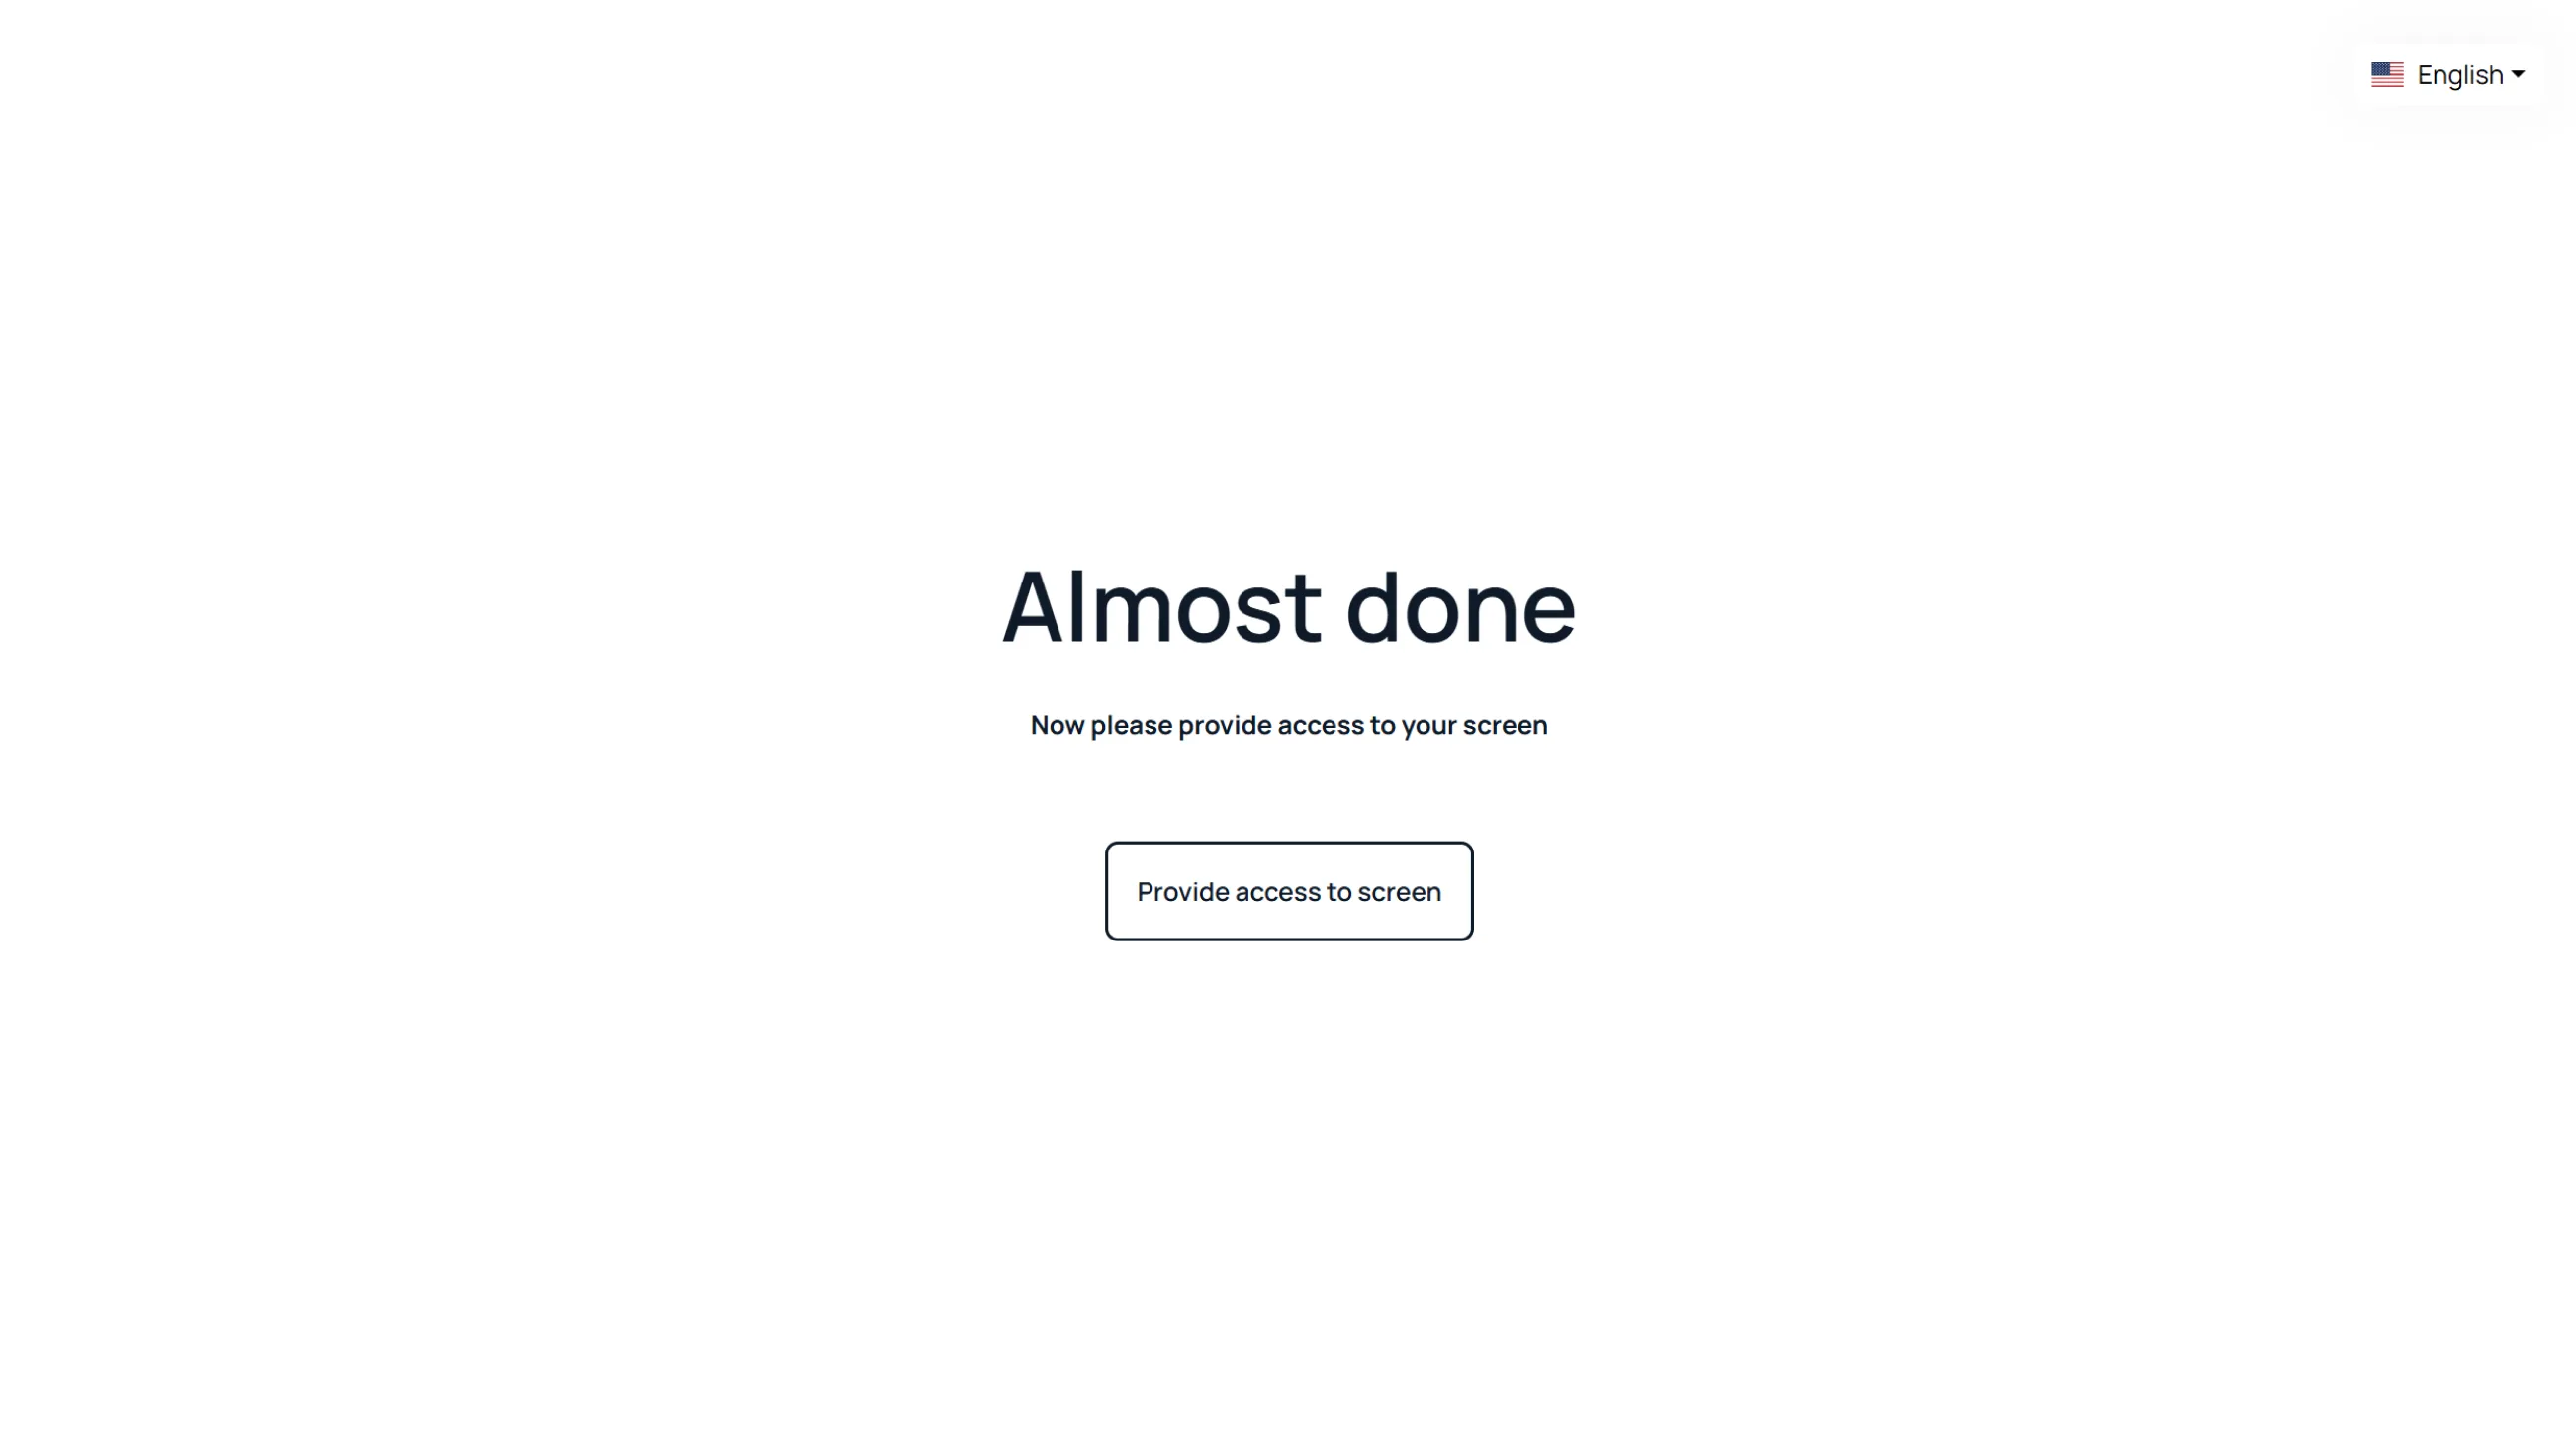
Click “Provide access to screen”;
Choose what to share;
Click “Share”.
Confirm Tracking Preview
Verify the webcam and screen previews;
Click “All good, open the form”.
Complete the Test
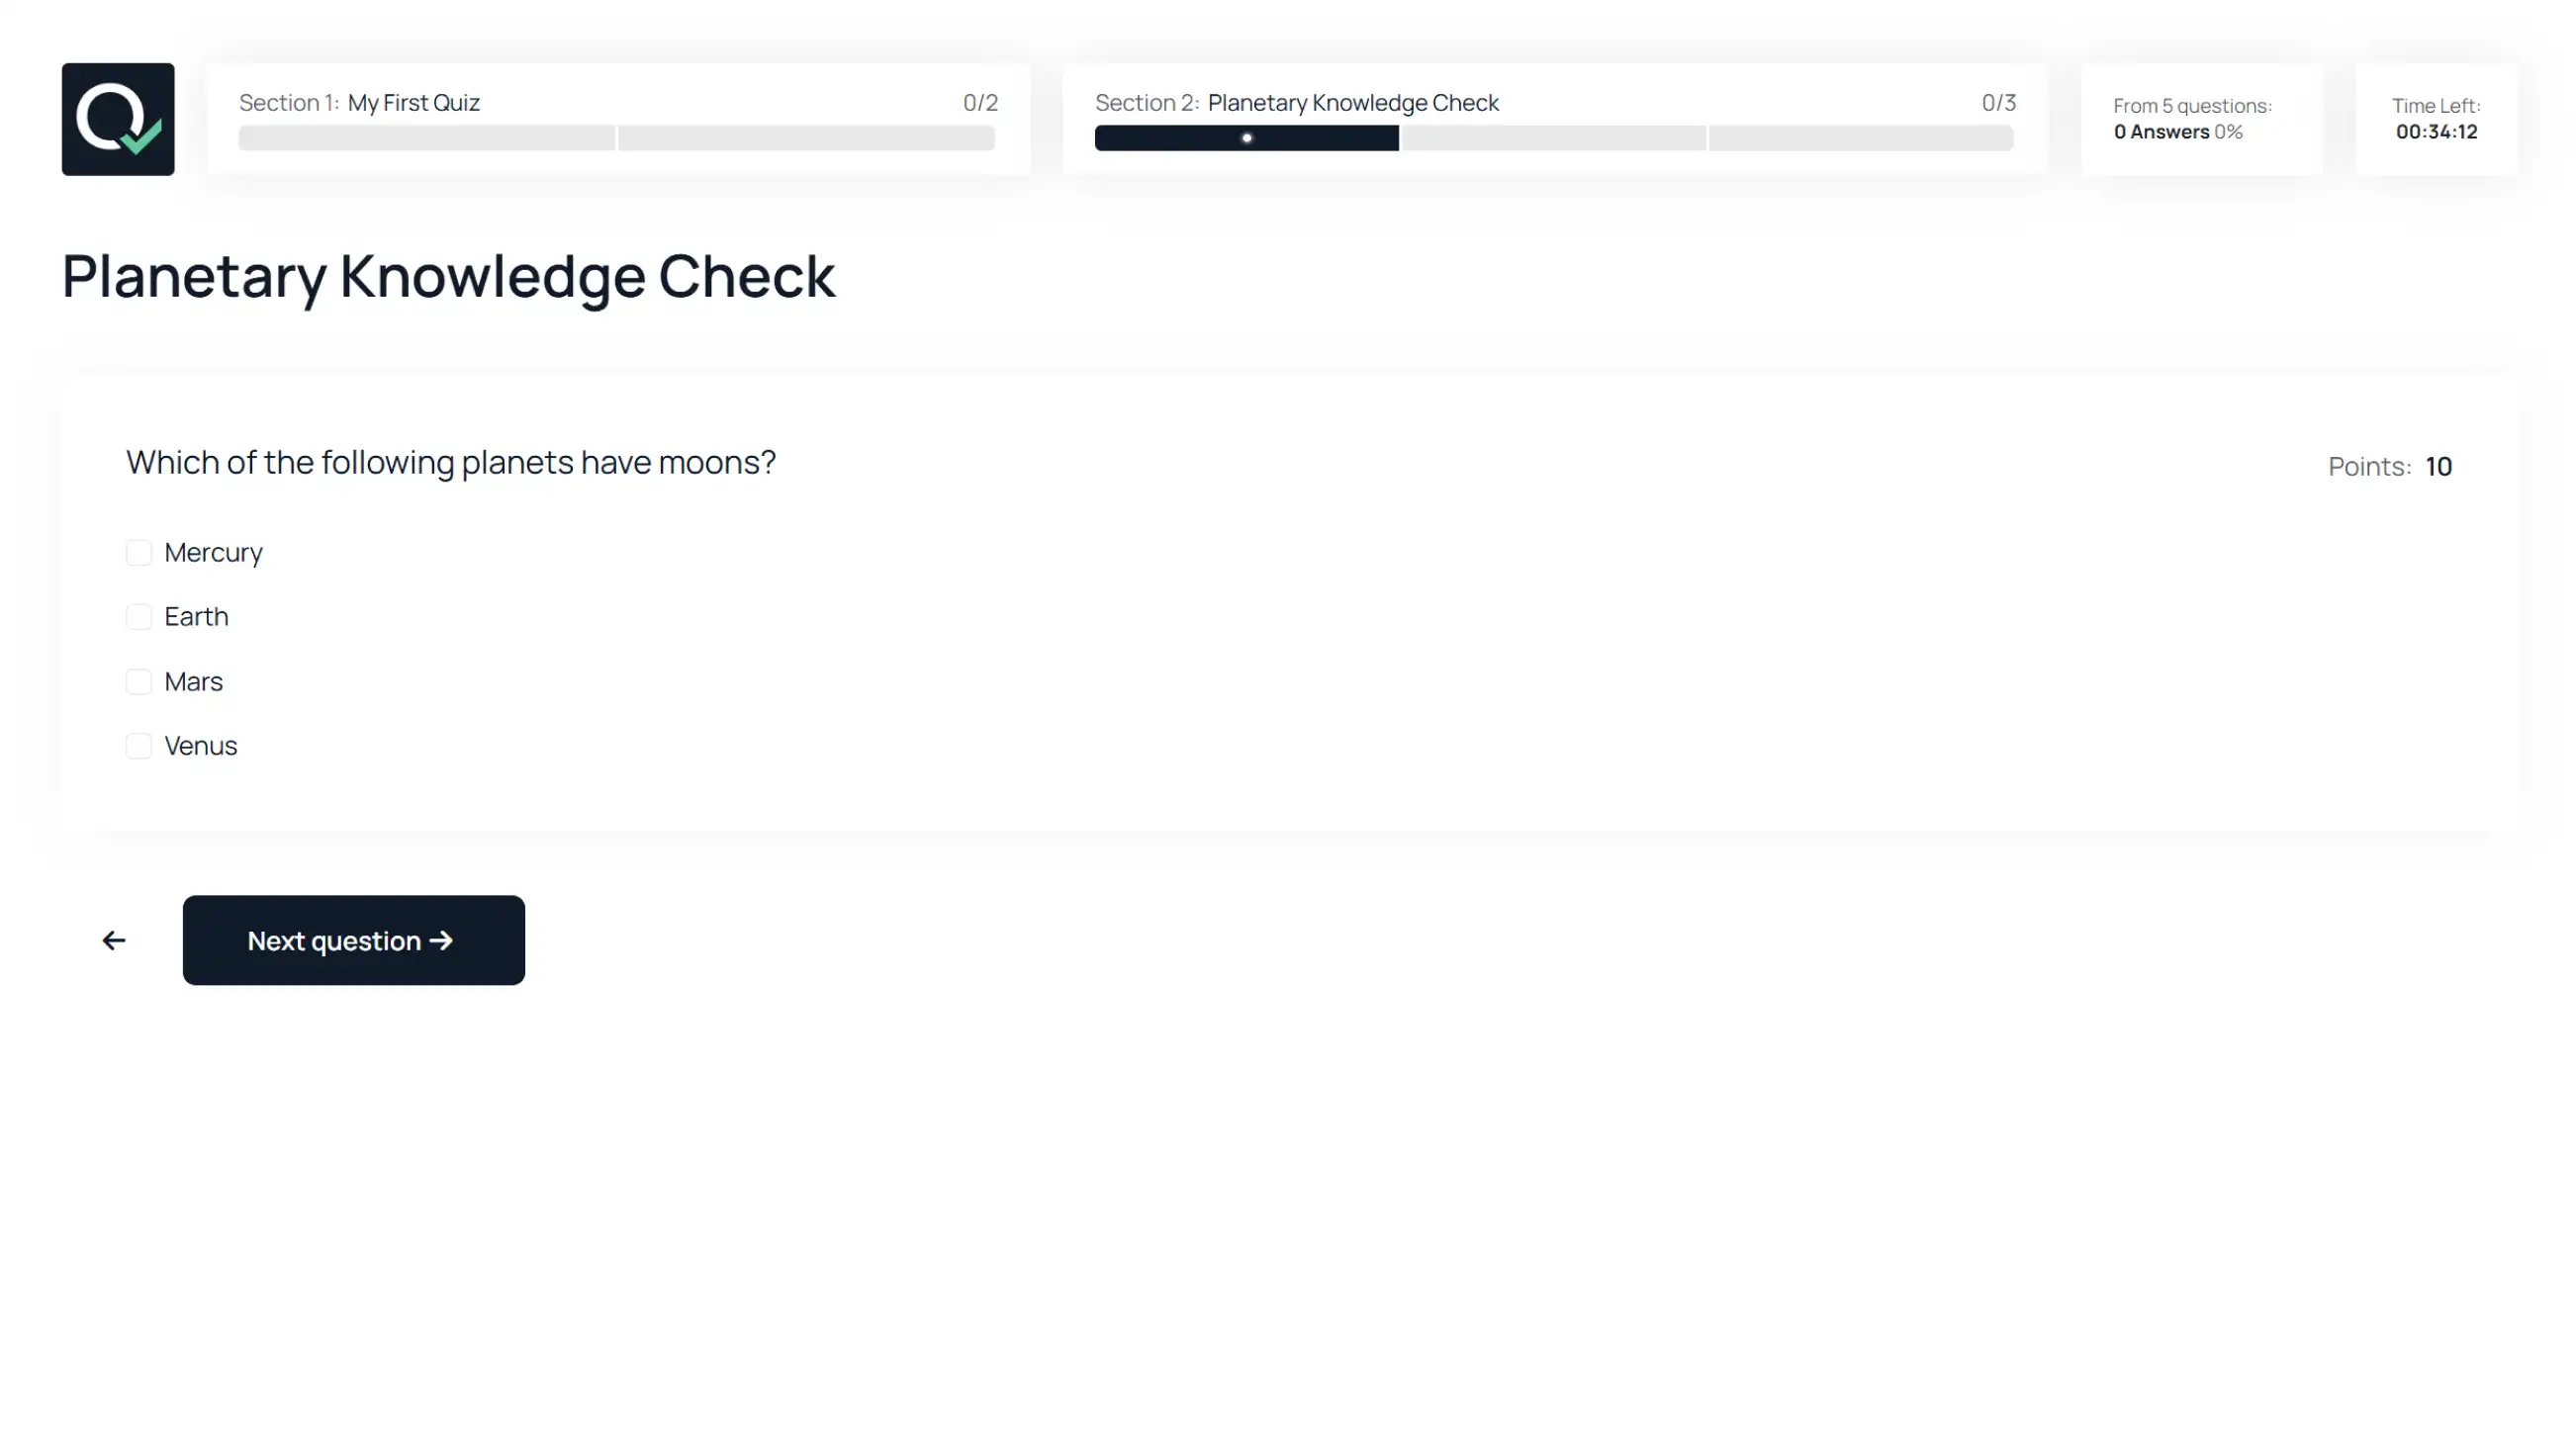
During the test, respondents can:
move between questions;
move between sections;
continue after reconnecting;
rely on autosave.
Reports and Grading
Open an Individual Report
To open a report:
Return to the dashboard;
Find the respondent row;
Click “View report”.
Reports may contain:
scores;
trust score;
timing;
suspicious activity;
answers;
snapshots.
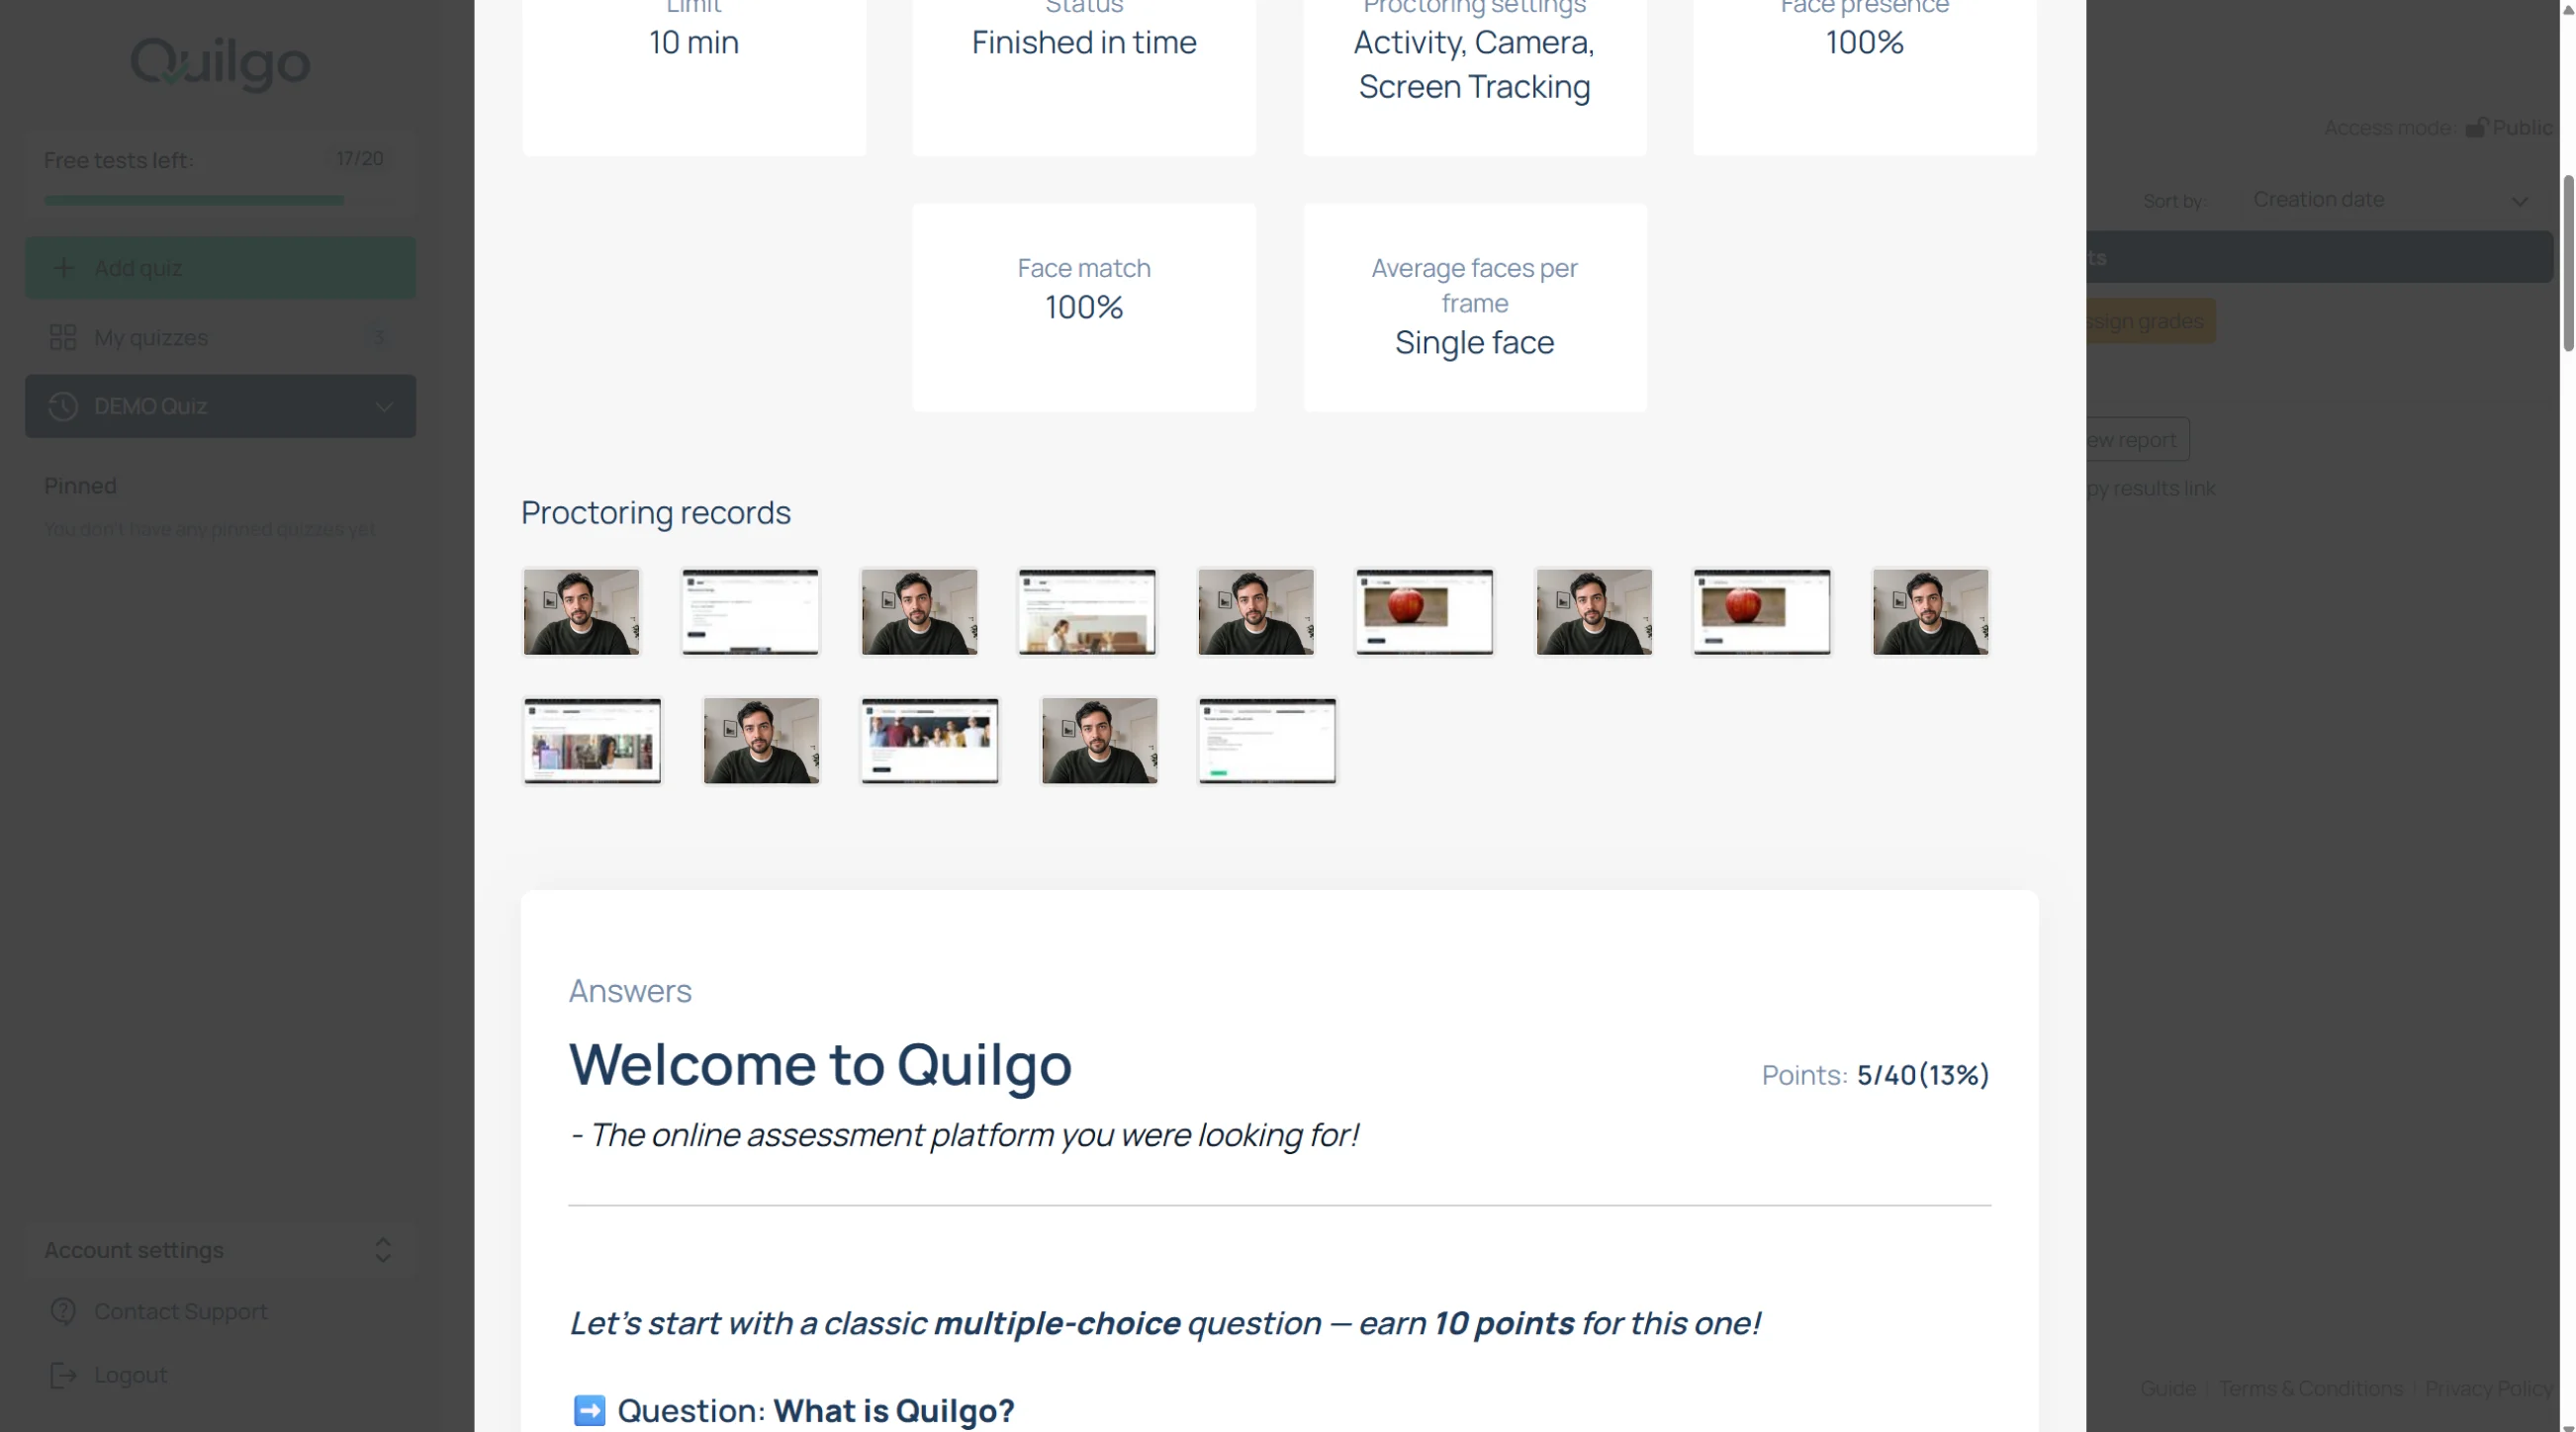
Review Proctoring Records
Proctoring records connect suspicious activity indicators with actual respondent behavior and answers. This helps reviewers evaluate integrity issues in context instead of relying on isolated screenshots.
Inside the report, scroll to “Proctoring records”.
You may see:
webcam snapshots;
screen snapshots;
tab switching indicators;
suspicious events.
Save the Report as PDF
Open the report;
Use the browser print dialog;
Save as PDF.
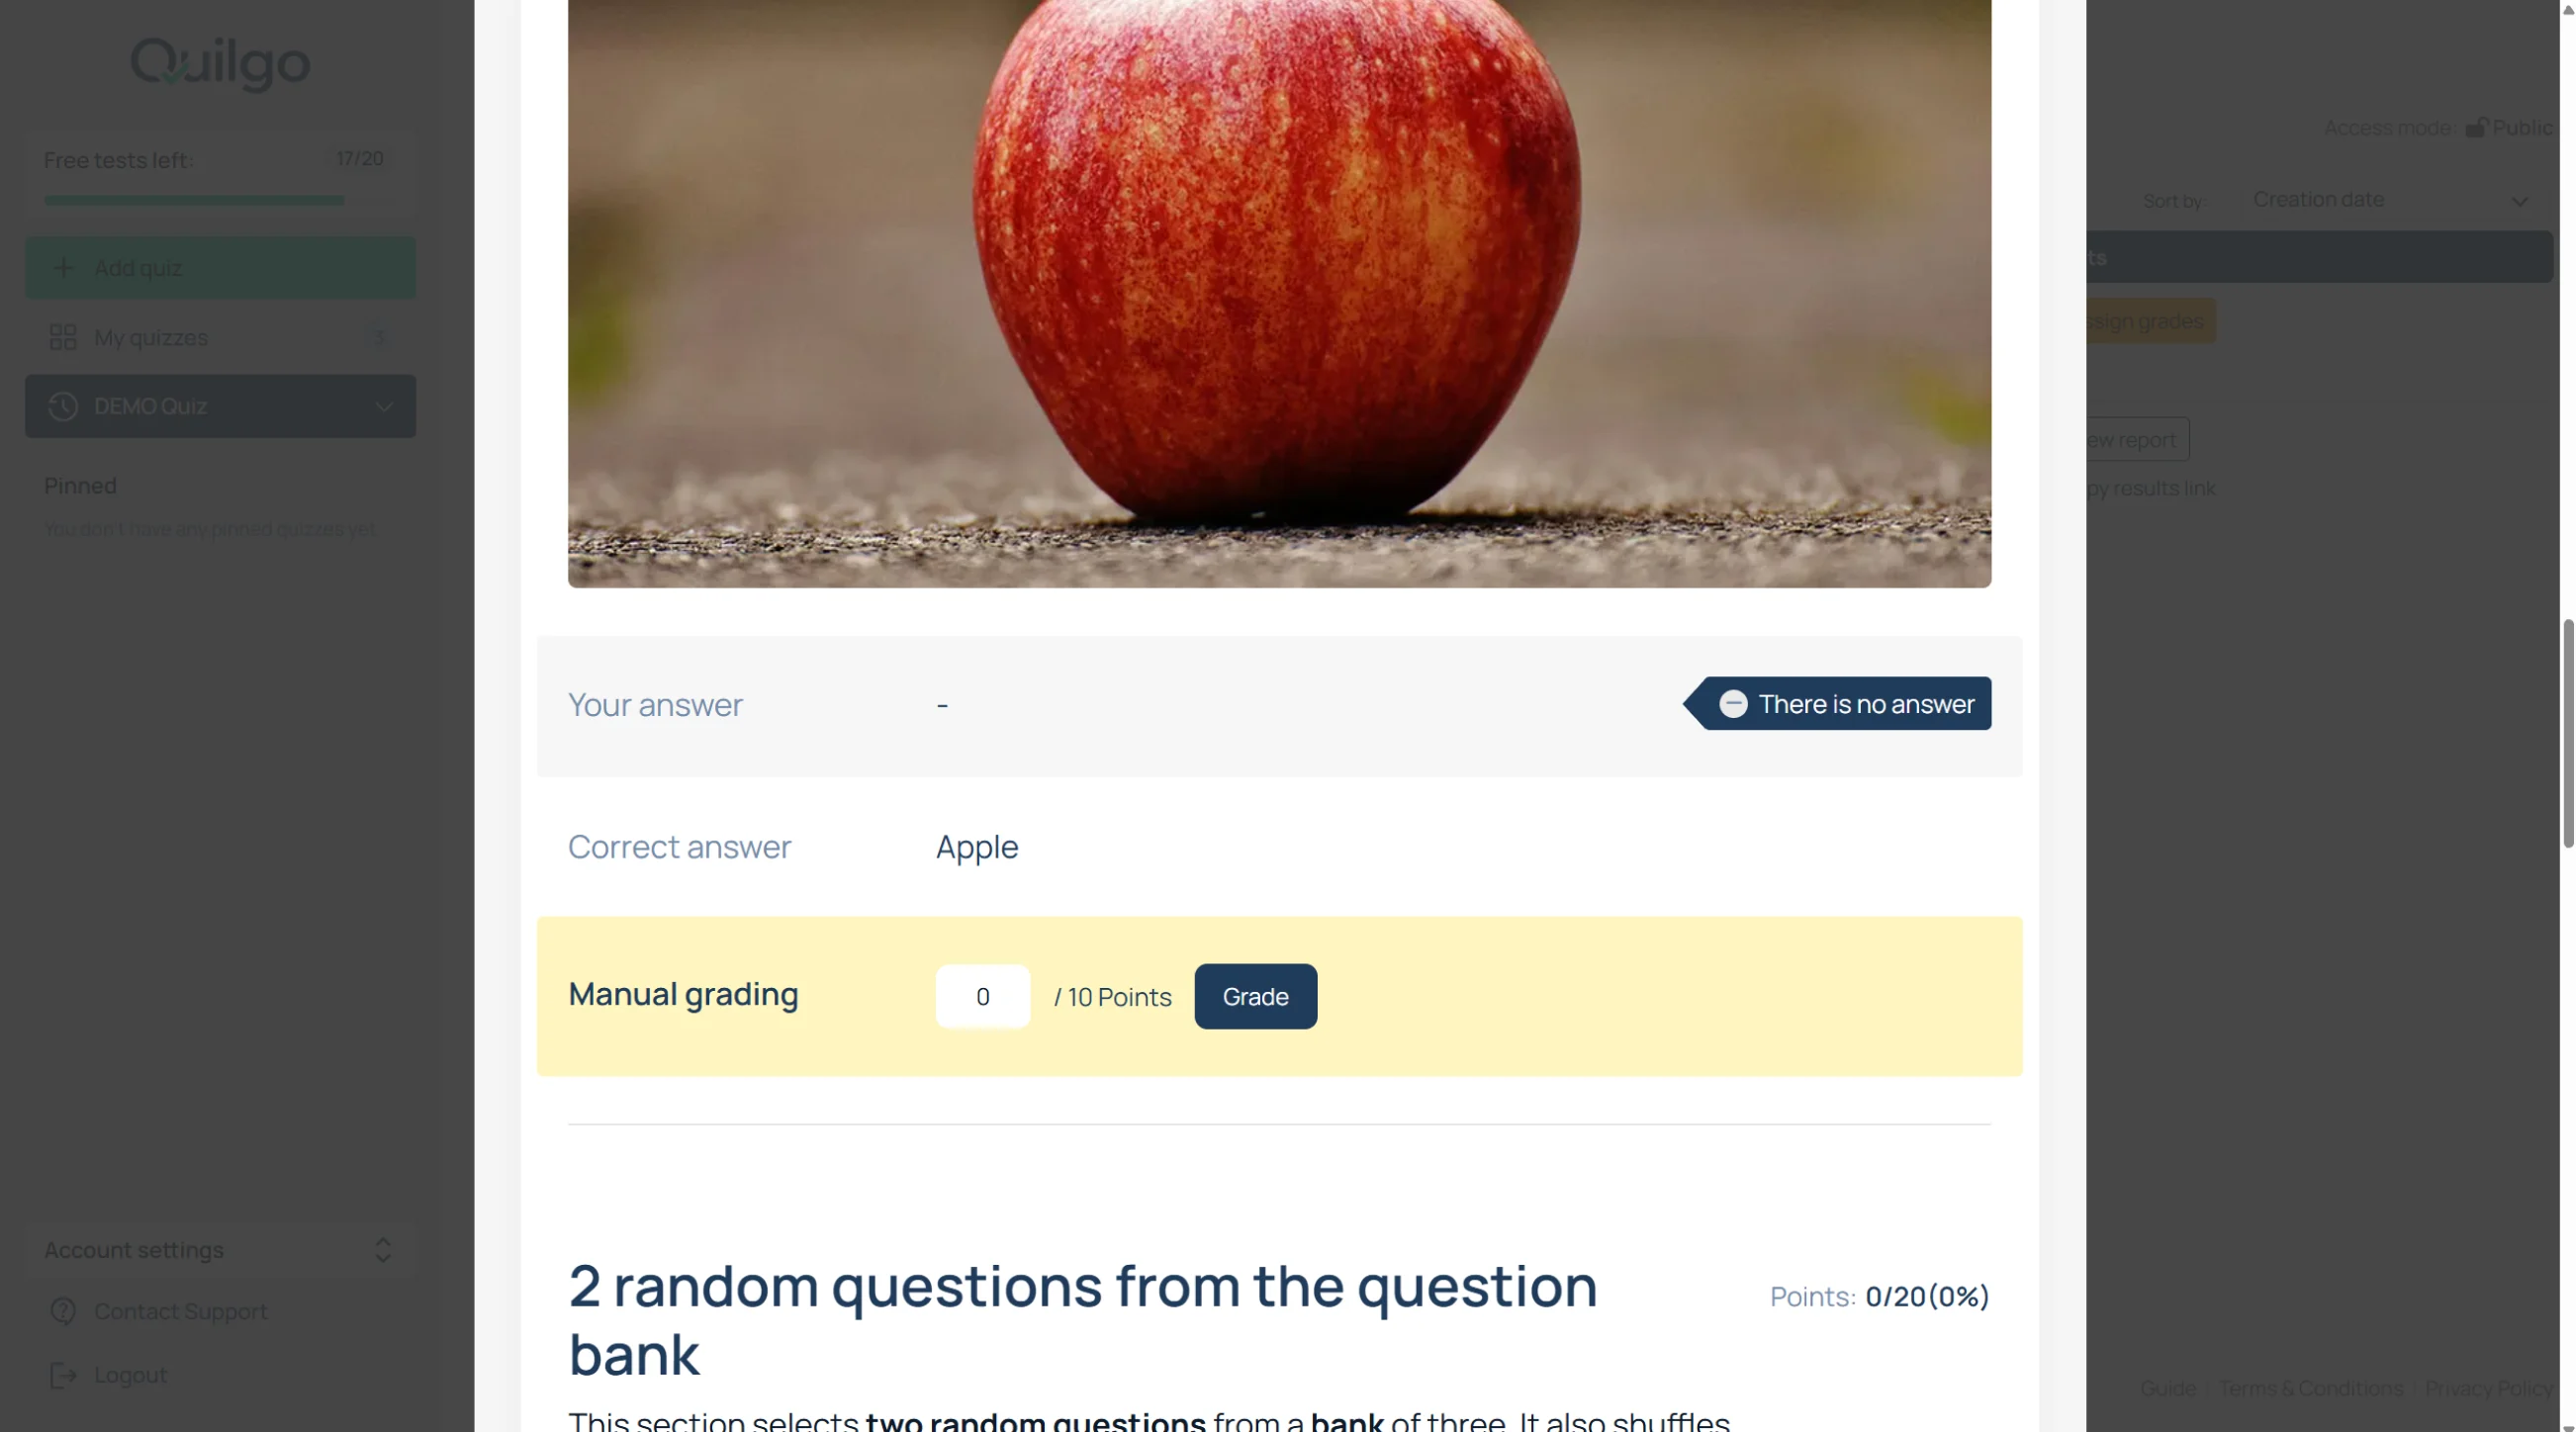
Assign Manual Grades
To manually grade Paragraph questions:
Click “Assign grades”;
Review the answer;
Enter the score;
Click “Grade”.
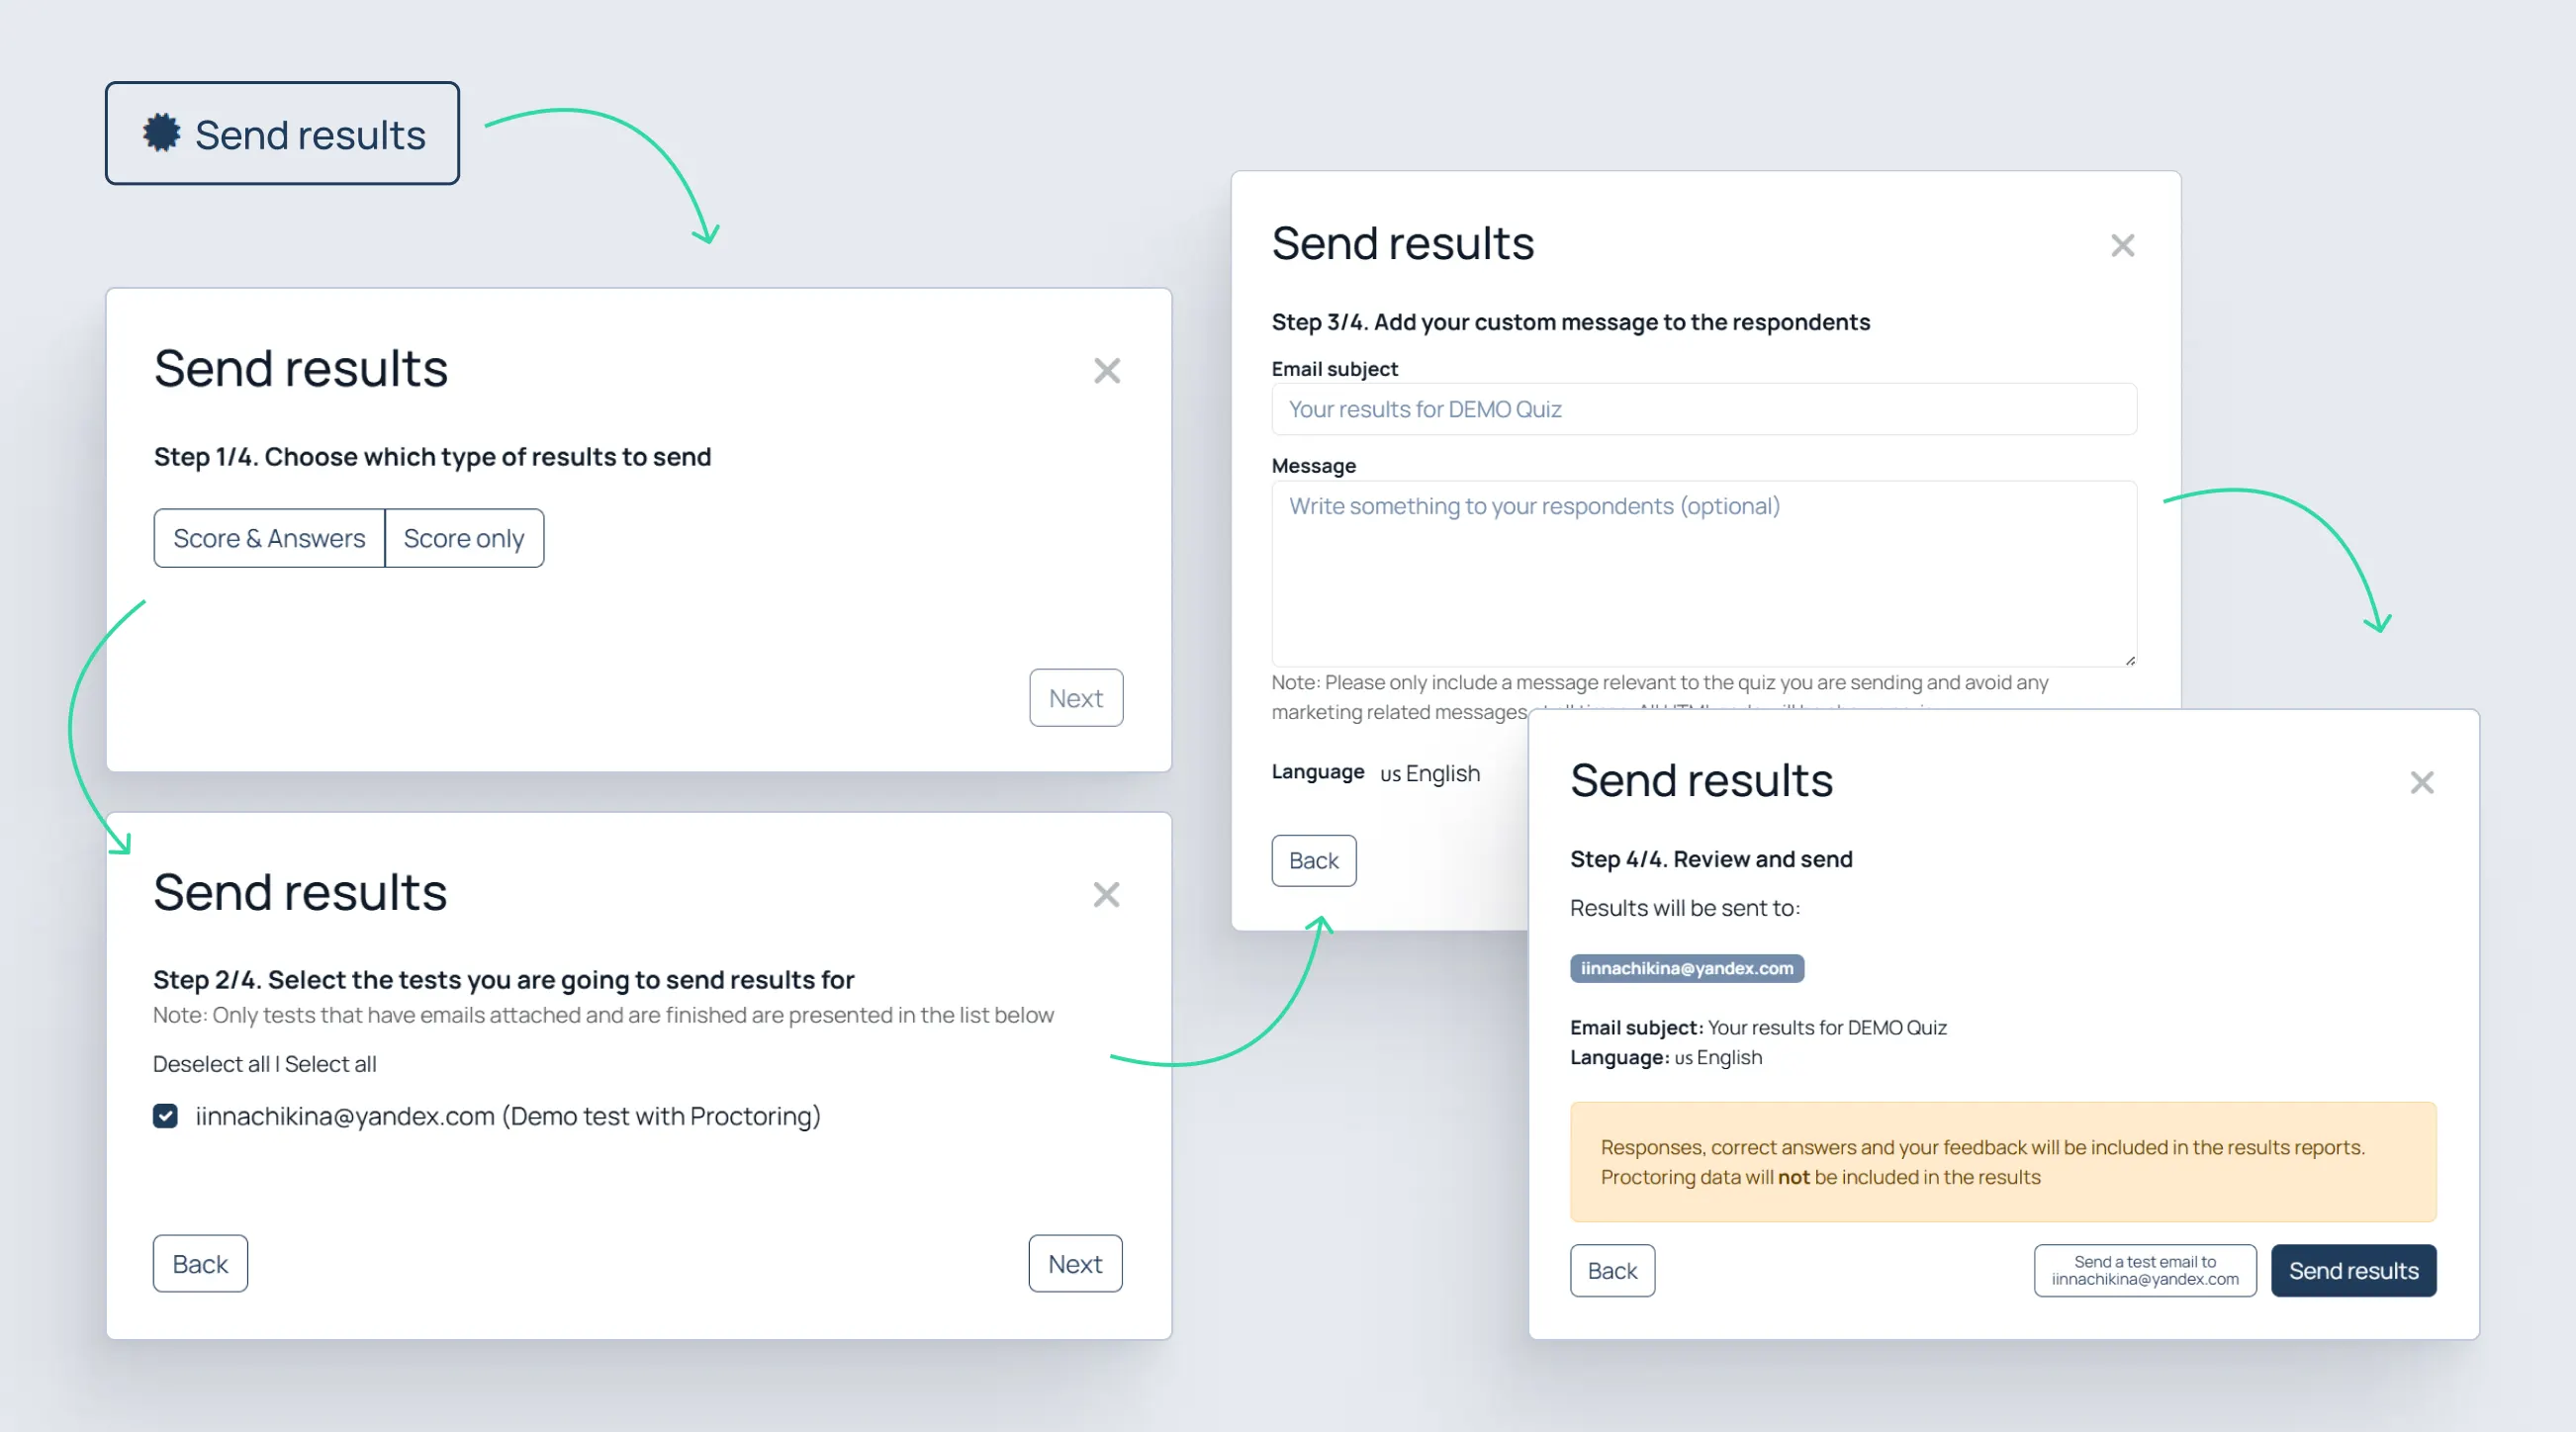
Share Results
Copy an Individual Results Link
Find the respondent row;
Click “Copy results link”;
Send the link.
Send Results by Email
Click “Send results”.
Choose result visibility
Select:
“Score & Answers”;
or “Score only”.
Select respondents
Select finished tests;
Click “Next”.
Customize the email
Enter the subject;
Optionally enter a message;
Choose the language.
Send results
Review the settings;
Click “Send results”.
Export and Reporting
Export Quiz Data
Exports are useful for institutions and organizations that need offline records, spreadsheet analysis, compliance archives, or internal reporting workflows.
To export data:
Click “Export”.
The Excel export may include:
quiz structure;
settings;
timing;
answers;
scores;
proctoring data.
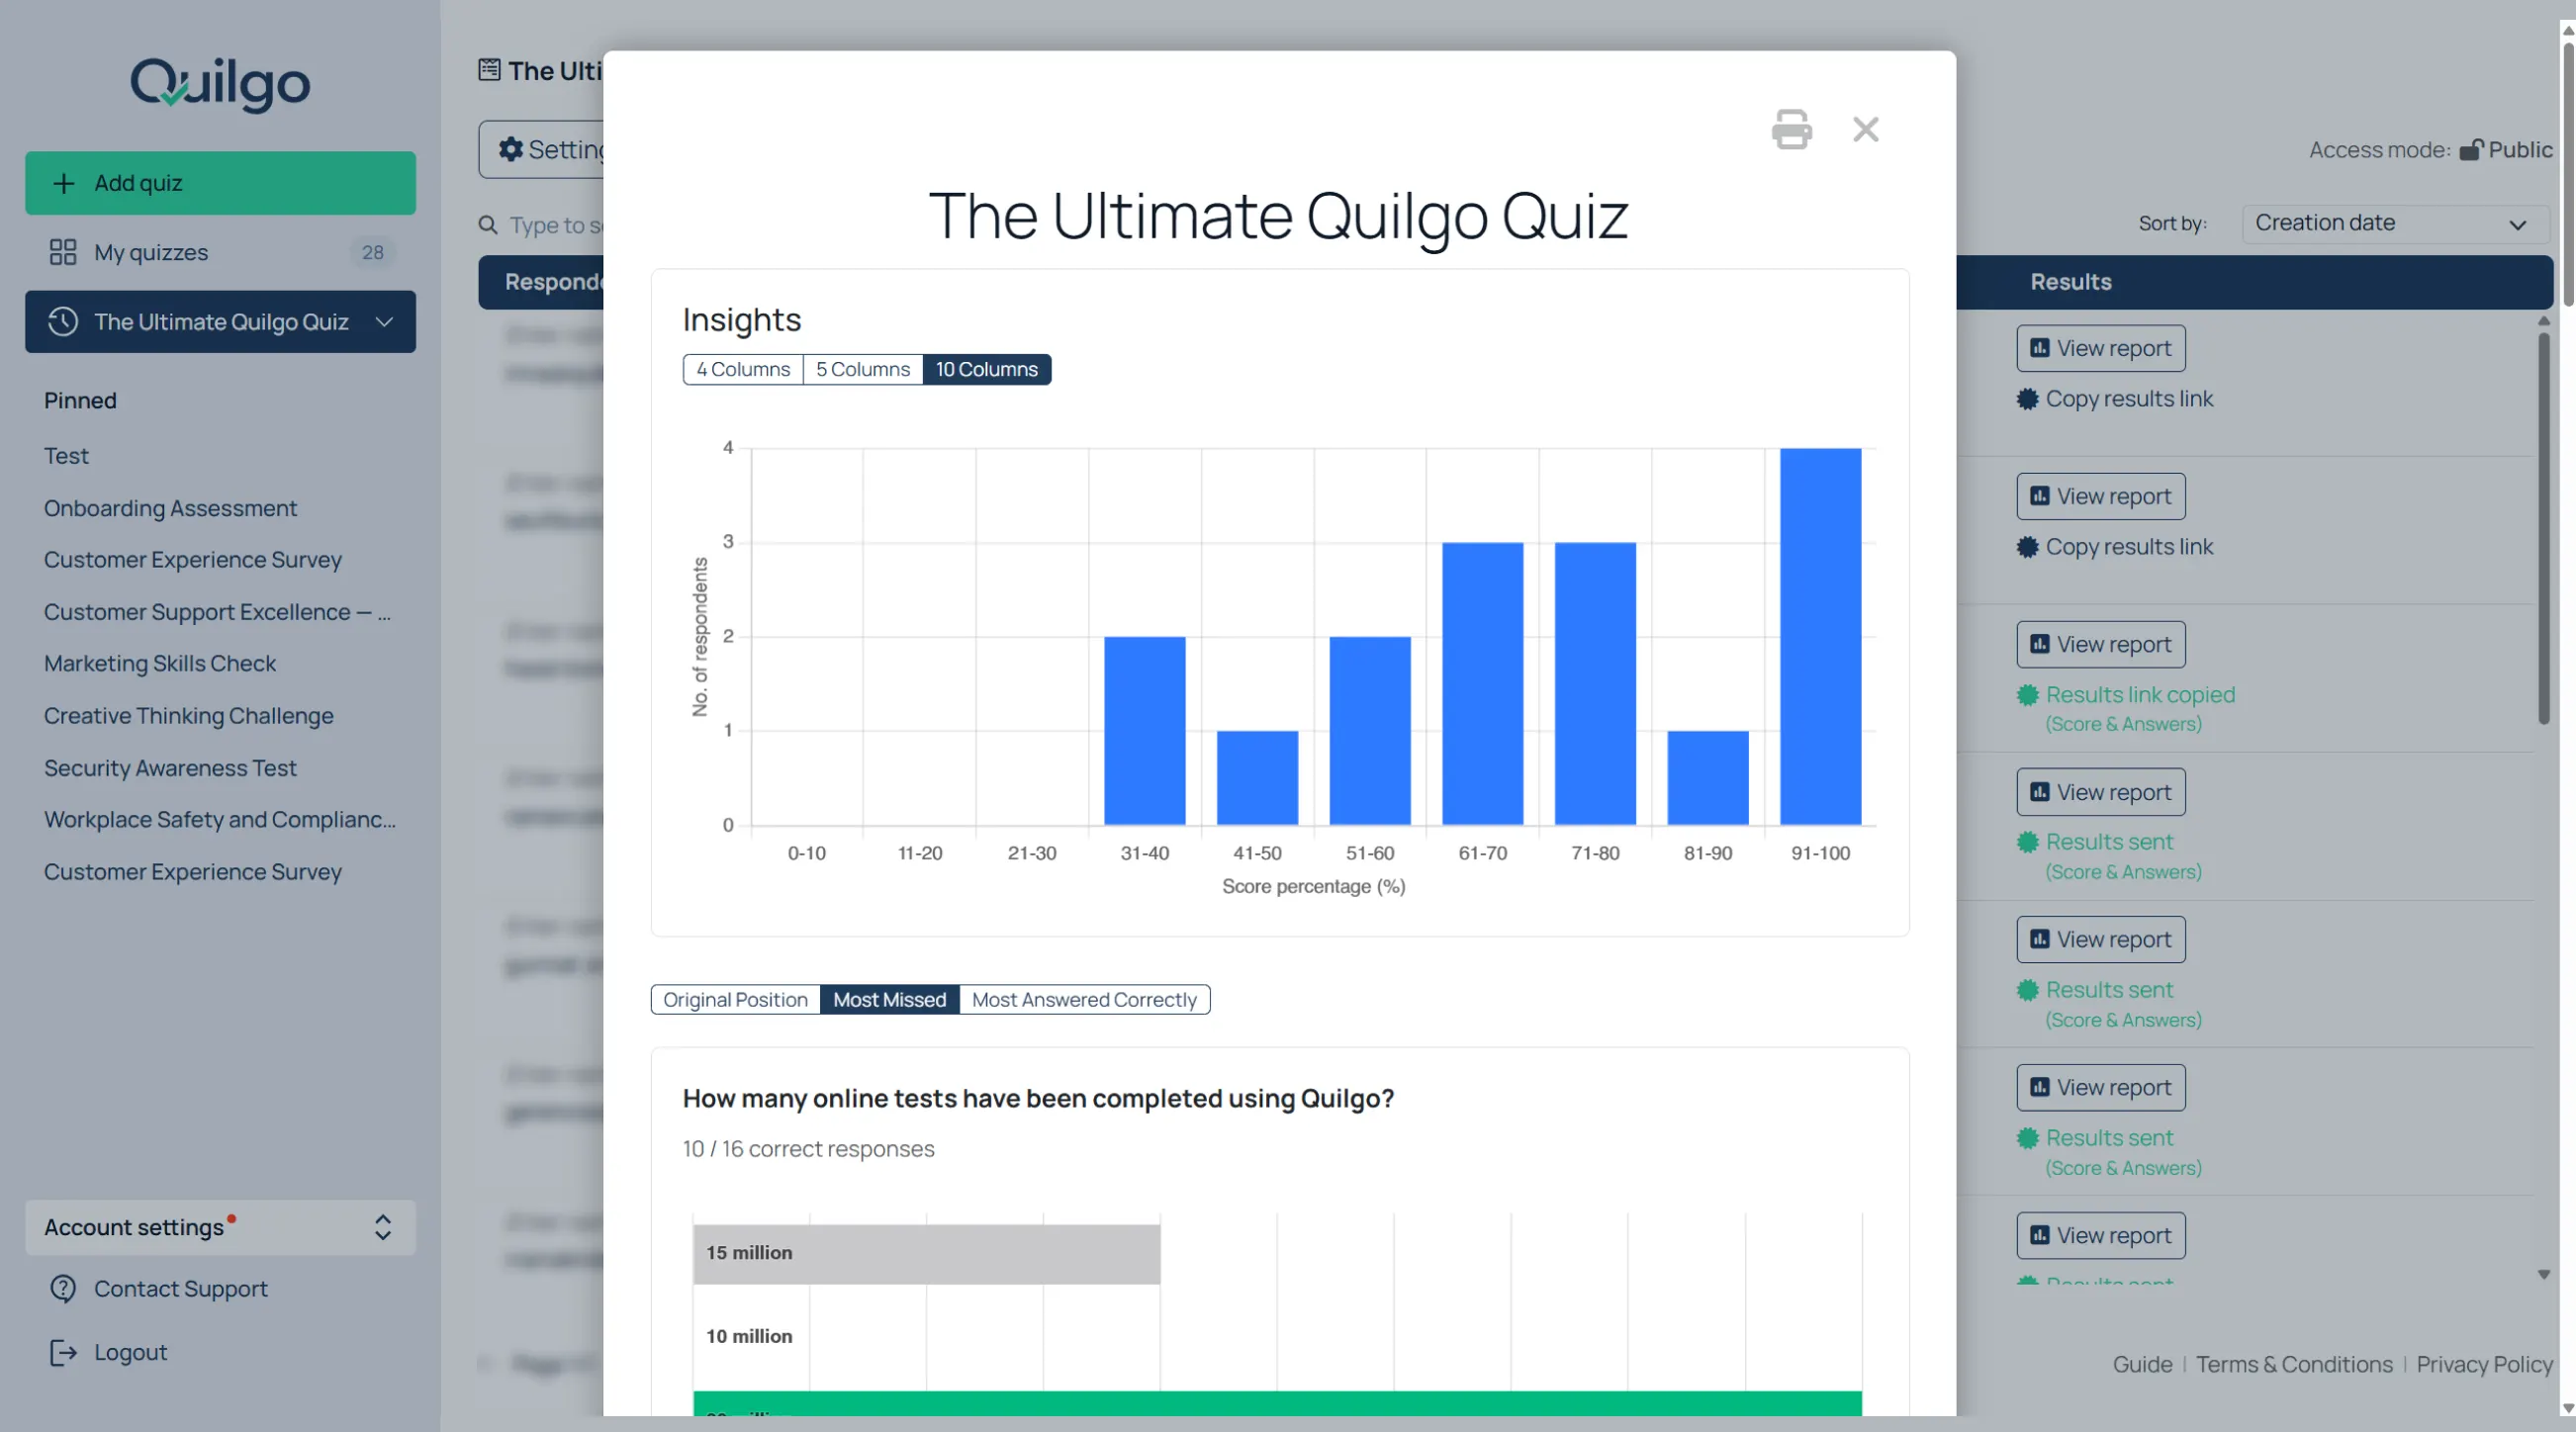
Open the Group Report
Click “Report”.
Use the group report for:
score overviews;
question summaries;
quick cohort analysis.
Branding and Organization
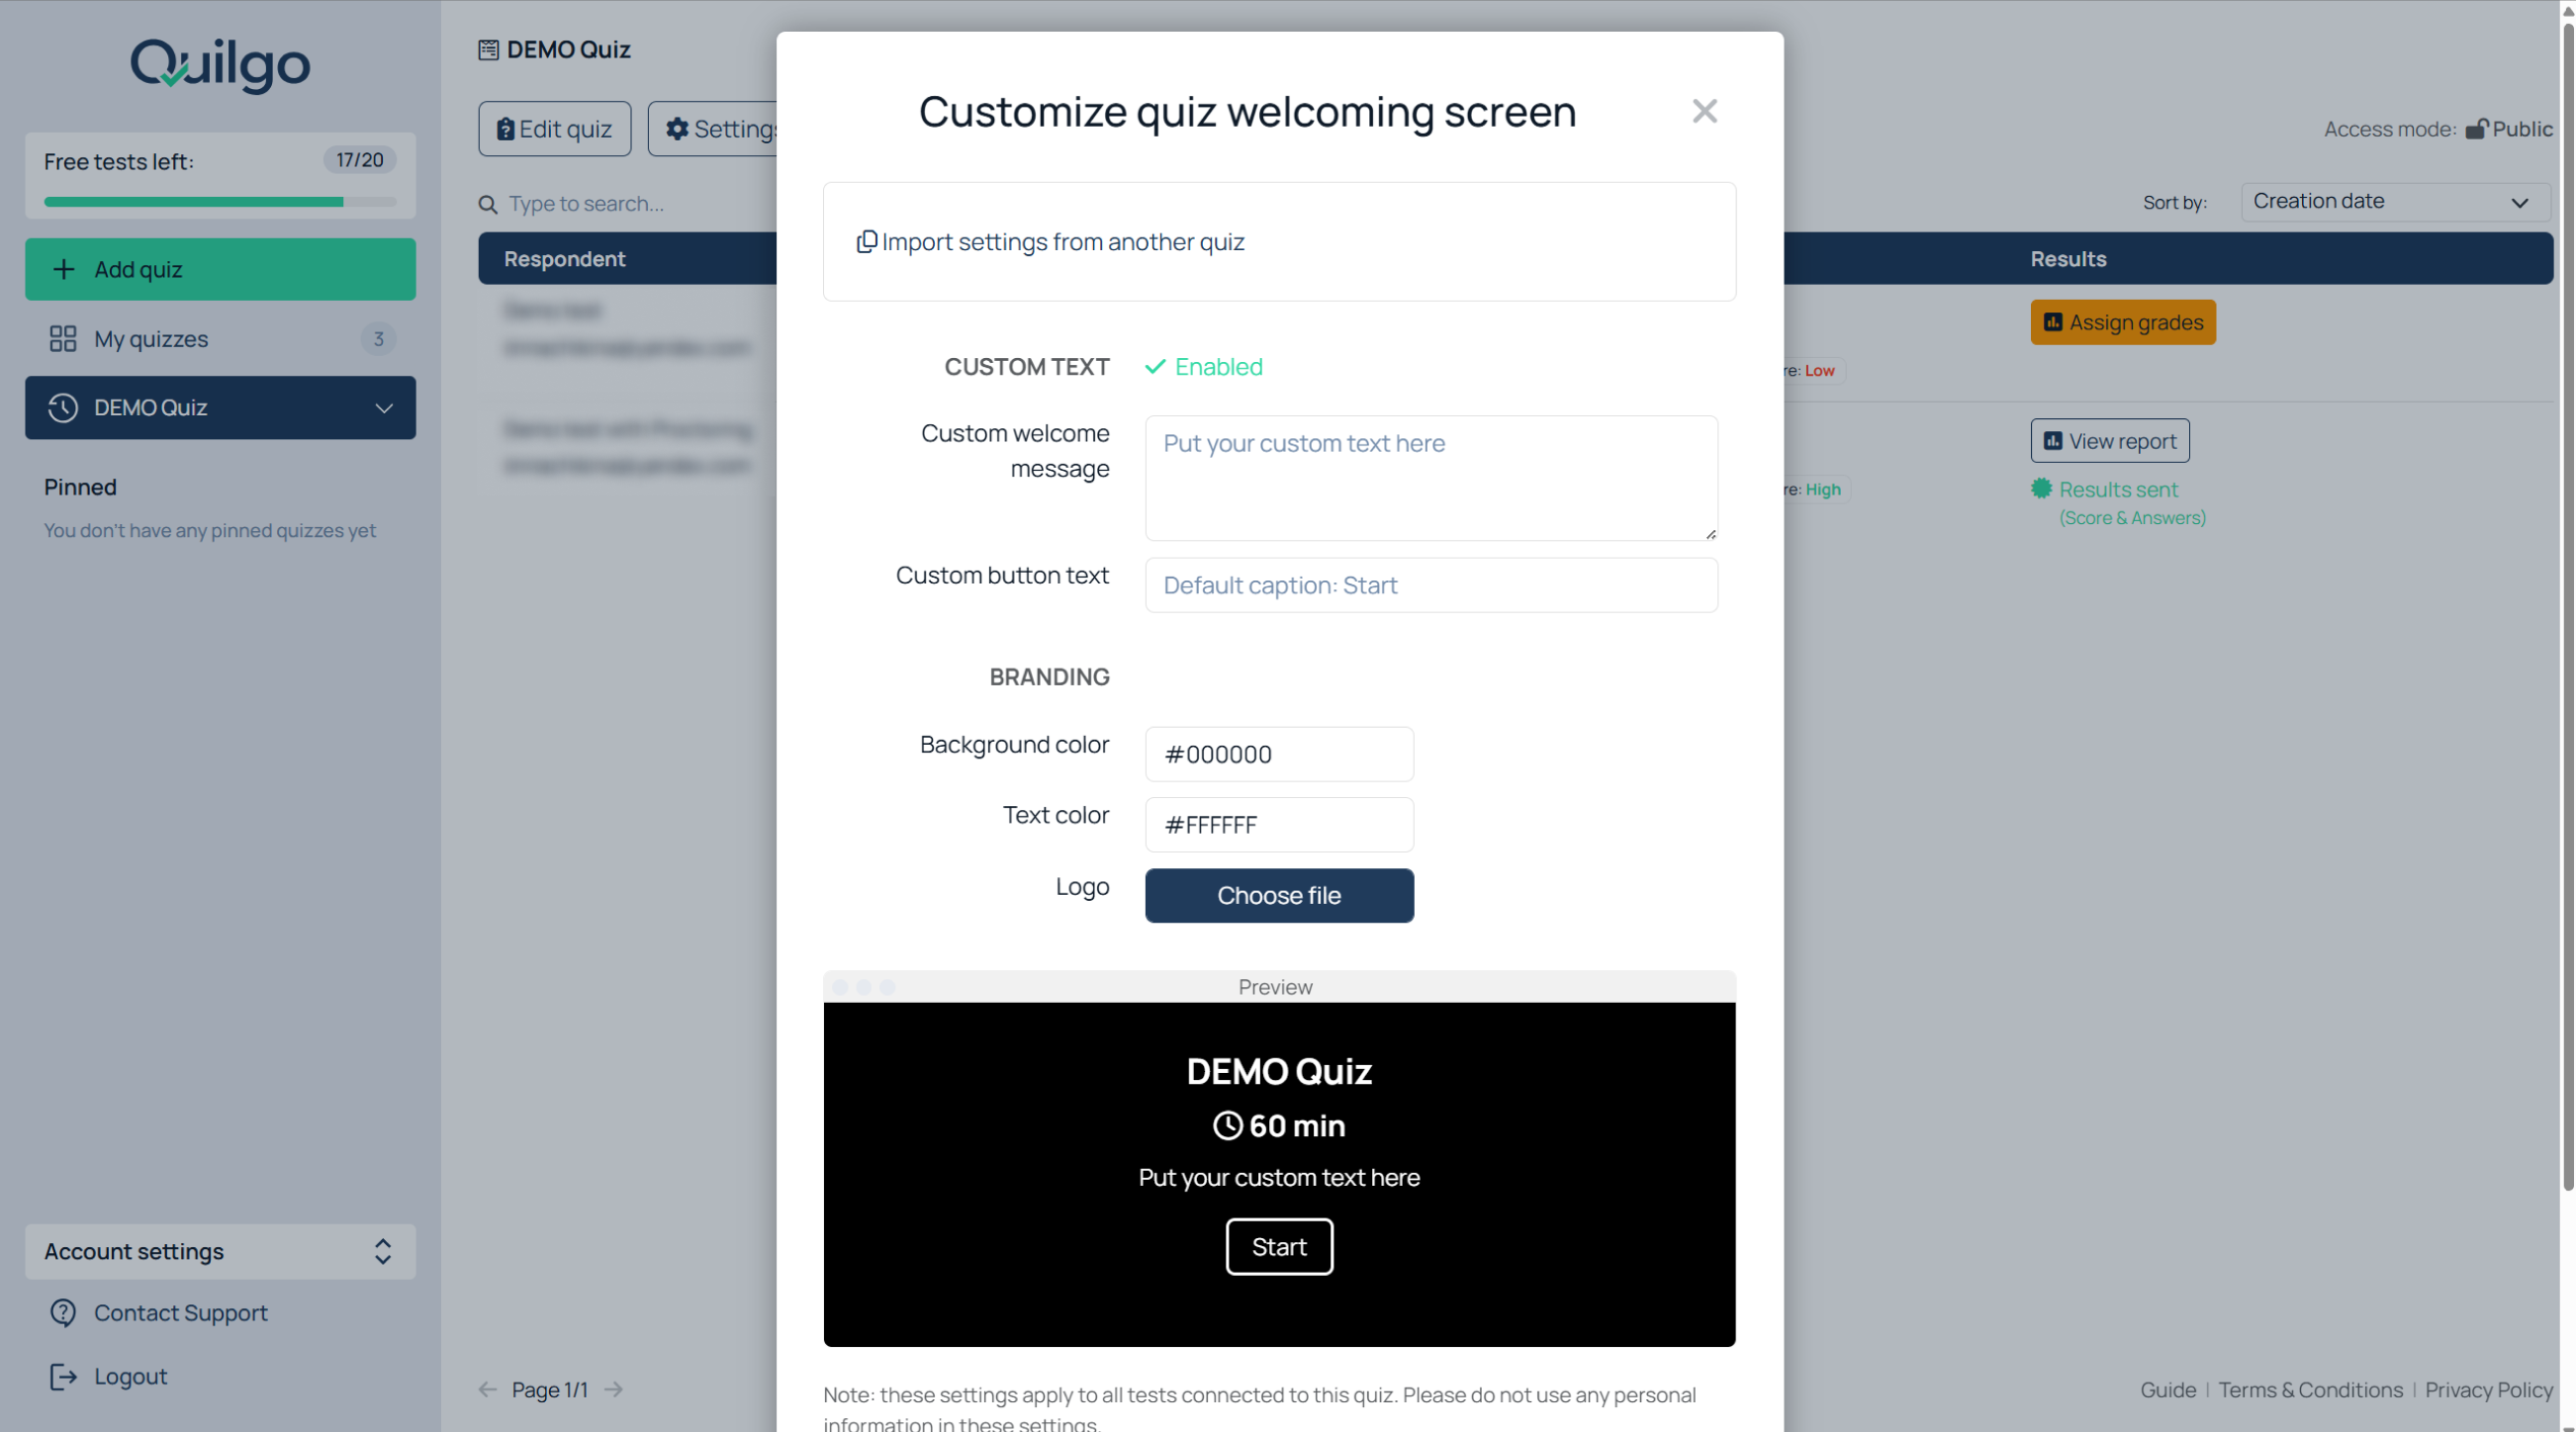
Customize Quiz Branding
Branding allows the assessment experience to match your organization instead of looking like a generic third-party tool. This is especially useful for schools, universities, agencies, and recruitment workflows.
To customize the welcome screen:
Click the dropdown next to the quiz title;
Click “Branding”.
You can customize:
welcome message;
button text;
background color;
text color;
logo.
Upload a logo
Click “Choose file”;
Upload the logo.
Save branding settings
Click “Save quiz settings”.
Organize Quizzes
Quiz organization tools help manage large numbers of assessments over time. This becomes especially important for recurring courses, hiring pipelines, certification programs, and reusable templates.
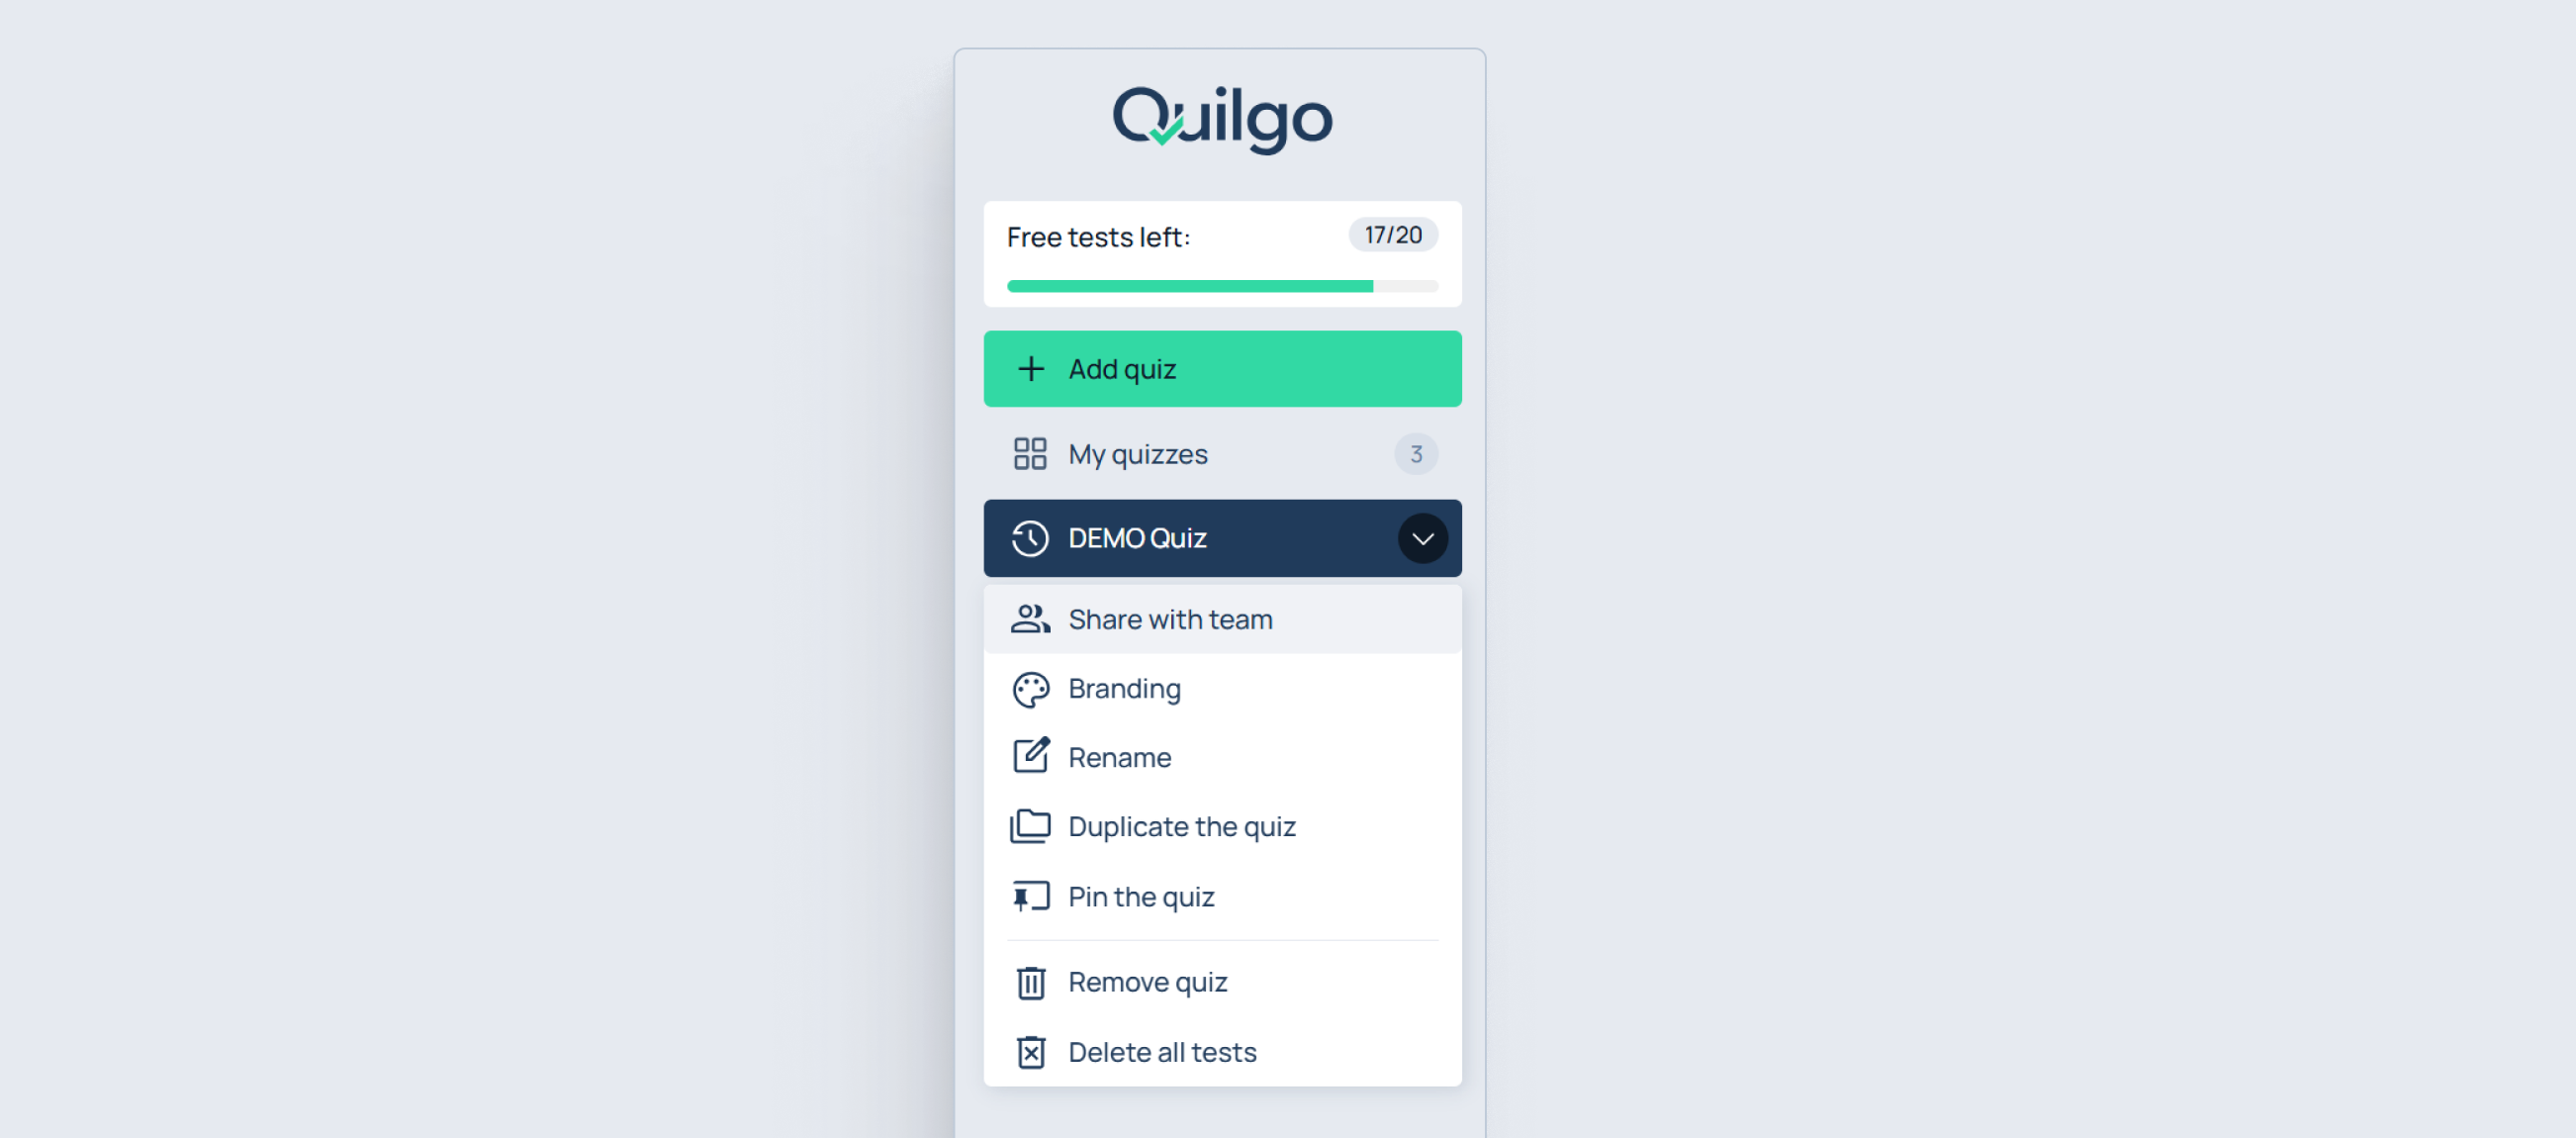
Open the quiz dropdown menu.
Available actions:
“Rename”;
“Duplicate the quiz”;
“Pin the quiz”;
“Remove quiz”;
“Delete all tests”.
Team Collaboration
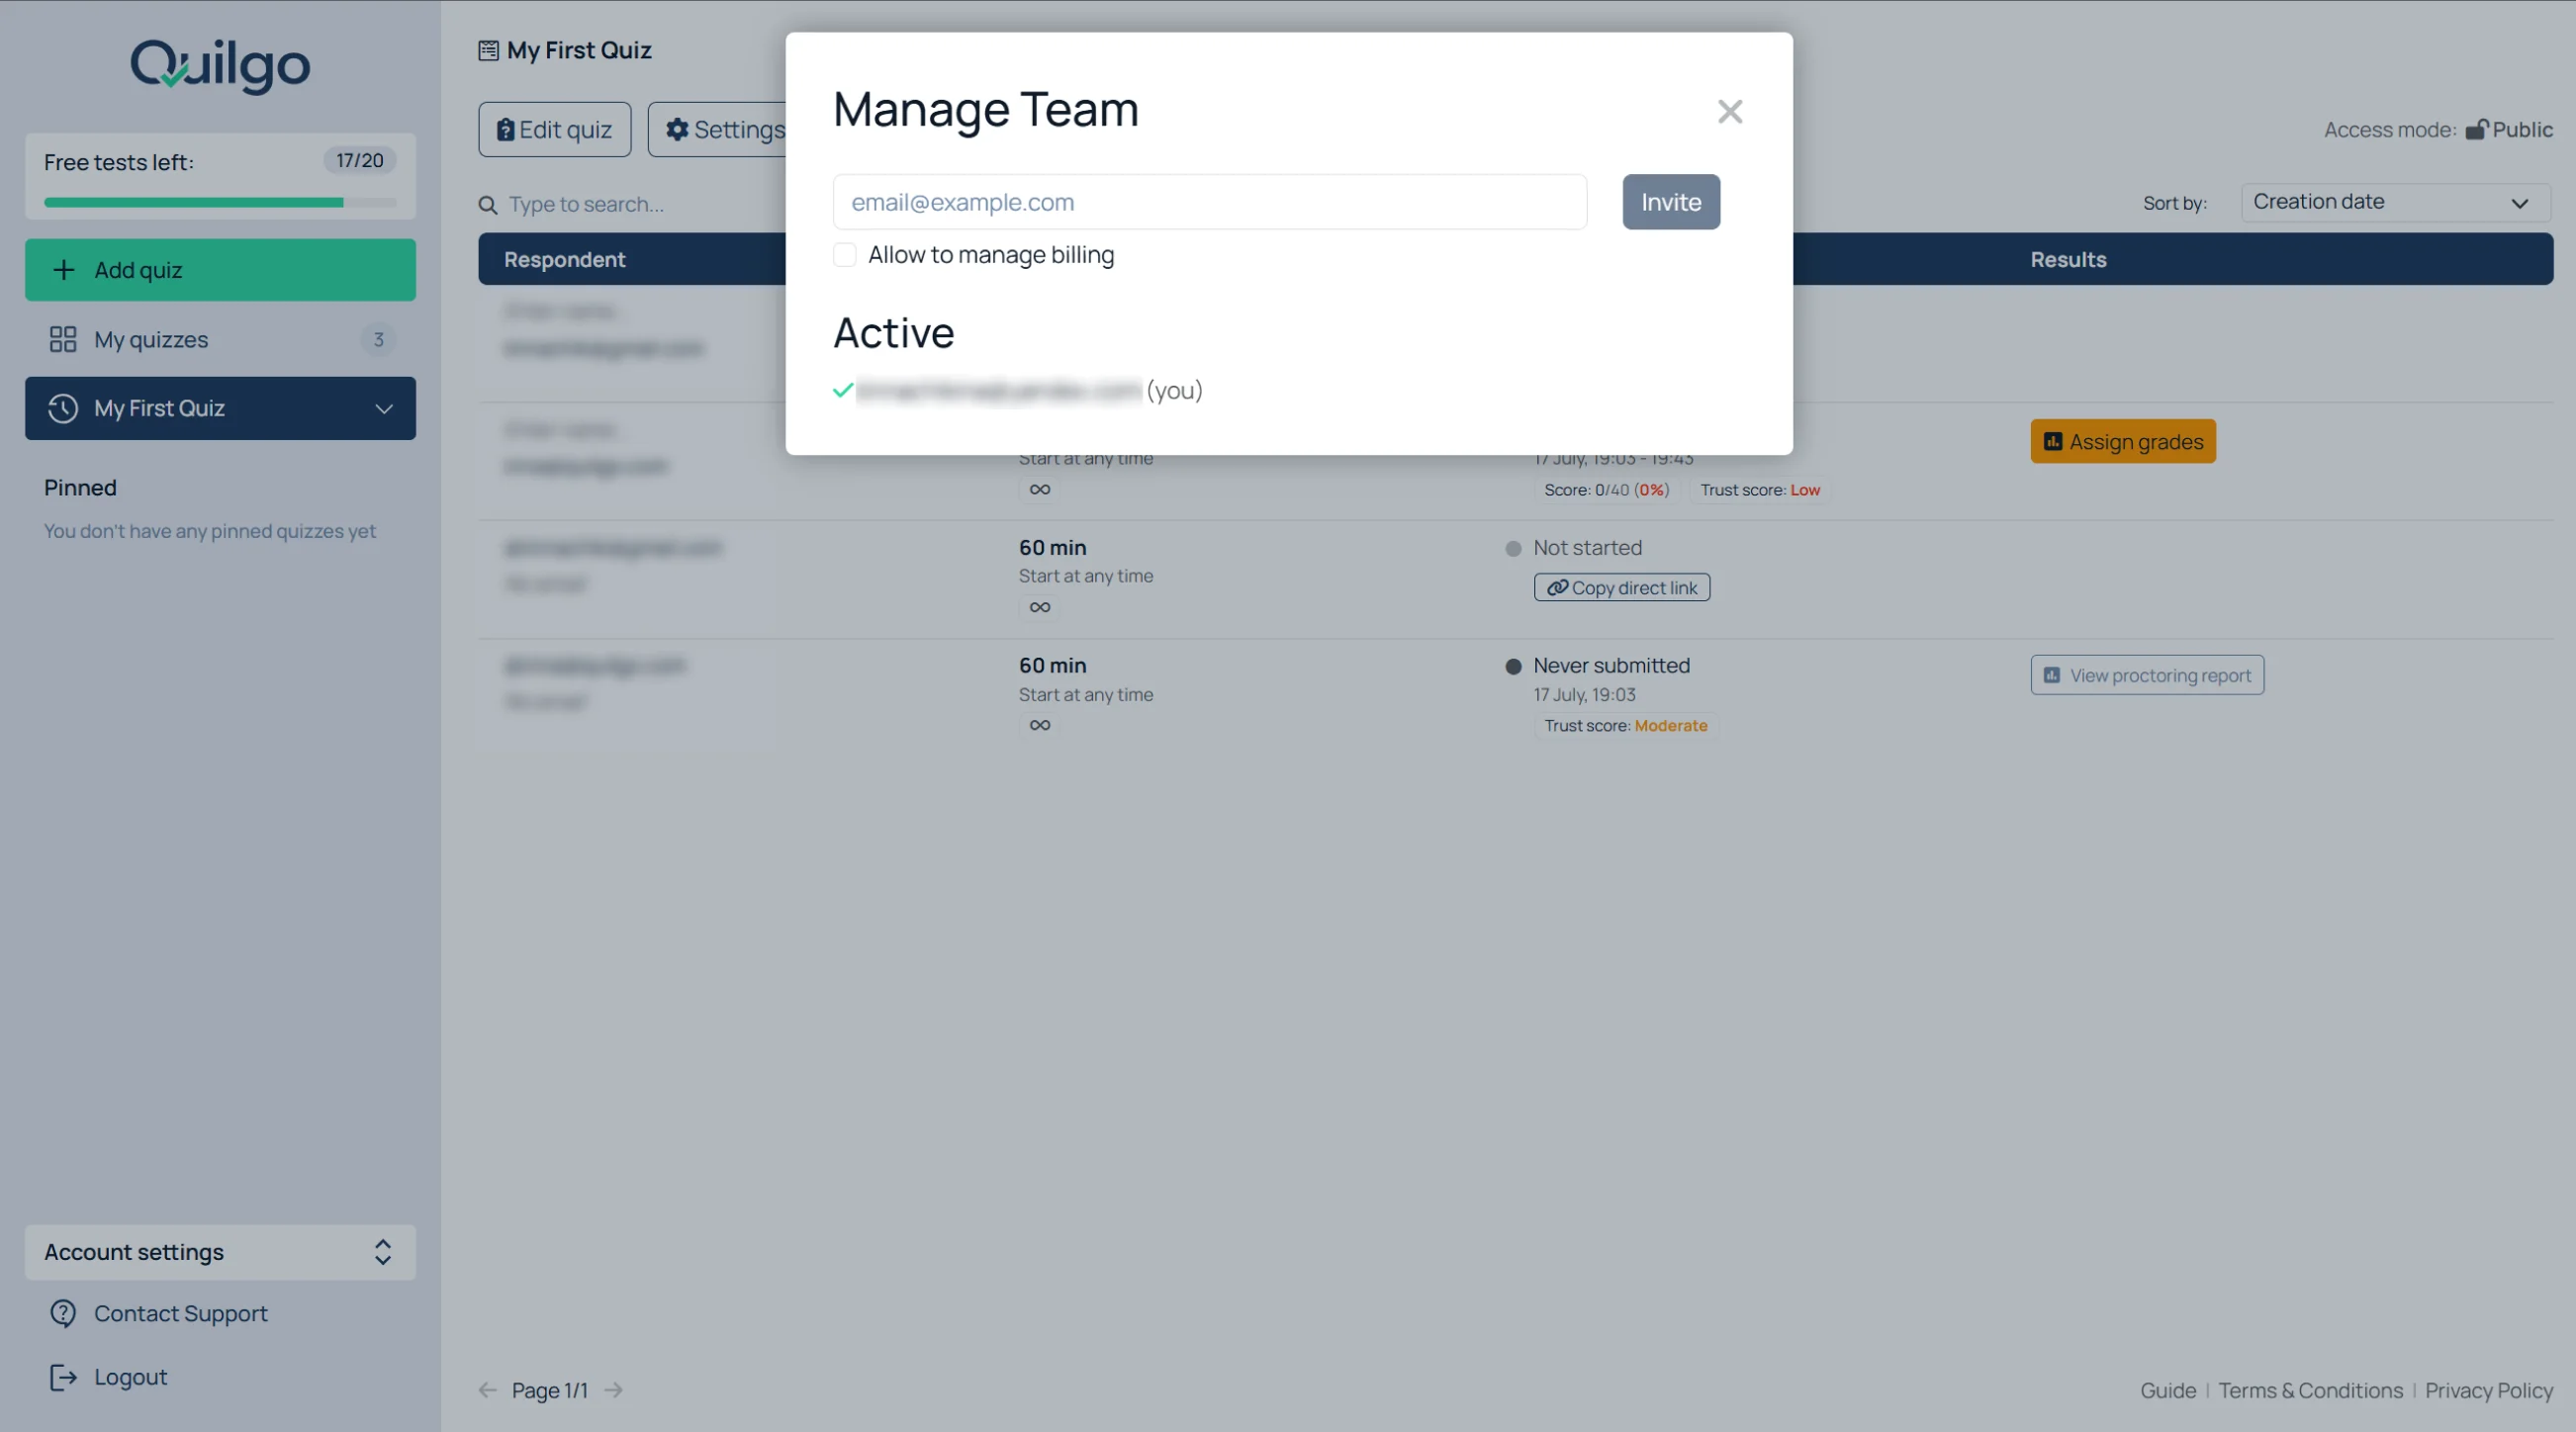
Invite Team Members
Open “Account settings”;
Click “Team”;
Enter the email address;
Decide whether the user should manage billing;
Click “Invite”.
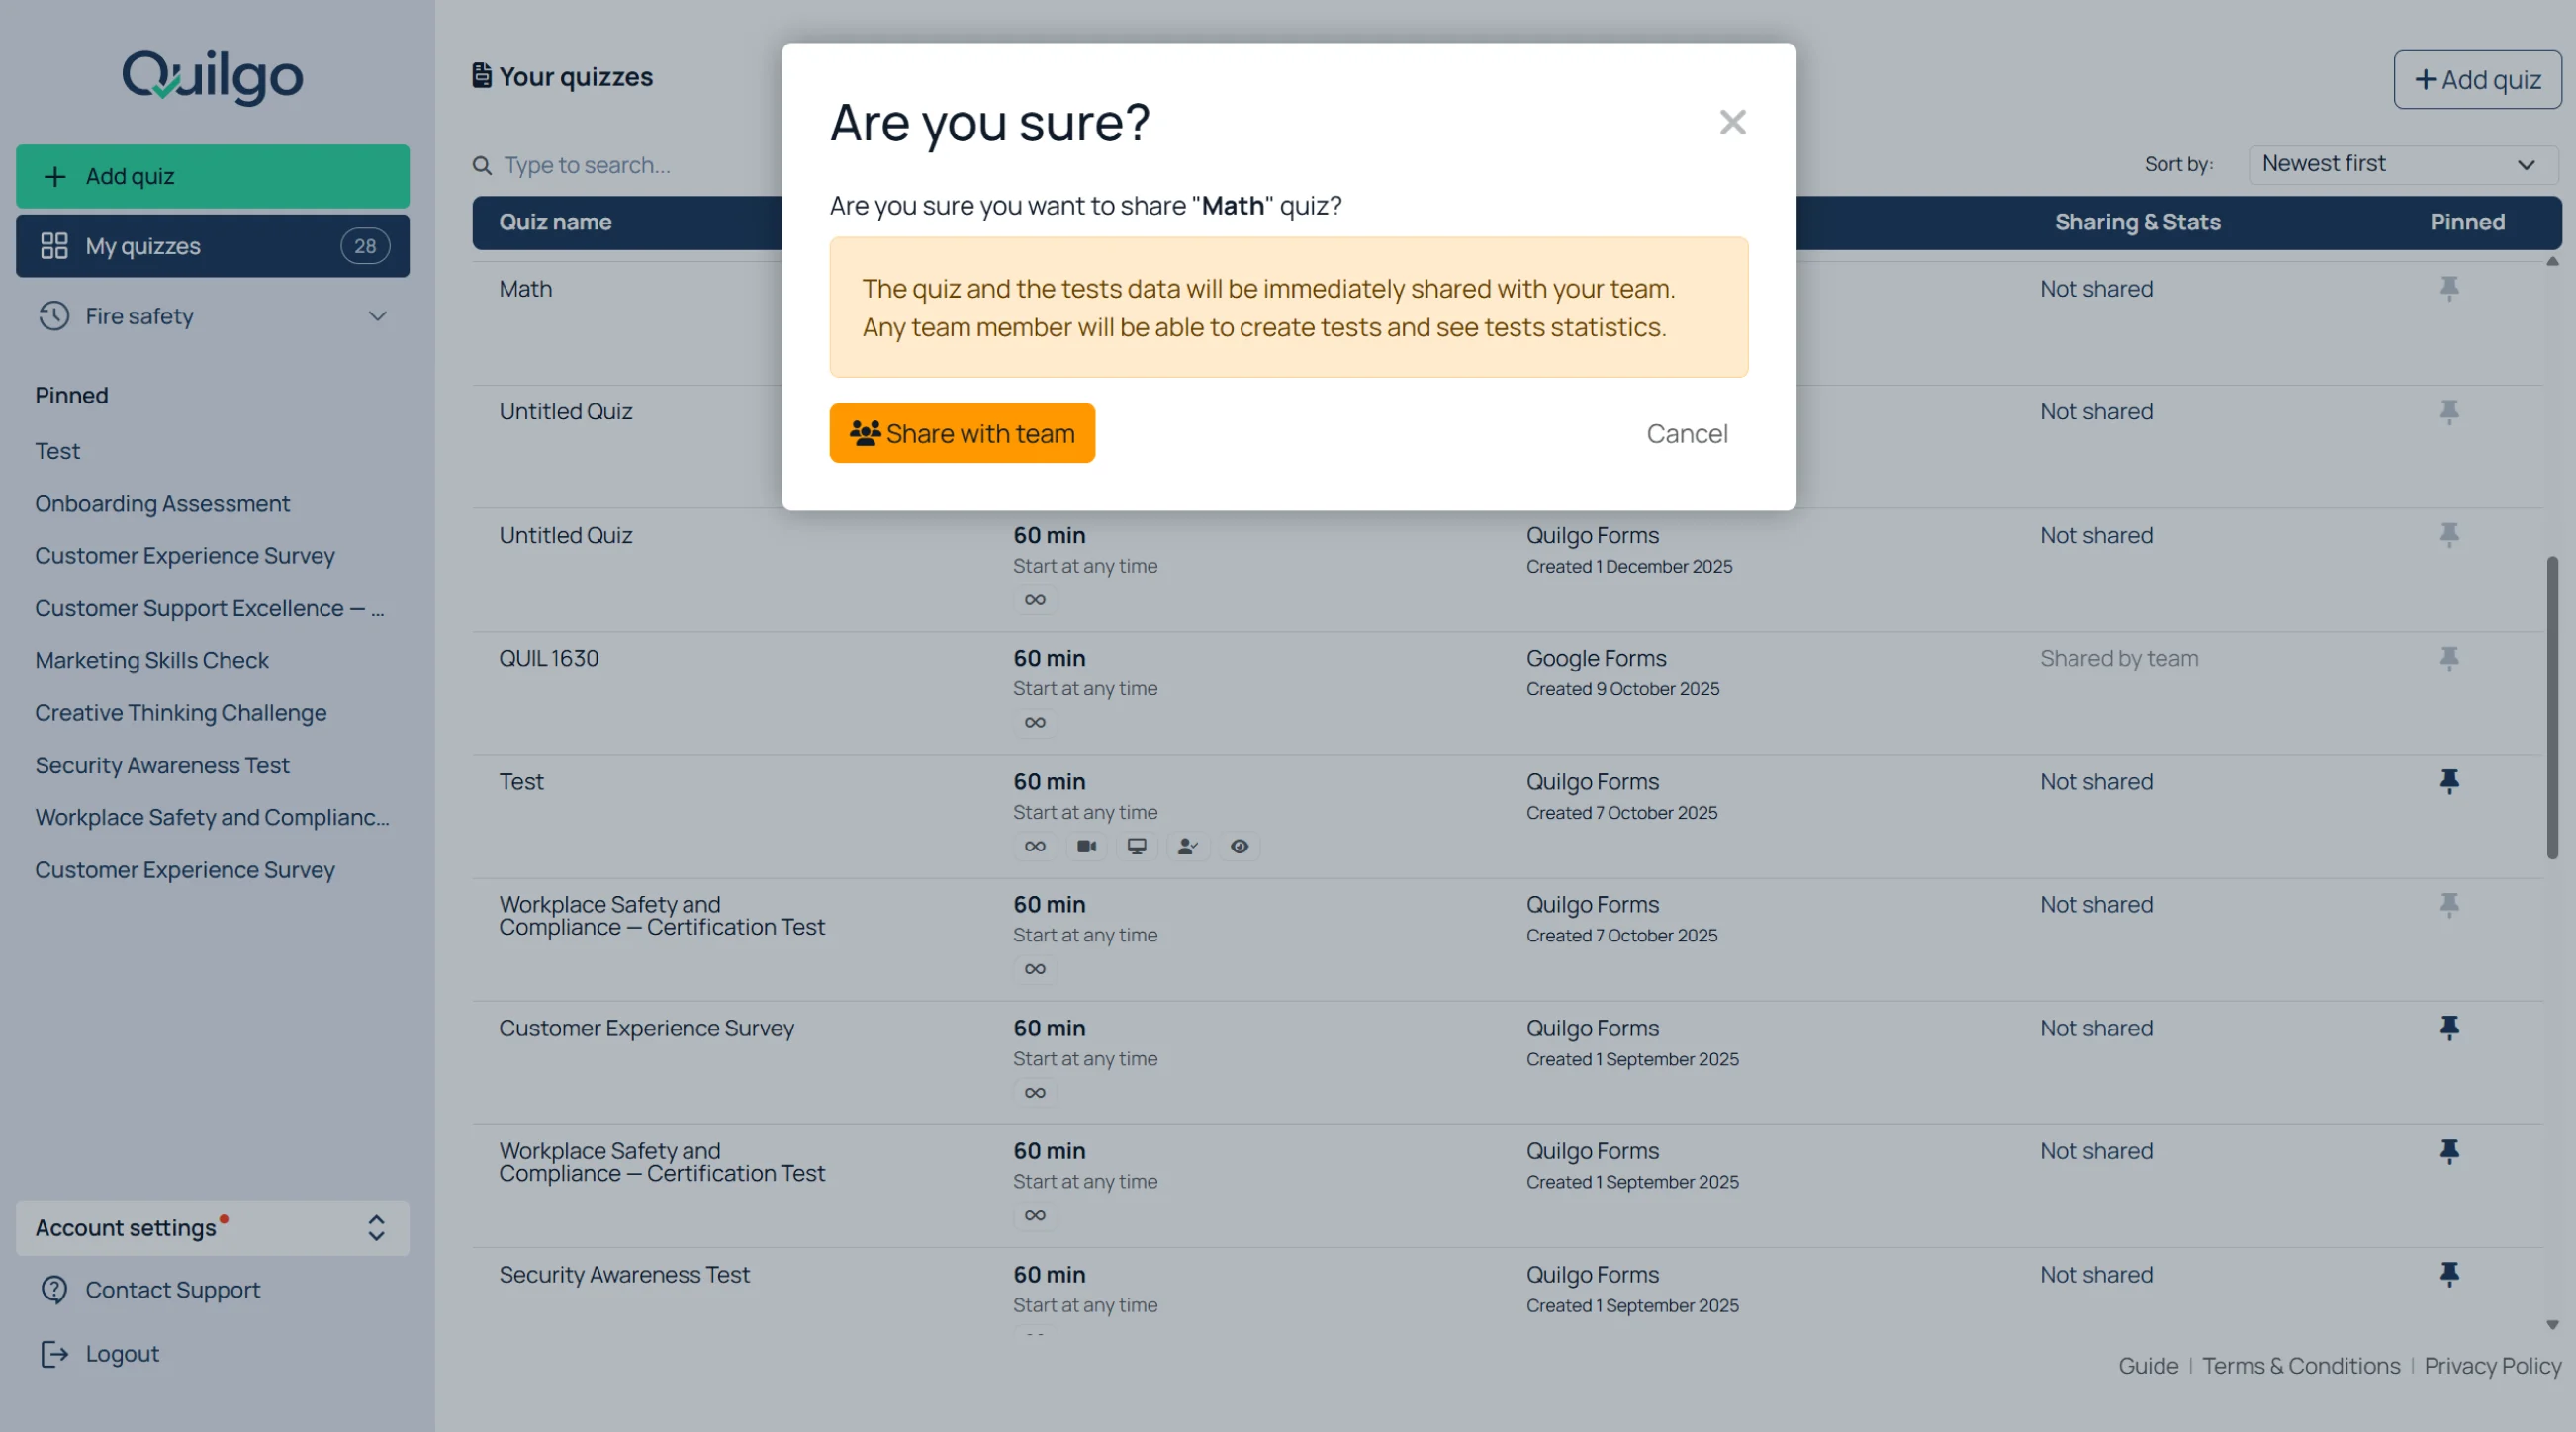
Share a Quiz with Team Members
Open the quiz dropdown menu;
Click “Share with team”;
Select team members.
Shared team members can:
review results;
open reports;
grade answers.
They cannot edit quiz content.
Integrations and automation
Quilgo works with several related products and integrations.
Google Forms™ Add-on
You can import existing Google Forms™ into Quilgo or use Google Forms™ as a quiz engine in Quilgo Platform. This is useful if you already have quizzes in Google Forms™ and want to add Quilgo's timing, delivery, reporting, and proctoring features.
Quilgo also has a Google Classroom Add-on. This is a separate product designed for Google Classroom workflows, including Classroom-based delivery and grade synchronization.
The Moodle plugin is a separate product for Moodle-based institutions. It supports Moodle workflows and includes additional controls such as storage retention and storage location options.